Have you ever walked into a bathroom and felt like something was missing? Maybe the all-white walls felt too sterile, or that single paint color just didn’t capture the vibe you were after. That’s where two-tone bathroom walls come in.
This approach isn’t just trendy – it’s smart. By dividing your walls into two distinct colors or materials, you create depth and visual interest that a single shade can’t match. Whether you’re working with a cramped powder room or a spacious master bath, this technique adapts beautifully.
I’ve seen people hesitate because they think it’ll look too busy or feel dated. But when done right, a color split wall actually makes a space feel more intentional and pulled together. You’re essentially giving your eyes somewhere to rest while adding personality that reflects your style.
Why Two-Tone Walls Work in Bathrooms
The beauty of this design choice lies in its versatility. You can go bold with contrasting hues or keep things subtle with tonal variations. Either way, you’re creating layers that make the room feel more finished.
Bathrooms are often small, which means every design decision counts. A well-executed two-tone wall can make low ceilings appear higher, narrow spaces feel wider, or awkward layouts seem more balanced. It’s basically a visual trick that costs no more than traditional painting.
Plus, it gives you flexibility. Not ready to commit to a dark color throughout? Use it on the lower half where it’s less overwhelming. Want to test out a bold shade? Try it above the chair rail where you can always paint over it without redoing tiles or beadboard.
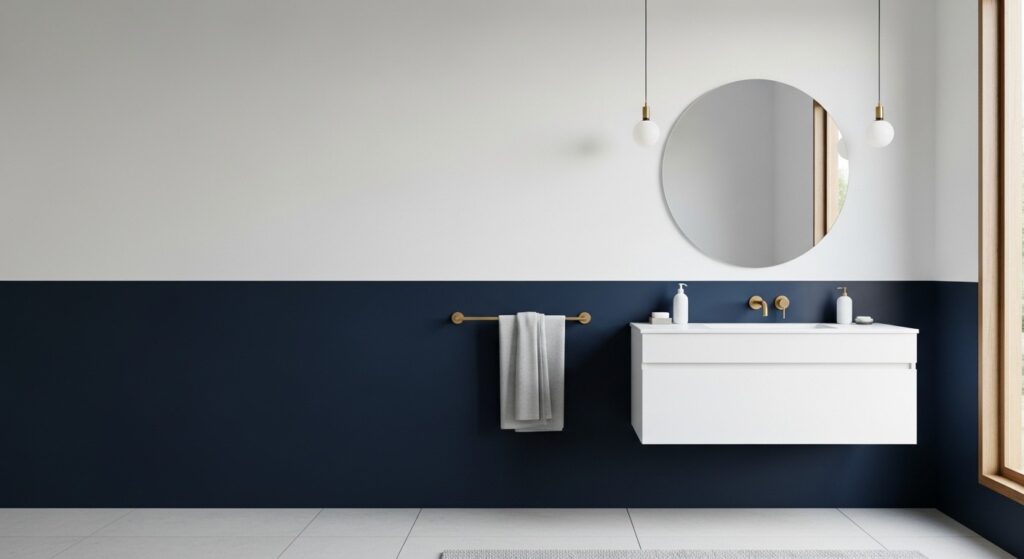
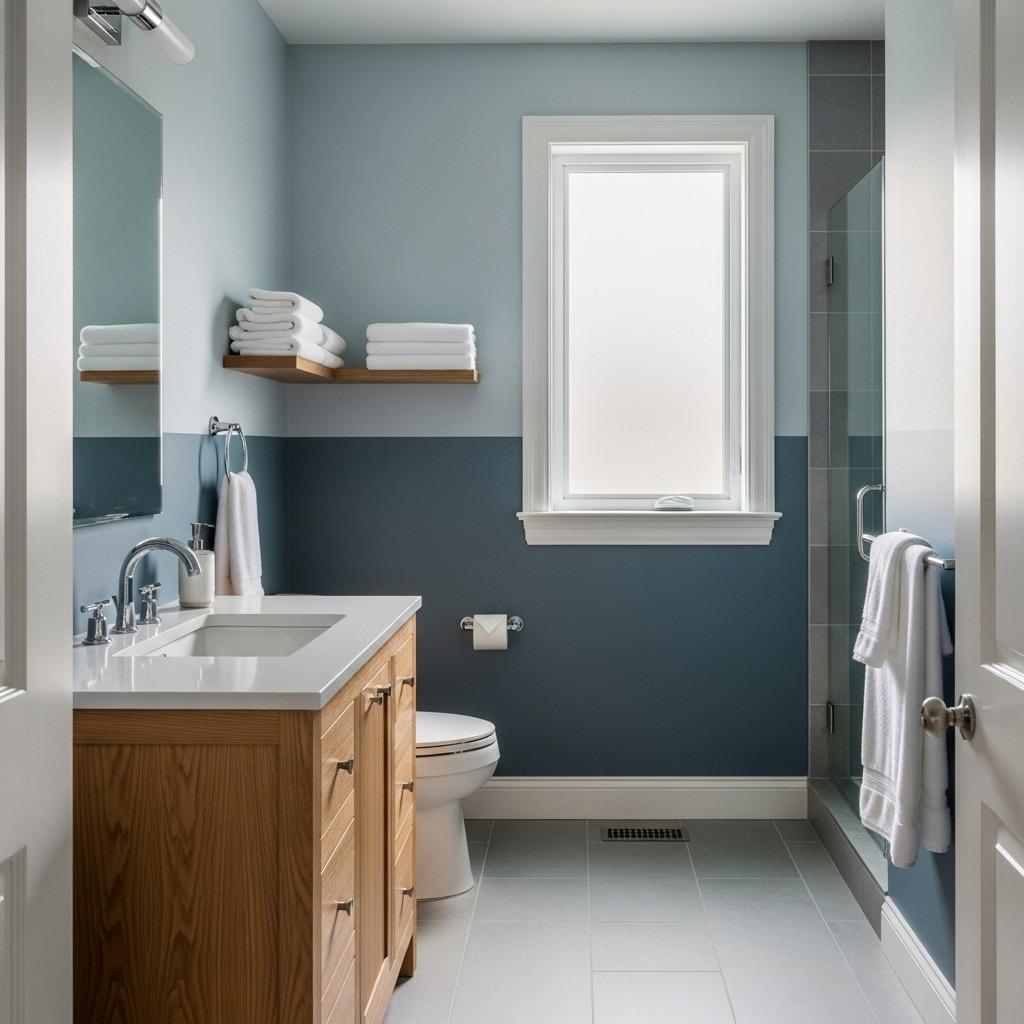
1. Classic Horizontal Split at Chair Rail Height

This is probably the most recognizable two-tone approach, and there’s a reason it’s stood the test of time. By placing your color break at chair rail height (typically 32-36 inches from the floor), you create natural proportions that feel balanced.
The lower section is your opportunity to go darker or bolder since it’s less visually dominant. Navy, forest green, or even black can look sophisticated here without overwhelming the space. Keep the upper portion lighter to maintain airiness and reflect light around the room.
What I appreciate about this method is how forgiving it is. If you’re painting over existing walls, you don’t need perfect edges at the ceiling line – the transition happens at a manageable height where you can use trim or molding to hide any imperfections. For more bathroom transformation ideas, check out these small bathroom renovation tips.
2. Vertical Color Block Behind Vanity
Instead of going horizontal, why not create a vertical focal point? This works especially well behind your vanity, where you’re essentially framing your most-used area with color.
Choose a width that makes sense for your vanity size – typically extending a few inches beyond each side creates the most pleasing proportions. This approach is fantastic if you have a long, narrow bathroom because it draws the eye upward rather than emphasizing the room’s tight dimensions.
I’ve seen this done with paint, but wallpaper or even textured tile work beautifully too. The key is making sure your vertical section has clear boundaries so it reads as intentional rather than unfinished. This modern accent wall ideas guide offers similar vertical design concepts.
3. Tile Lower, Paint Upper Contrast
This combination gives you the practical benefits of tile where you need it most while keeping costs reasonable on the upper walls. Tile the lower 4-5 feet where water splashes, then transition to paint above.
The material contrast adds even more interest than color alone. You get different textures catching light in varying ways, which creates depth you can’t achieve with paint-only approaches. Plus, tile is obviously more durable in high-moisture areas.
Don’t feel locked into matchy-matchy colors either. White subway tile with a bold painted top looks crisp and intentional. Or try colored tiles with neutral paint for a more subtle shift. The modern bathroom tile article has additional pairing suggestions worth considering.
4. Dark Below Wainscoting, Light Above
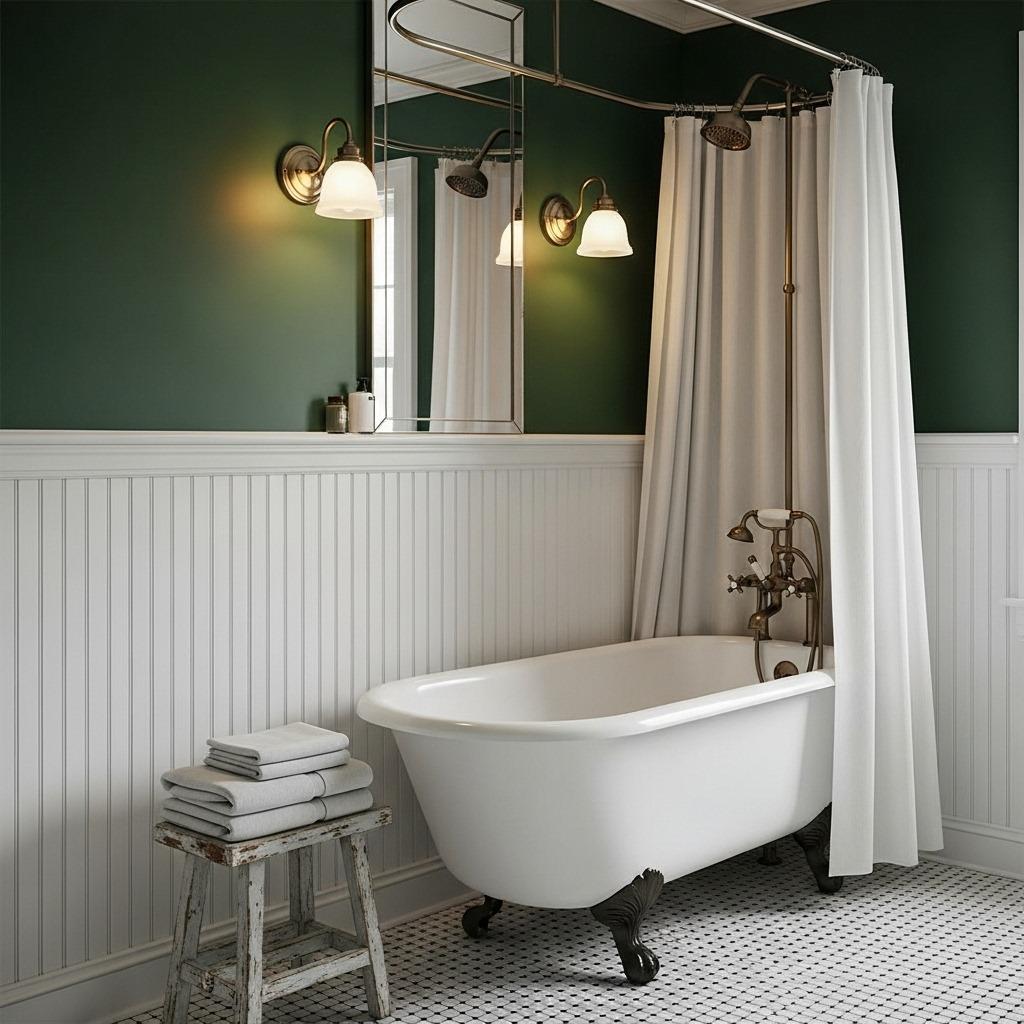
Wainscoting or beadboard naturally creates a two-tone effect even if you paint it all one color. But when you add contrasting hues, you’re amplifying that architectural detail.
Paint the wainscoting itself in a lighter shade – white or cream are classic for good reason. Then go deeper on the upper walls. This reverses the typical dark-below approach but works wonderfully, especially in bathrooms with vintage or cottage vibes.
The texture of the wainscoting adds dimension that flat paint can’t replicate. It also protects your walls from bumps and scrapes in high-traffic areas. If you’re considering adding this type of detail, wall paneling DIY tips can help you install it yourself.
5. Two-Tone Tile Arrangement

Who says two-tone has to involve paint? Using different tiles at different heights creates stunning visual separation while maintaining durability throughout.
This approach shines in shower surrounds and tub areas where you need water-resistant surfaces from floor to ceiling anyway. Mix shapes (subway on top, hexagons below) or stick with one shape in different colors for varied effects.
The grout color matters here too. White grout keeps things light and cohesive, while dark grout adds even more definition between your two tile choices. Consider where the split happens – mid-wall transitions work well, but so do asymmetrical divisions if you’re feeling adventurous.
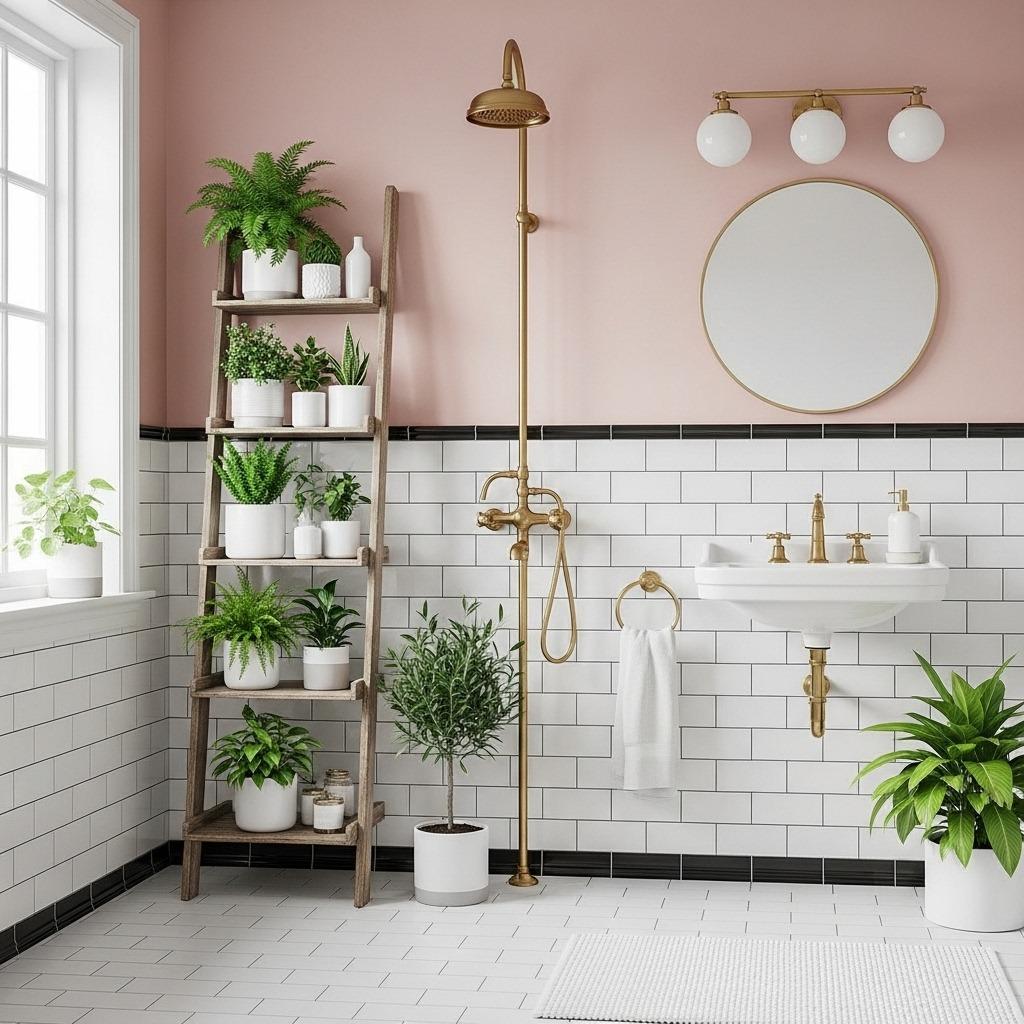
6. Soft Tonal Shift in Same Color Family
Not every two-tone bathroom needs dramatic contrast. Sometimes a subtle shift within the same color family creates exactly the right amount of interest without feeling busy.
Think pale sage above with deeper olive below, or soft blush transitioning to dusty mauve. This approach feels cohesive and calming – perfect for creating that spa-inspired bathroom atmosphere many of us crave.
The beauty here is that you get visual separation without the space feeling chopped up. It’s particularly effective in small bathrooms where too much contrast might feel overwhelming. The key is choosing shades that clearly differ but share the same undertones.
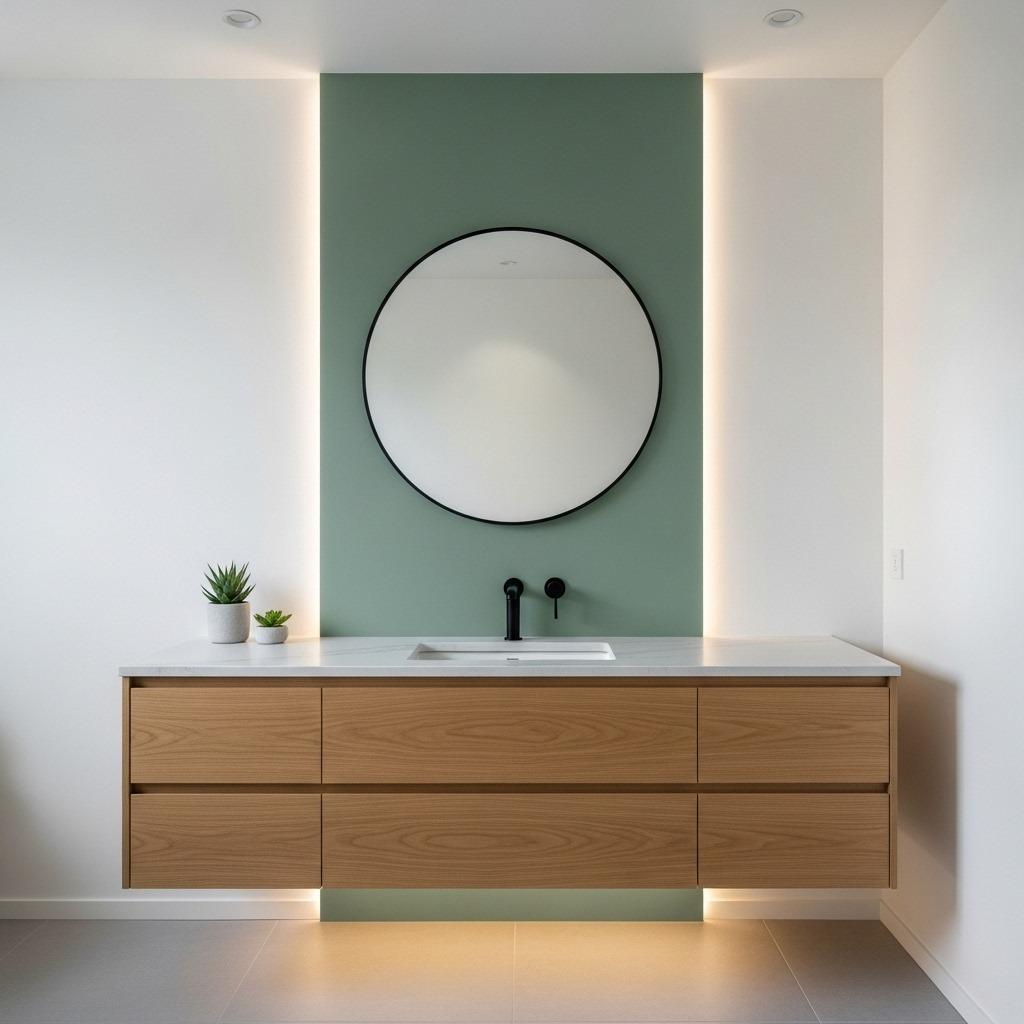
7. Bold Accent Wall With Neutral Sides
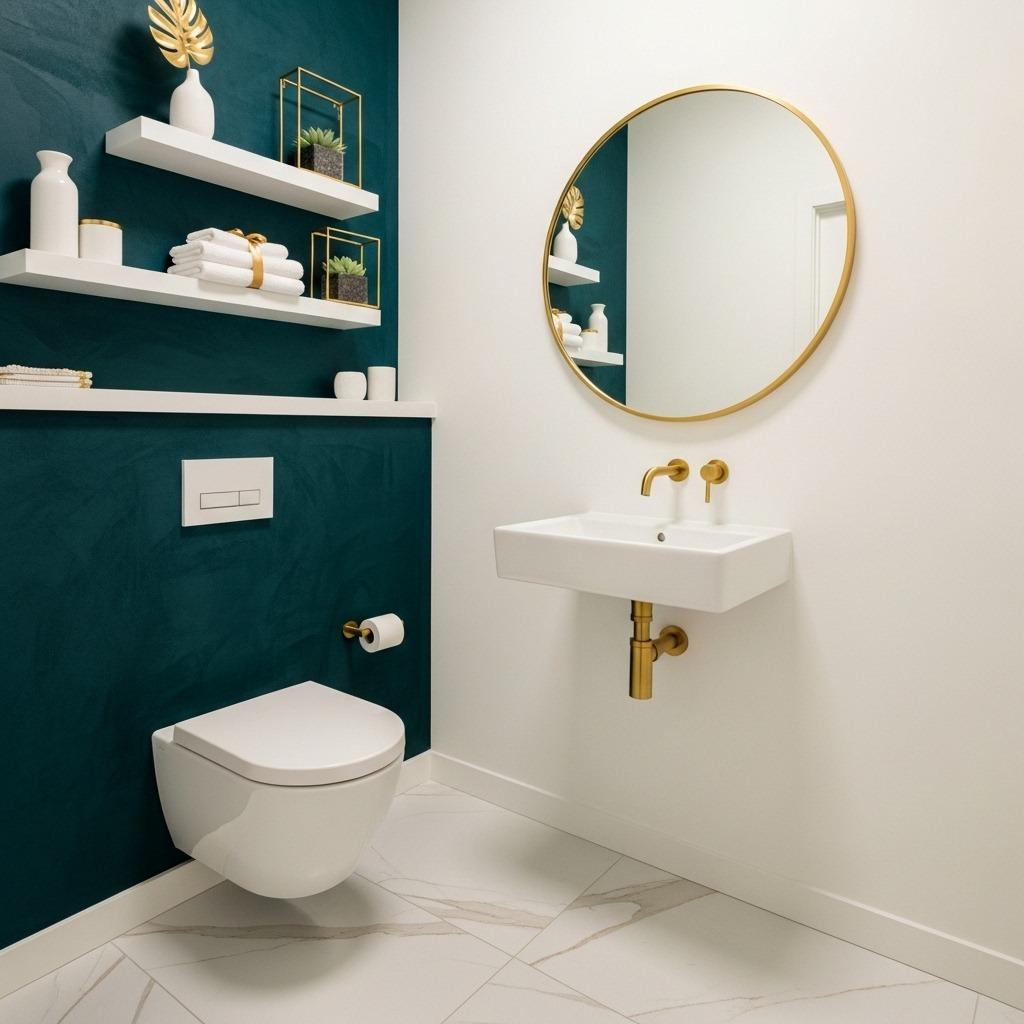
This isn’t strictly a split within one wall, but it creates a two-tone effect by treating different walls uniquely. One bold wall (often behind the toilet or vanity) becomes your focal point while others stay neutral.
I particularly like this for powder rooms where you have less wall space to work with anyway. A single accent wall makes a big impact without requiring you to commit to color throughout. If you tire of it, repainting one wall is far less daunting than redoing the whole room.
Choose your accent wall strategically. Behind the vanity creates a backdrop for your mirror and decor. Behind the toilet draws attention upward and away from the fixture itself. For broader bathroom design inspiration, browse these bathroom ideas from various styles.
8. Geometric Pattern Division
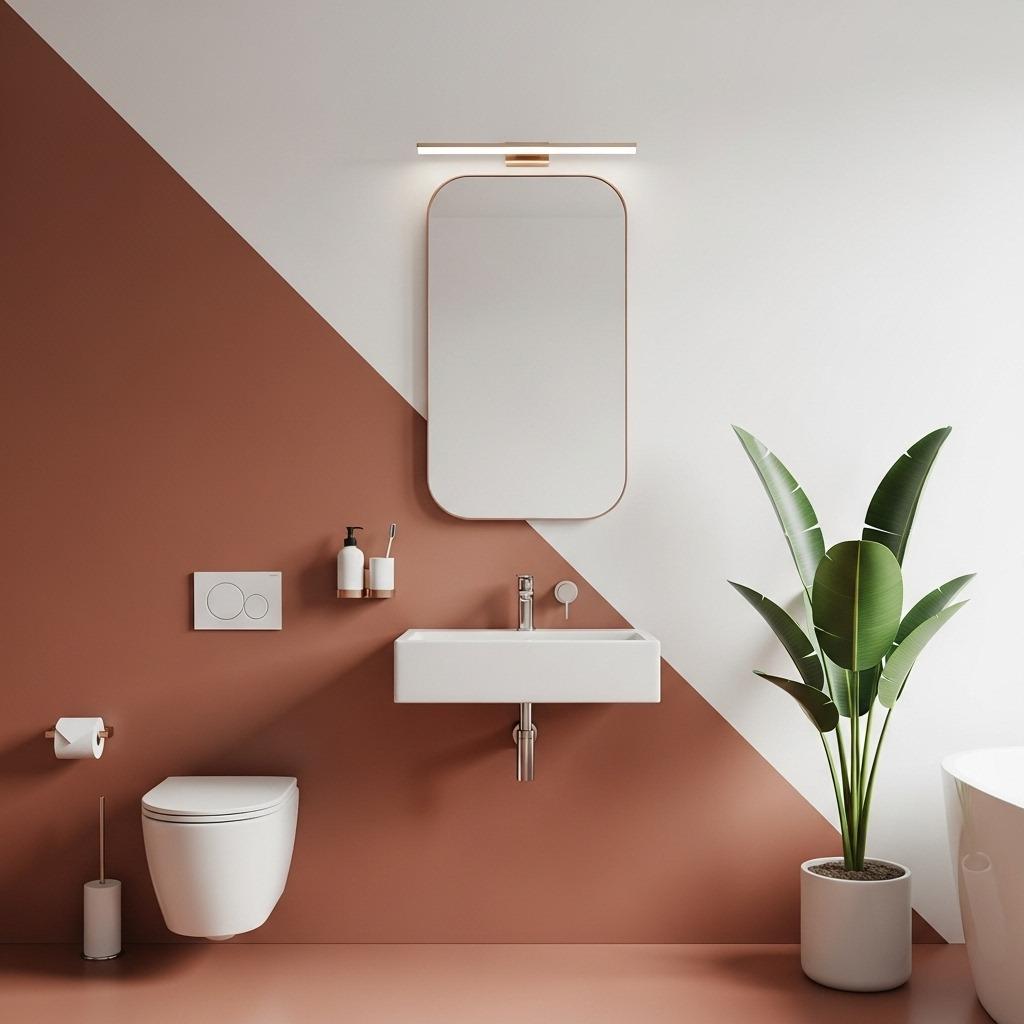
Why stick to straight lines? A diagonal or curved division point adds unexpected personality and works especially well in contemporary spaces.
This requires more planning and taping precision, but the payoff is a truly unique look. Diagonal splits can make ceilings feel higher and rooms feel larger by drawing the eye along an unconventional path. Curved divisions feel softer and more organic.
Fair warning: this approach reads more modern and artistic, so it might not suit traditional or farmhouse aesthetics. But if you’re after something that stands out on Pinterest (and in person), geometric divisions deliver. The article on artistic bedroom ideas explores similar creative wall treatments.
9. Shiplap Lower, Painted Plaster Upper
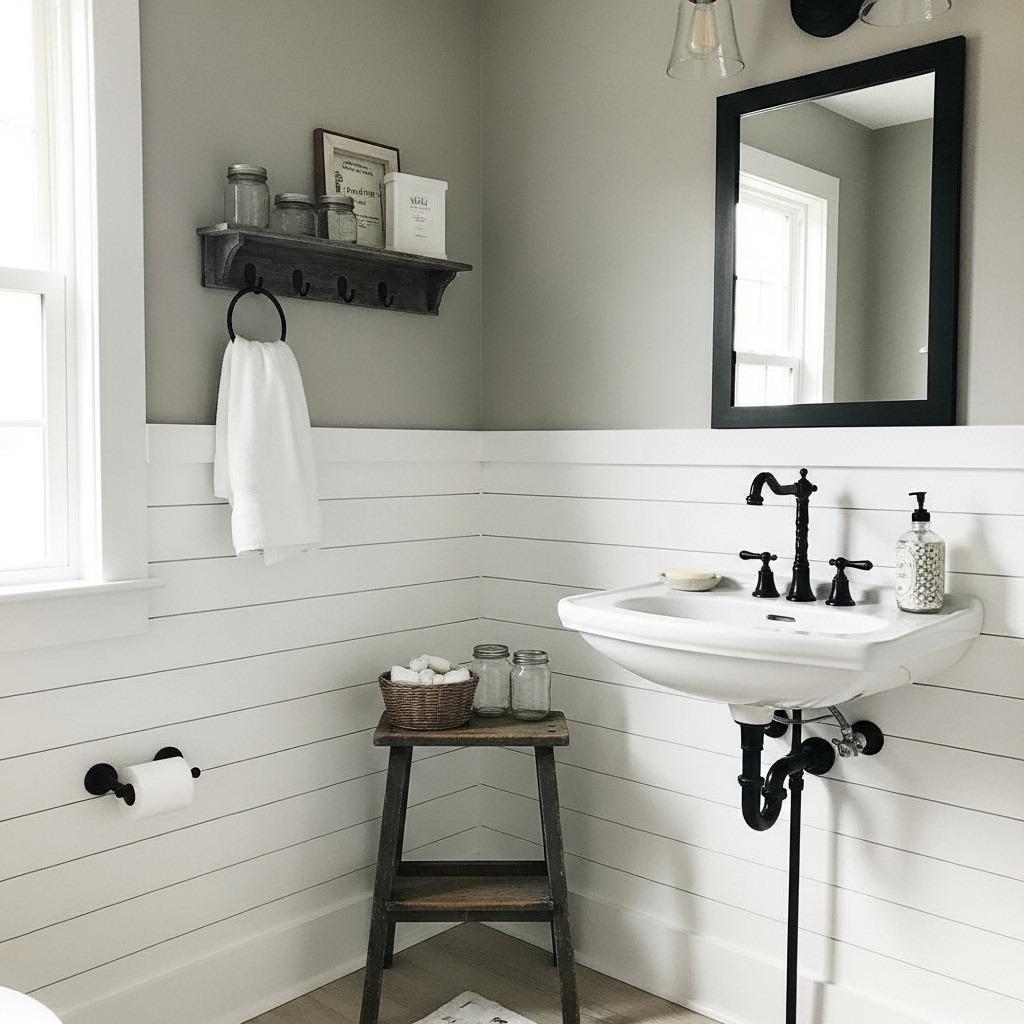
Mixing materials creates automatic contrast even when colors are similar. Shiplap brings texture and casual charm to the lower portion while smooth painted walls keep the upper area clean and simple.
This combination feels particularly at home in farmhouse or coastal designs. Paint the shiplap white or a soft neutral, then choose a complementary color for the upper walls. The horizontal lines of the shiplap naturally draw the eye around the room.
Installation is straightforward if you’re handy, and shiplap hides minor wall imperfections better than flat paint. It also adds a layer of protection in areas where walls might get bumped or splashed. More rustic material combinations appear in this rustic cabin bedroom feature.
10. Metallic Tile With Matte Paint
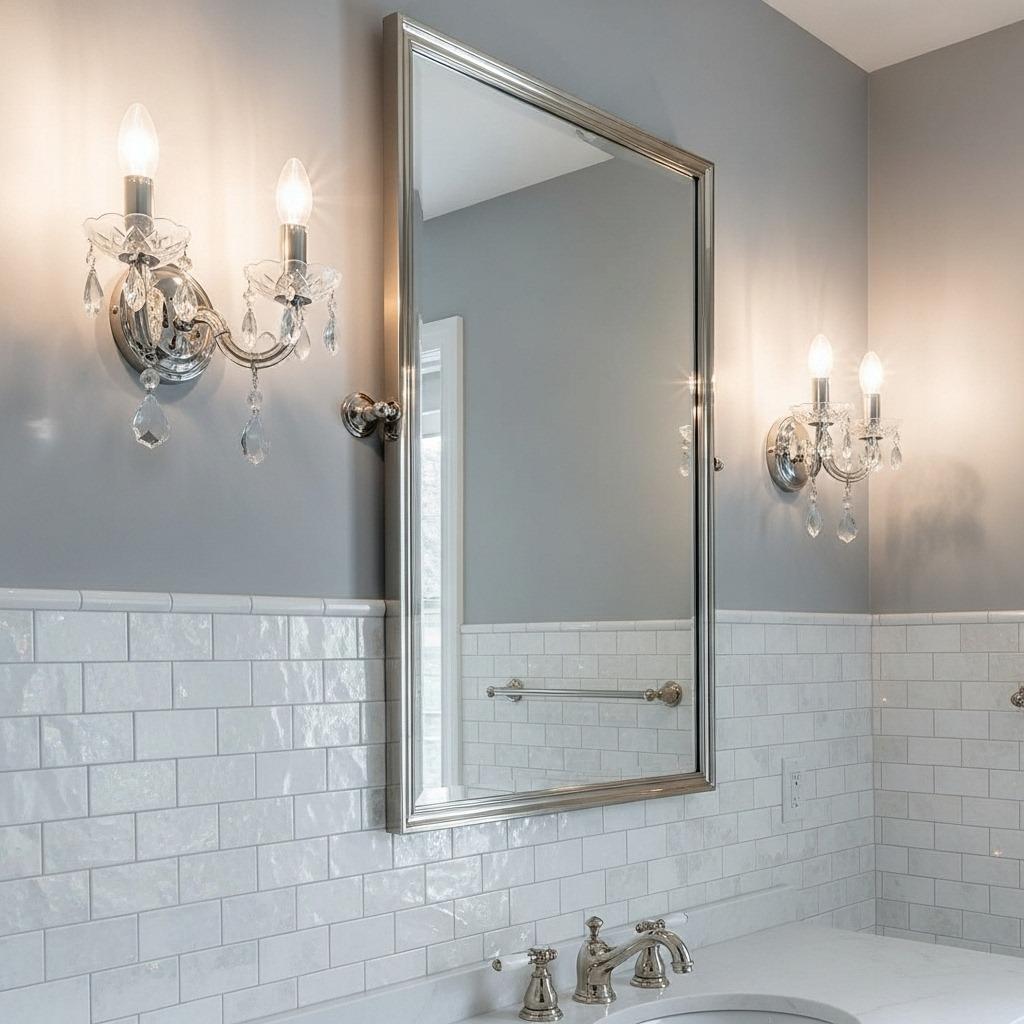
The finish contrast here is just as important as the color difference. Glossy or metallic tiles catch and reflect light while matte paint absorbs it, creating dynamic visual interest throughout the day.
Metallic tiles don’t have to be over-the-top. Subtle pearlescent whites or soft metallics add just enough shimmer without feeling too glitzy. Pair them with matte paint in a similar tone for sophistication, or go contrasting for more drama.
This approach works beautifully in bathrooms with good natural light, where the changing light throughout the day will play off your different finishes. It’s also an excellent way to add a touch of luxury without gold-plating everything.
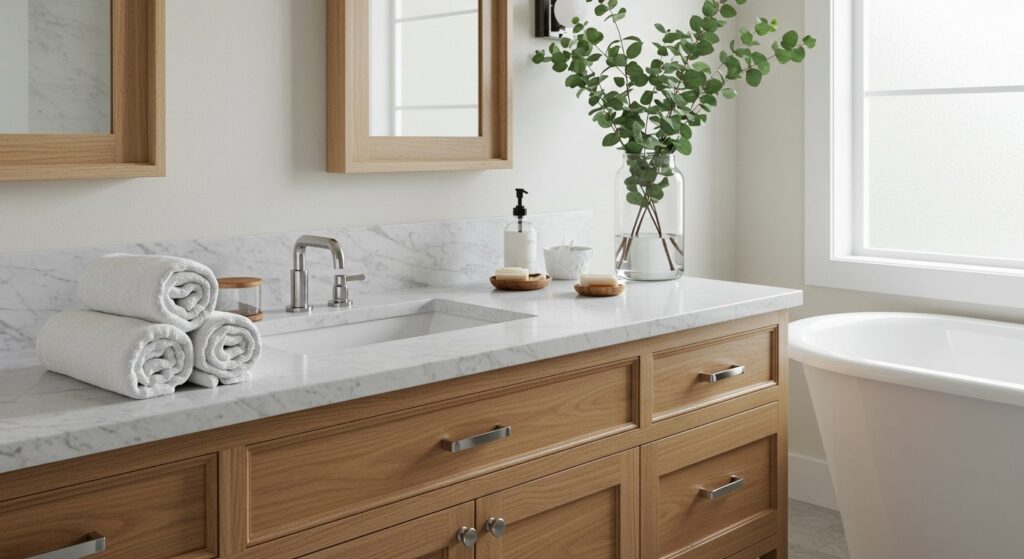
11. Colorful Lower Cabinets As Visual Split
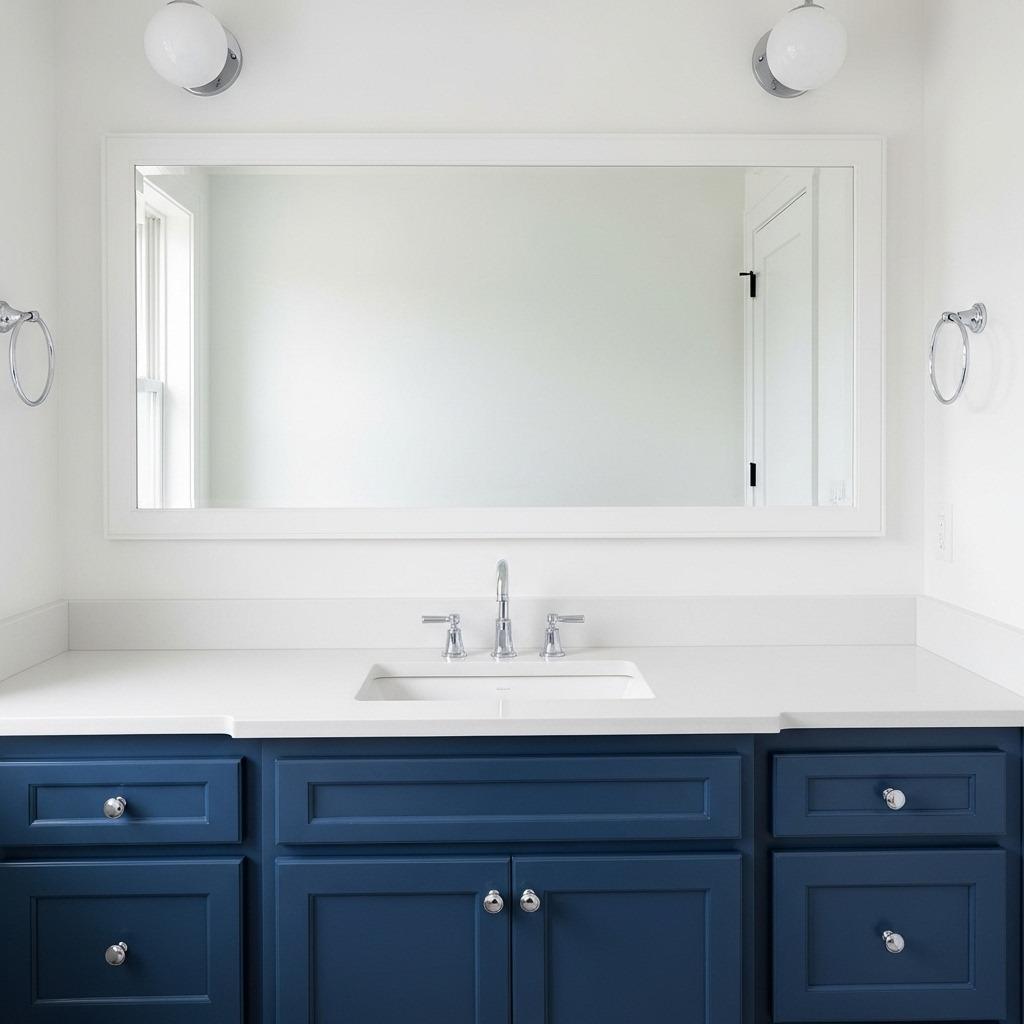
Sometimes your two-tone effect comes from furniture rather than walls themselves. A colored vanity against white walls creates a horizontal color division that’s just as effective as painted walls.
This approach gives you flexibility since you can change the vanity color without repainting entire walls. Navy, forest green, or even black vanities look stunning against white or light gray walls. Add matching hardware and you’ve created a cohesive look with minimal commitment.
The best part? If you’re renting or not ready for permanent changes, you can achieve this with a vanity makeover rather than wall painting. Similarly, two-tone kitchen cabinet concepts apply the same principle in different spaces.
12. Wallpaper Lower, Paint Upper Balance
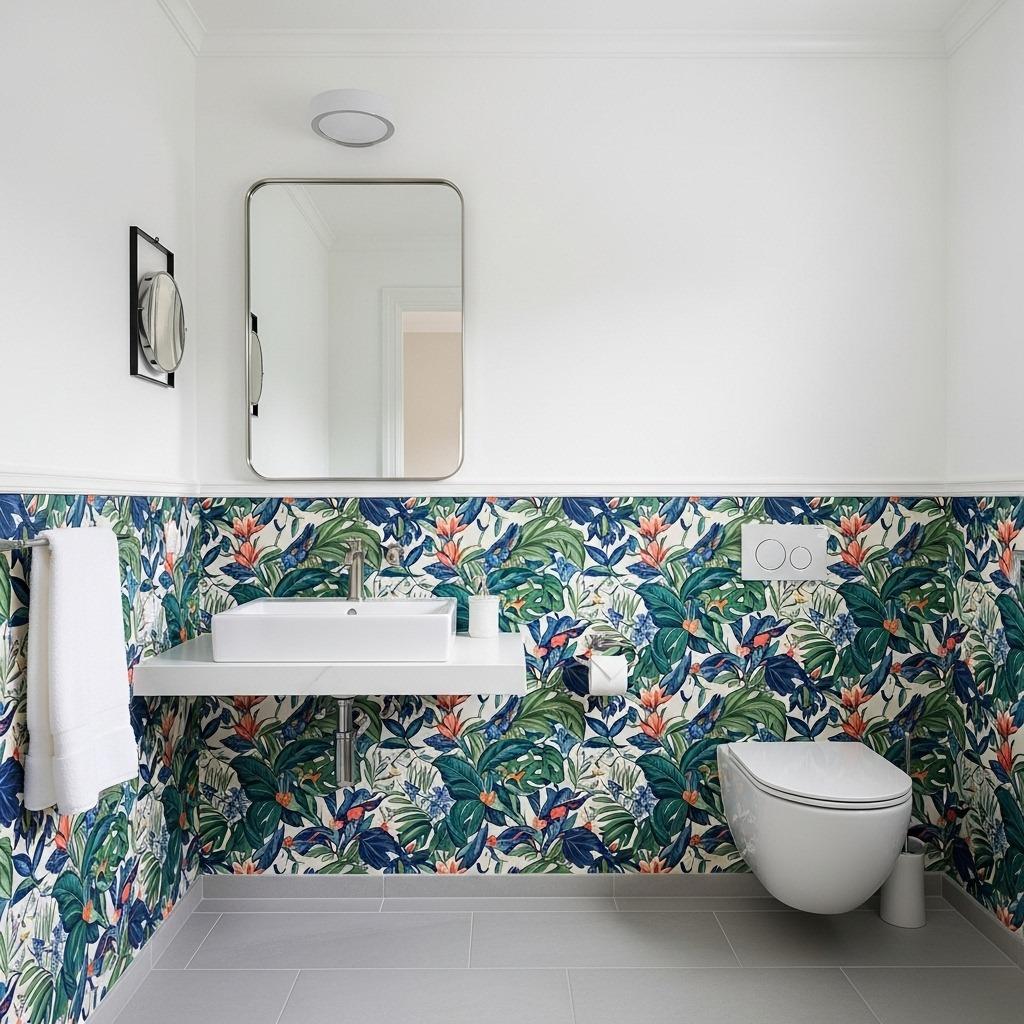
Wallpaper adds pattern and personality that paint alone can’t match. Using it on just the lower portion controls costs and keeps the look from feeling too busy.
This works particularly well with bold patterns – florals, geometrics, or even subtle textures. The upper painted portion gives your eyes a place to rest while the wallpaper brings energy and interest. Make sure to use moisture-resistant wallpaper suitable for bathrooms.
The transition point is your chance to add trim or molding for a polished finish. Even a simple chair rail makes the division look intentional and complete. For more wallpaper inspiration, see these bold wallpaper bathroom examples.
13. Concrete-Look Tile Below, Warm Paint Above
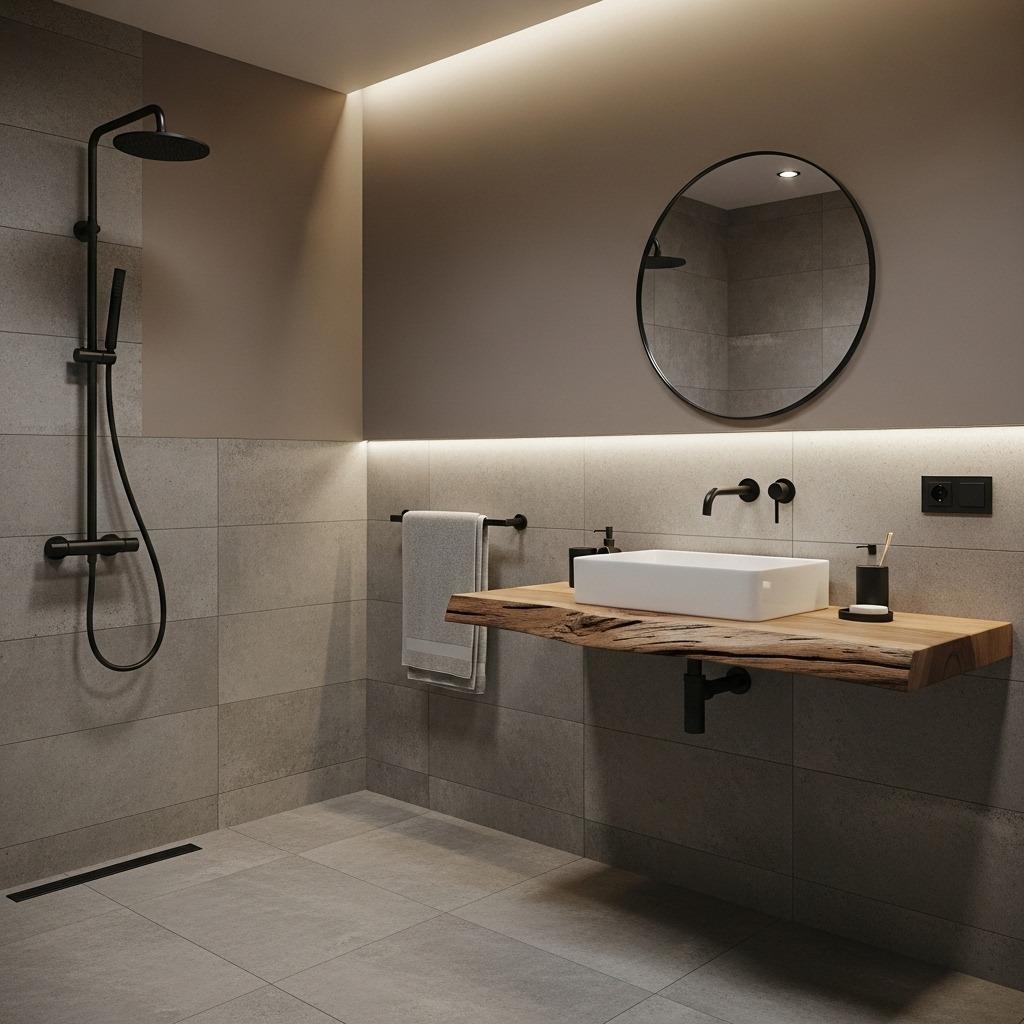
Industrial materials bring edge and durability to bathroom design. Concrete-look tiles on the lower walls provide that urban aesthetic while painted upper walls soften the overall feel.
This combination prevents the space from feeling too cold or warehouse-like. The warm paint color (think taupe, greige, or soft terracotta) balances the cool gray tiles below. It’s a sophisticated look that works in both modern and transitional bathrooms.
Large-format tiles minimize grout lines for a cleaner appearance, while the textured surface of concrete-look tiles adds depth.
14. White Upper, Wood-Look Tile Lower
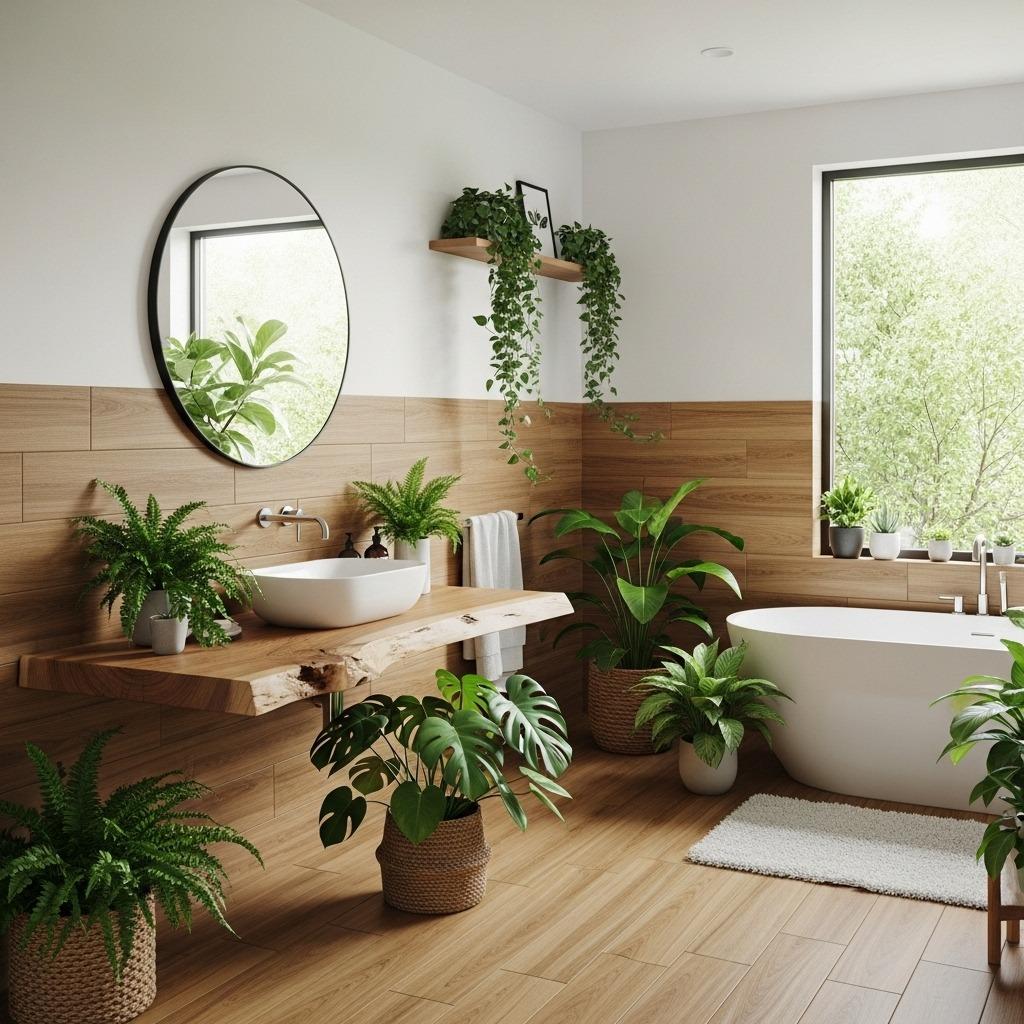
Bringing wood tones to bathroom walls might sound risky, but wood-look porcelain tiles give you the warmth of wood with the durability of ceramic. Paired with white upper walls, you get a natural, organic feel that’s completely practical.
This combination works beautifully in nature-inspired or Scandinavian designs. The wood tones ground the space while white keeps things bright and airy. Choose lighter wood tones for smaller bathrooms or go darker for more drama in larger spaces.
The horizontal grain of wood-look tiles naturally draws the eye around the room, making narrow bathrooms feel wider. It’s also an unexpected choice that adds character without requiring actual wood maintenance. More nature-focused design appears in nature-inspired bathroom concepts.
15. Monochromatic Split With Different Textures

Sometimes the most impactful two-tone effect comes from texture rather than color. Keeping everything in the same color family while varying the surface treatment creates subtle sophistication.
Think smooth paint above and textured tile below, both in white or soft gray. The texture catches light differently throughout the day, creating shadows and depth that flat surfaces can’t achieve. This approach is perfect for minimalist bathroom design lovers who want interest without color commitment.
3D tiles, penny rounds, or even simple subway tiles laid in interesting patterns all add that textural contrast. The monochromatic palette keeps things cohesive while the varied surfaces keep things interesting. It’s understated elegance at its finest.
Choosing Your Two-Tone Bathroom Color Palette
Now that you’ve seen the possibilities, how do you actually pick colors that work? Start by considering your bathroom’s size, lighting, and existing fixtures.
Small bathrooms benefit from lighter upper walls to maintain a sense of openness. You can go darker below without making the space feel cramped. Larger bathrooms can handle bolder contrasts and darker overall palettes.
Think about what you already have that’s staying put – tile floors, countertops, fixtures. Your two-tone walls should complement these elements rather than fight them. If you have warm-toned wood vanity, consider warm paint colors. Cool gray counters? Cooler paint tones will feel more cohesive.
Don’t forget about lighting. Natural light shows true colors, while artificial light can shift how hues appear. Test paint samples in your actual bathroom at different times of day before committing. What looks perfect at noon might feel completely different under evening lighting.
Tips for Creating Clean Paint Lines
The technical execution matters as much as your color choices. Crisp lines between your two tones make the difference between polished and sloppy.
Invest in quality painter’s tape and take time applying it carefully. Press edges down firmly to prevent paint from bleeding underneath. Some painters swear by running a thin bead of the base color along the tape edge first, letting it dry, then applying the top color – any bleed-through will be the base color rather than your top coat.
Use a small brush for edges and a roller for larger sections. Work in thin coats rather than trying to achieve full coverage in one pass. Multiple thin coats look smoother and are less likely to drip or create texture differences.
If you’re adding molding or trim at your transition point, you get more forgiveness in your paint line since the trim will cover the edge. This is honestly the approach I’d recommend for anyone not confident in their taping skills.
Where to Place Your Two-Tone Split
The height of your color division dramatically affects the room’s proportions. Lower splits (around 32-36 inches) feel traditional and make ceilings appear higher.
Higher splits (around 60 inches or more) create a cozier feel and work well in bathrooms with very high ceilings that might otherwise feel cavernous. Mid-wall splits (48-54 inches) offer a contemporary look that works in most ceiling heights.
Consider your specific room too. If you have a window at a certain height, aligning your split with the window sill can create pleasing symmetry. Existing tile work might also dictate where your split makes sense.
There’s no single “right” answer here. Walk into your bathroom and use painter’s tape to mark potential split points. Live with each option for a day or two to see what feels best. Take photos – sometimes the camera reveals proportions our eyes miss.
The right two-tone wall treatment can completely transform your bathroom without requiring a gut renovation. Whether you go bold with contrasting colors or subtle with tonal shifts, you’re adding layers of visual interest that elevate the entire space.
What resonates most with your style? The classic elegance of a chair rail split, or maybe the unexpected charm of mixed materials? Whatever direction you choose, you’re creating a bathroom that reflects thoughtful design rather than default all-white walls.
The beauty of this approach is that it scales to any budget. Paint and DIY labor keep costs low, while tile and professional installation create more permanent luxury. Either way, you’re investing in a space that feels custom and intentional every time you step inside.