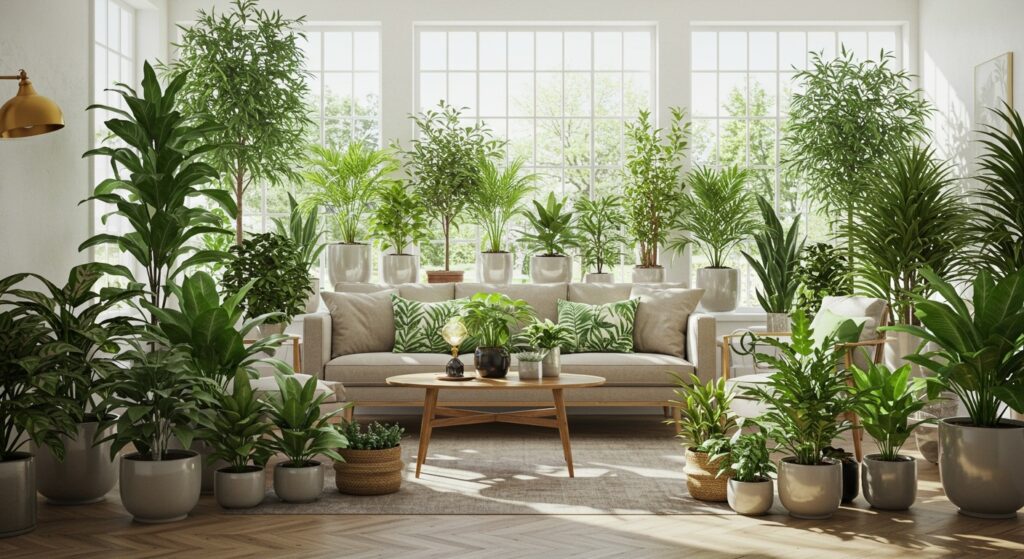
There’s something magical about stepping onto your balcony or patio and being greeted by lush greenery. But what if you’re working with limited square footage, concrete floors, or a space that isn’t exactly garden-ready? That’s where container gardening becomes your secret weapon.
Whether you’re a renter who can’t dig into the ground, someone with a tiny balcony, or just craving more flexibility in how you design your outdoor oasis, growing plants in containers opens up endless possibilities. You can move things around, experiment with different arrangements, and create a personalized garden that fits your lifestyle perfectly.
This guide will walk you through practical hacks and creative solutions that make container gardening not just doable, but genuinely enjoyable. From choosing the right pots to maximizing vertical space, you’ll discover how to transform even the smallest outdoor area into a thriving green retreat.
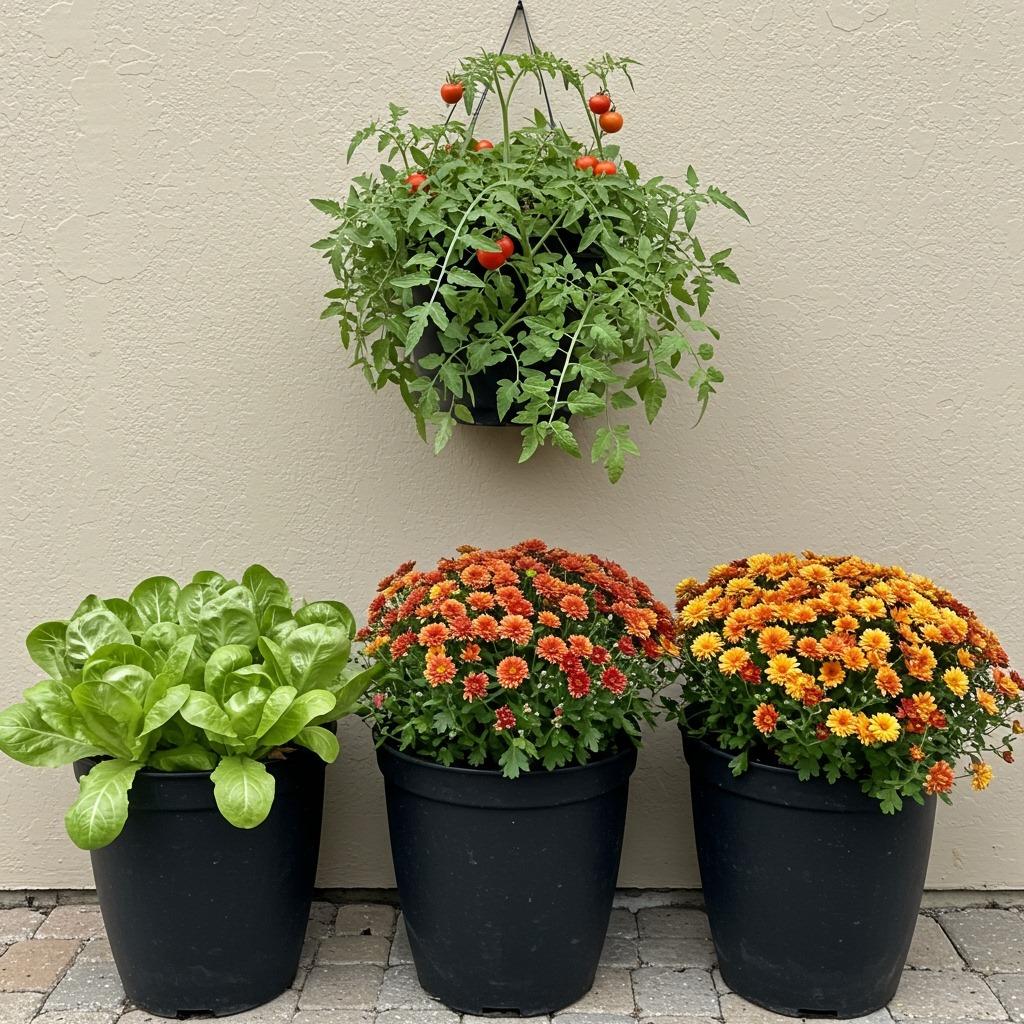
1. Start with the Right Container Size (Yes, It Really Matters)
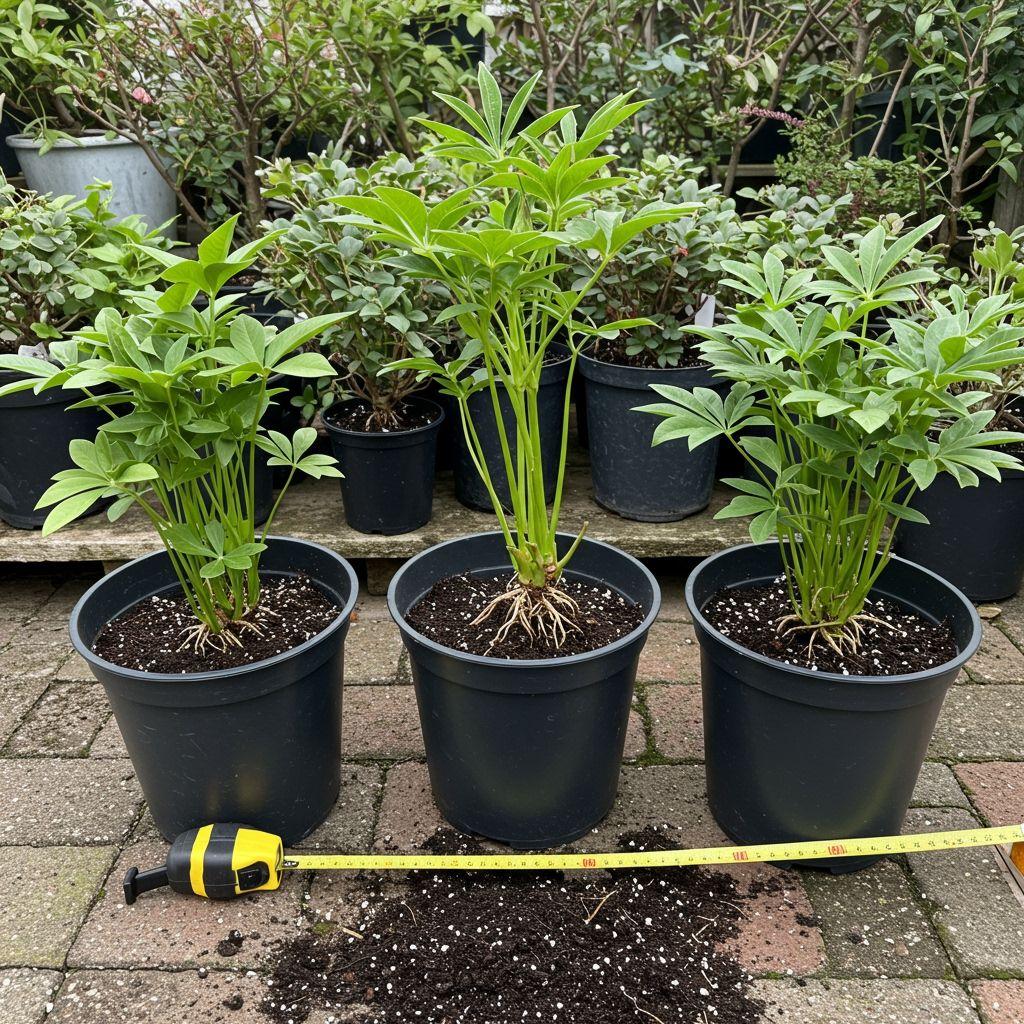
One of the biggest mistakes new container gardeners make is choosing pots that look cute but aren’t functional. Your plants need room to spread their roots, and cramped quarters lead to stunted growth and constant watering headaches.
For herbs and small flowers, aim for containers that are at least 6-8 inches deep. Vegetables like tomatoes or peppers? They’ll thank you for 12-18 inches of depth. The width matters too – root vegetables especially need horizontal space to develop properly.
Before you buy that adorable tiny pot, think about where your plant will be in a few months. Transplanting is possible, but starting with adequate space saves you hassle later. Plus, larger containers retain moisture better, which means less frequent watering during hot summer days.
2. Create Drainage Like a Pro (Your Plants Will Thank You)
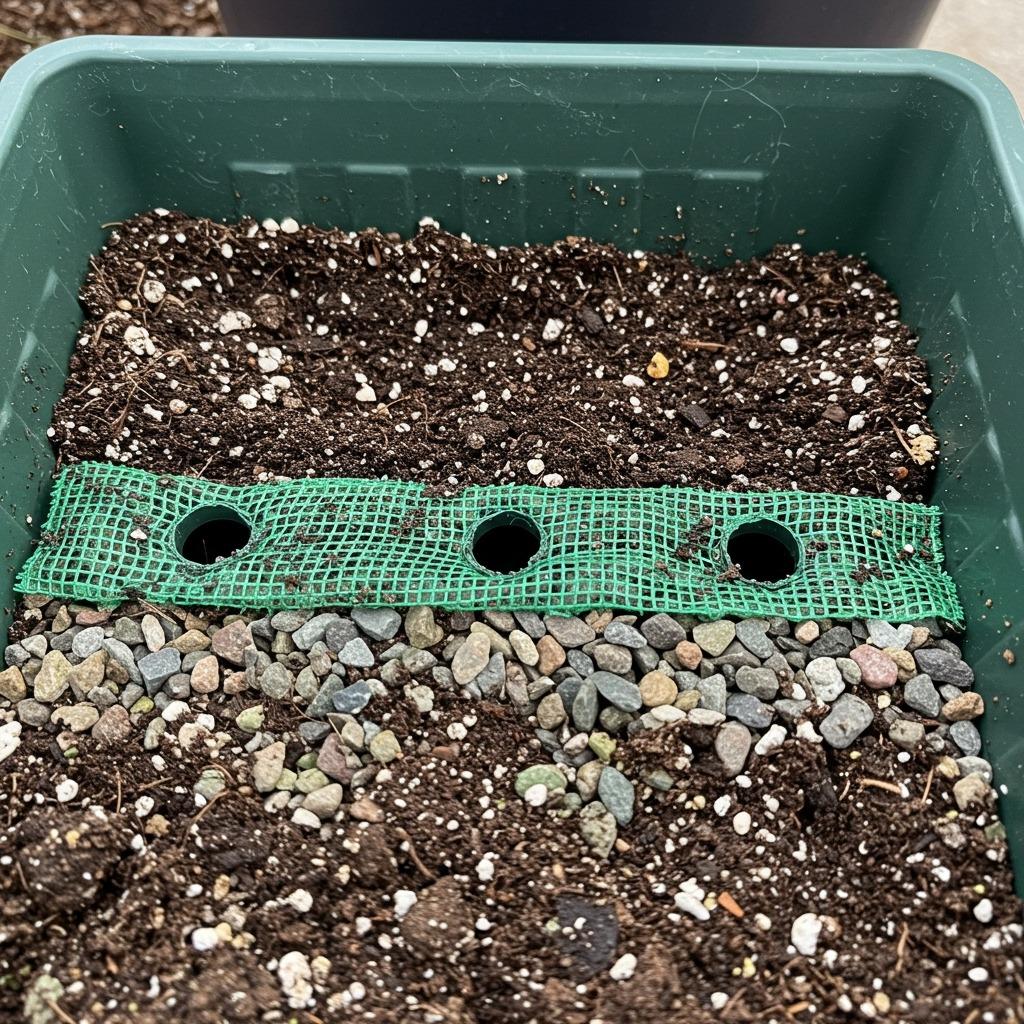
Waterlogged roots are the fastest way to kill an otherwise healthy plant. Even if your container has drainage holes, you need to set up a system that prevents water from pooling at the bottom.
Start by adding a layer of small rocks, broken pottery pieces, or even wine corks at the base of your pot. This creates space for excess water to drain away from the roots. Some gardeners swear by placing a coffee filter or landscaping fabric over the drainage layer before adding soil – it prevents soil from washing away while still allowing water through.
If you’ve fallen in love with a container that doesn’t have holes, you have options. You can drill your own (works great for plastic or wood), or use it as a decorative outer pot with a draining inner pot inside. Just make sure you’re not creating a water trap that slowly drowns your plants.
3. Mix Your Own Potting Soil Blend

Regular garden soil is too heavy for containers and doesn’t provide the drainage container plants need. You could buy pre-made potting mix, but creating your own blend gives you control over what your plants are growing in.
A simple formula that works beautifully: combine equal parts quality potting soil, perlite or vermiculite for drainage, and compost for nutrients. For succulents or cacti, add extra sand to the mix. Moisture-loving plants might benefit from a bit of coco coir to help retain water.
This custom approach also saves money in the long run, especially if you’re filling multiple containers. You can buy ingredients in bulk and mix only what you need. Plus, you’ll avoid the mystery ingredients sometimes found in cheap commercial mixes.
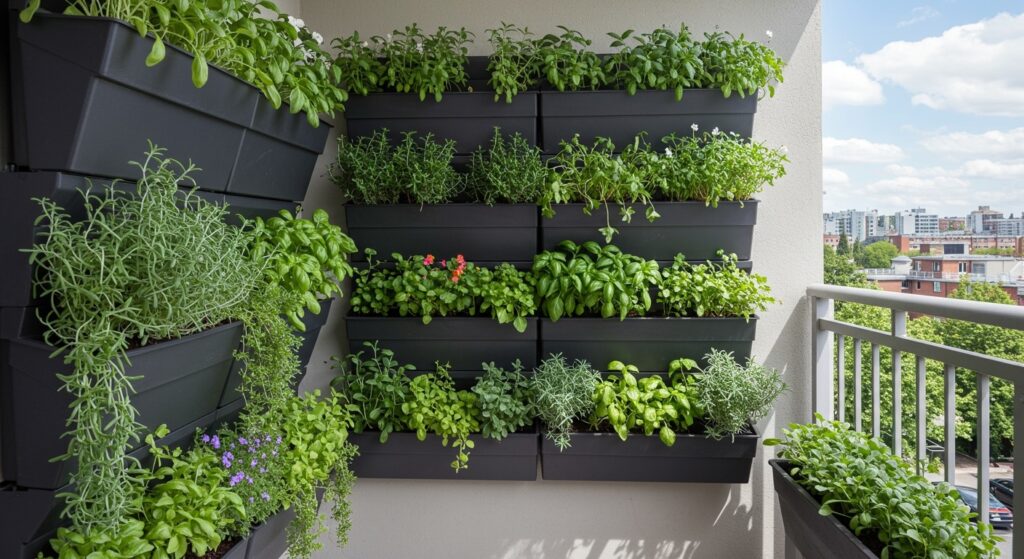
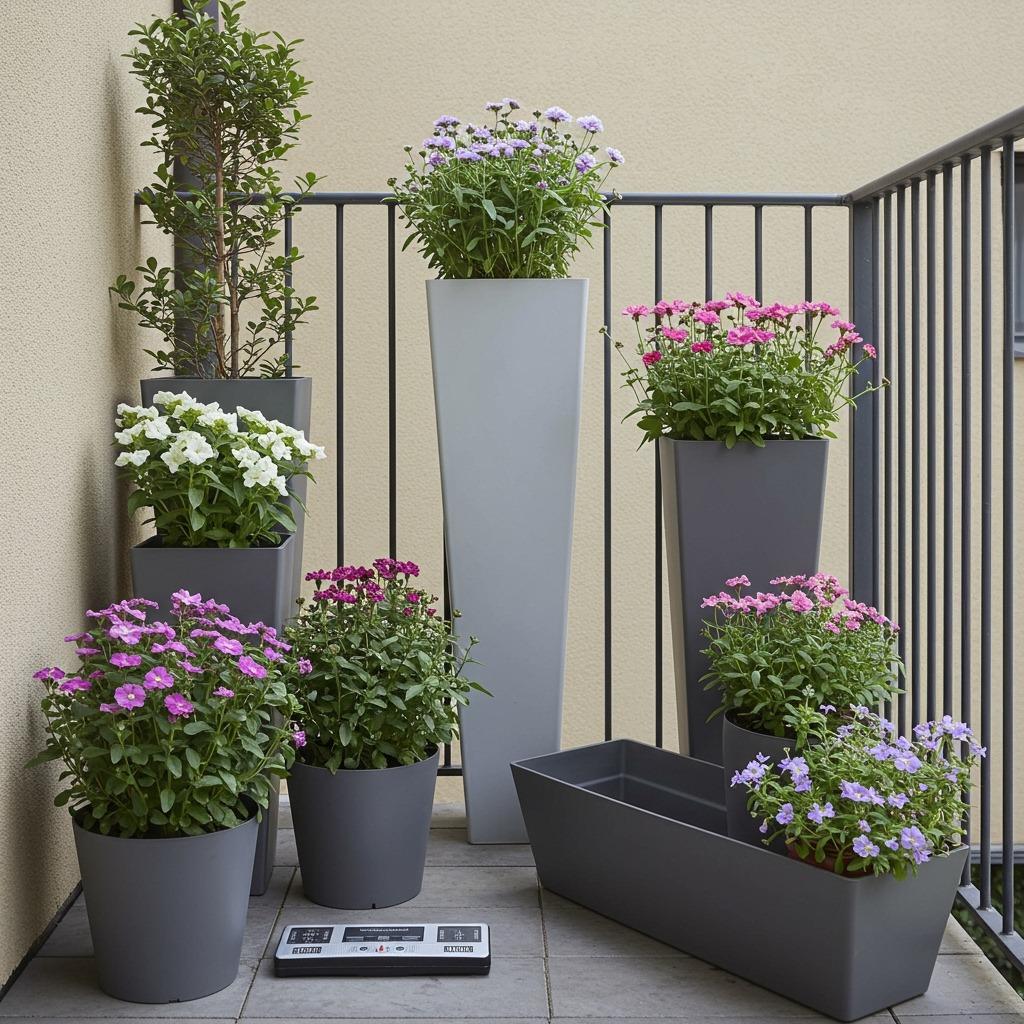
4. Master the Vertical Growing Game

When floor space is limited, the only direction to go is up. Vertical gardening transforms blank walls and railings into productive growing areas without sacrificing your walking space.
Wall-mounted planters, hanging baskets, and tiered plant stands instantly multiply your growing capacity. You can train climbing plants like beans, peas, or flowering vines up simple trellises attached to your containers. Even strawberries grow beautifully in vertical tower planters that take up minimal footprint.
The trick is securing everything safely – balcony railings and walls need to handle the weight of wet soil and mature plants. Use proper mounting hardware, and consider the sun exposure at different heights. Plants at the top might dry out faster and need more frequent watering than those lower down.
5. Group Plants by Water Needs

Watering becomes infinitely easier when you organize plants with similar moisture requirements together. Succulents and Mediterranean herbs that prefer drier conditions shouldn’t be next to moisture-loving ferns and begonias.
Create zones in your space based on how often you’ll need to water. Put thirsty plants closer to your water source and drought-tolerant varieties farther away. This system saves time and prevents the common problem of overwatering some plants while underwatering others.
You can also match container materials to water needs. Terracotta pots naturally wick moisture away, making them perfect for plants that like to dry out between waterings. Plastic or glazed ceramic containers hold moisture longer, ideal for plants that prefer consistently damp soil.
6. Add Self-Watering Containers to Your Arsenal
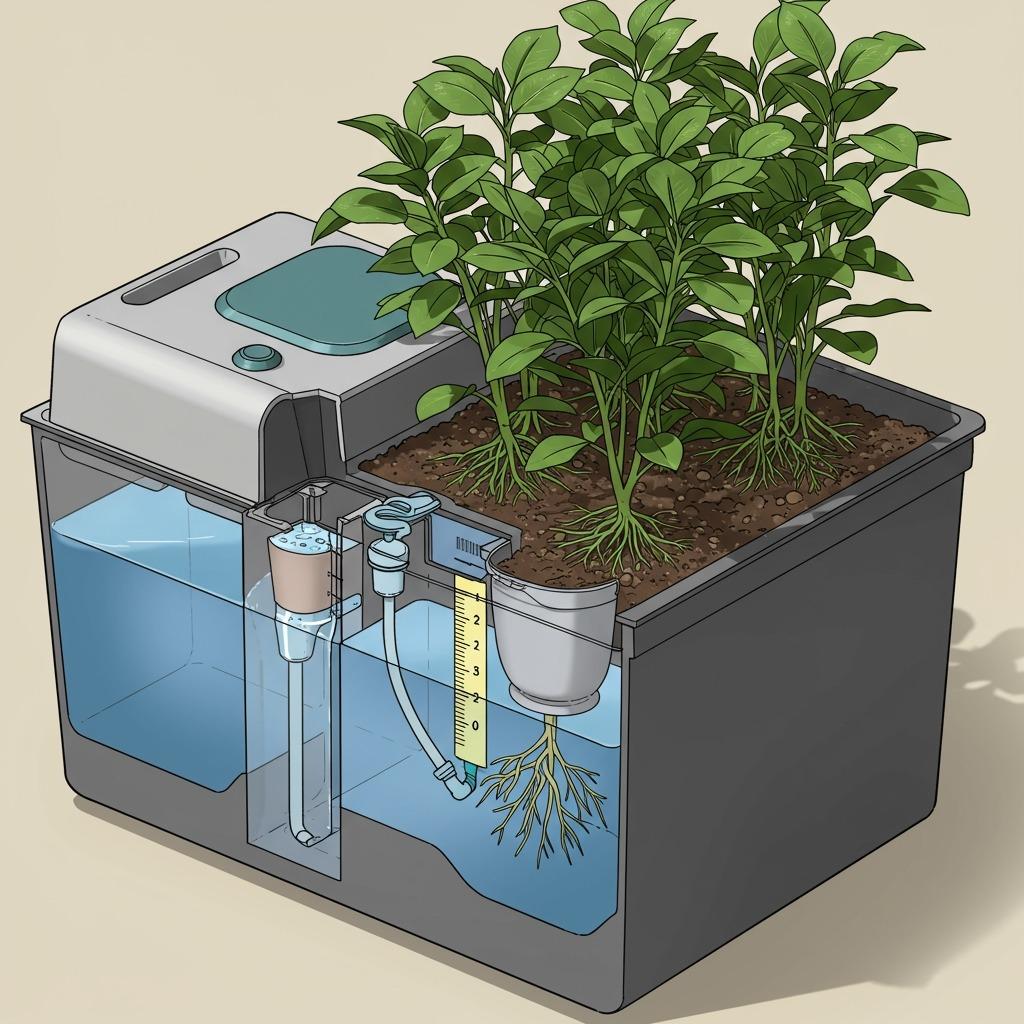
If you travel frequently or simply forget to water, self-watering containers can be absolute lifesavers. These clever systems have built-in reservoirs that gradually release moisture to plant roots over several days.
You can buy containers with self-watering features already built in, or convert regular pots using water reservoir inserts. Some DIY enthusiasts create their own systems using nested pots and wicking materials.
The key is checking the reservoir level regularly and not assuming the system is foolproof. During extreme heat, even self-watering containers need attention. But for maintaining consistent moisture levels, especially for vegetables and annual flowers, they’re incredibly helpful.
7. Choose Varieties Bred for Container Life
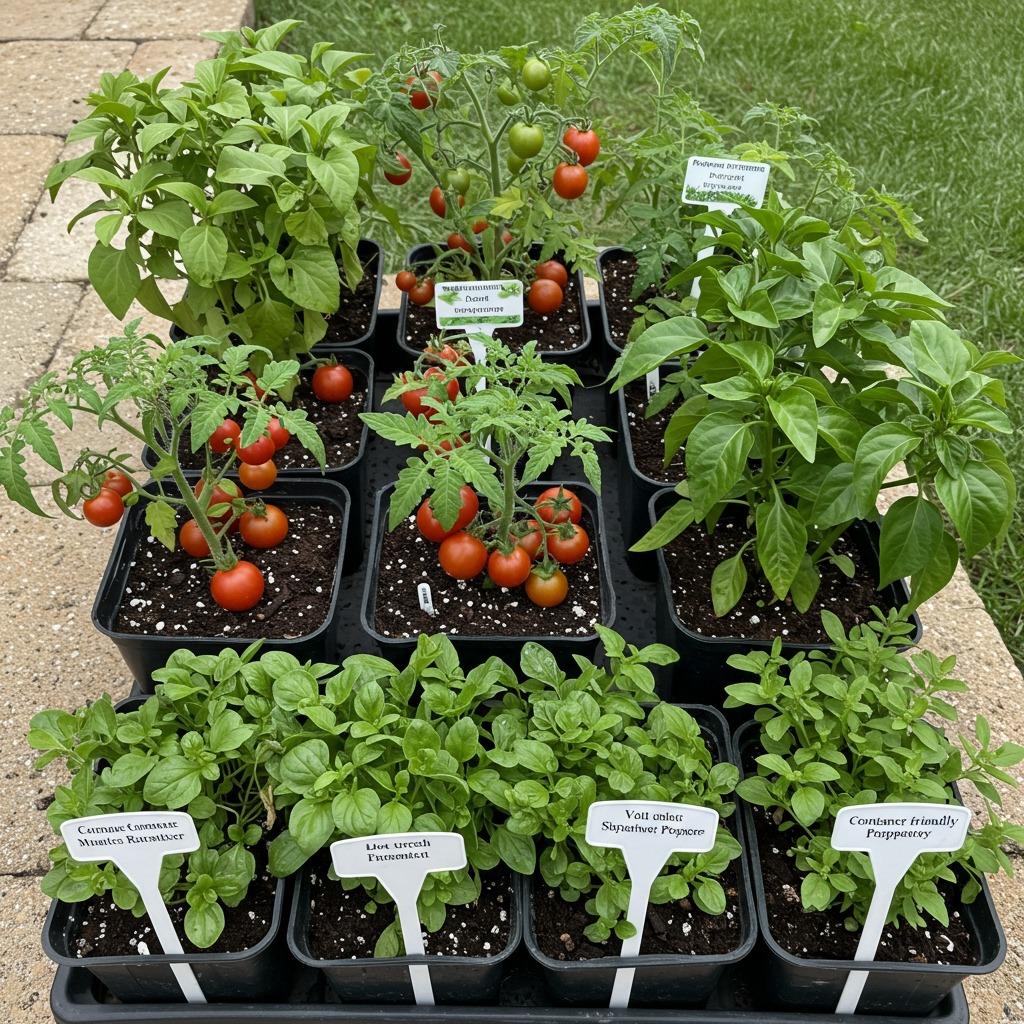
Not all plant varieties thrive in containers, but breeders have developed countless options specifically for potted growing. These compact versions produce full-sized harvests without requiring massive root space.
Look for terms like “patio,” “bush,” “dwarf,” or “compact” when selecting vegetables. Cherry tomatoes generally perform better than beefsteak varieties in pots. Determinate tomato plants stay more manageable than indeterminate types that grow into sprawling vines.
For flowers, many petunias, marigolds, and zinnias are naturally suited to container life. Herbs like basil, parsley, and chives actually thrive in pots and can be conveniently placed right outside your kitchen door. Reading plant tags carefully before buying saves disappointment later when a plant outgrows its space.
8. Implement a Simple Fertilizing Schedule
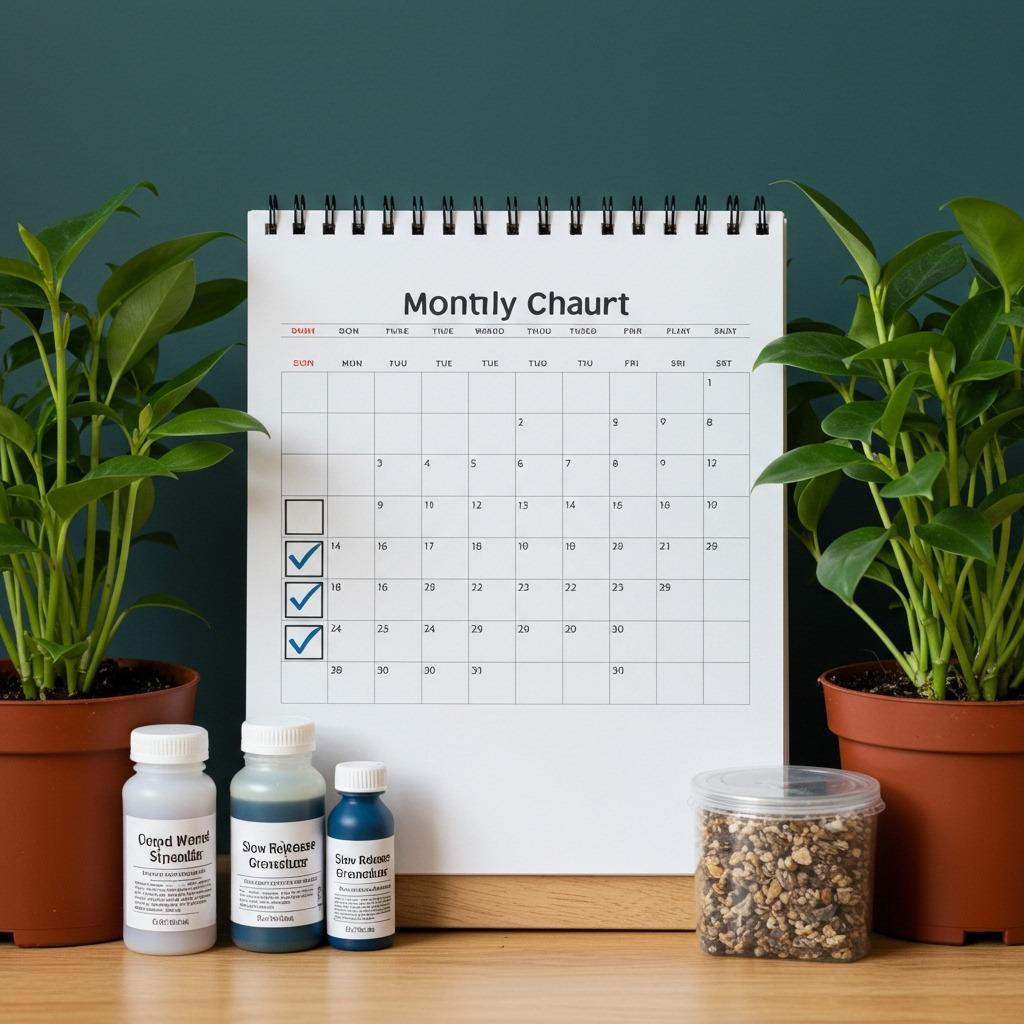
Container plants exhaust nutrients in their soil much faster than in-ground gardens because frequent watering washes away fertilizer. Establishing a feeding routine keeps your plants healthy and productive throughout the growing season.
Slow-release fertilizer pellets mixed into the soil at planting time provide a steady nutrient supply for months. Supplement with liquid fertilizer every two weeks during active growth periods. Different plants have different needs – flowering varieties often want more phosphorus, while leafy greens benefit from nitrogen-rich formulas.
Don’t fertilize during dormant periods or when plants are stressed from heat or transplanting. More isn’t always better with fertilizer; overfed plants can develop burned leaves or excessive foliage at the expense of flowers and fruit. Following package directions prevents problems.
9. Rotate Containers for Even Sun Exposure

Plants naturally grow toward their light source, which can lead to lopsided, leaning specimens if they stay in one position too long. This is especially noticeable indoors or on covered patios where light comes from one direction.
Giving containers a quarter turn every few days promotes even growth on all sides. For heavy pots that are difficult to move, rolling plant caddies are worth every penny. These wheeled platforms make rotation effortless and also simplify moving plants to shelter during storms or extreme weather.
Pay attention to which sides of your plants look healthiest, and use that information to fine-tune positioning. Sometimes moving a container just a few feet can make the difference between a struggling plant and a thriving one.
10. Design with Thrillers, Fillers, and Spillers

This classic design formula creates professional-looking container arrangements that have visual impact from every angle. Start with a “thriller” – a tall, dramatic plant in the center or back that draws the eye upward.
Surround your thriller with “fillers” – mounding plants that add color and fullness around the middle section. These could be flowers, herbs, or foliage plants that complement your centerpiece. Finally, add “spillers” – trailing plants that cascade over the container’s edge and soften the overall look.
You don’t need to overthink it. A simple combination might be a spiky cordyline as the thriller, colorful petunias as fillers, and trailing sweet potato vine as the spiller. Experiment with textures and colors that appeal to you.
11. Protect Pots from Winter Damage

If you live where temperatures drop below freezing, protecting your investment in quality containers matters. Terracotta and ceramic pots can crack when water inside them freezes and expands.
Before the first hard freeze, empty pots you won’t use through winter and store them in a shed or garage. For year-round plantings like evergreens or cold-hardy perennials, wrap containers with bubble wrap or burlap for insulation. Elevating pots on feet or bricks allows drainage and prevents them from freezing to the ground.
Some materials weather winter better than others. Fiberglass, resin, and certain treated woods can stay outside without protection in most climates. Knowing what you’re working with helps you plan appropriate care.
12. Create Portable Privacy with Planted Screens
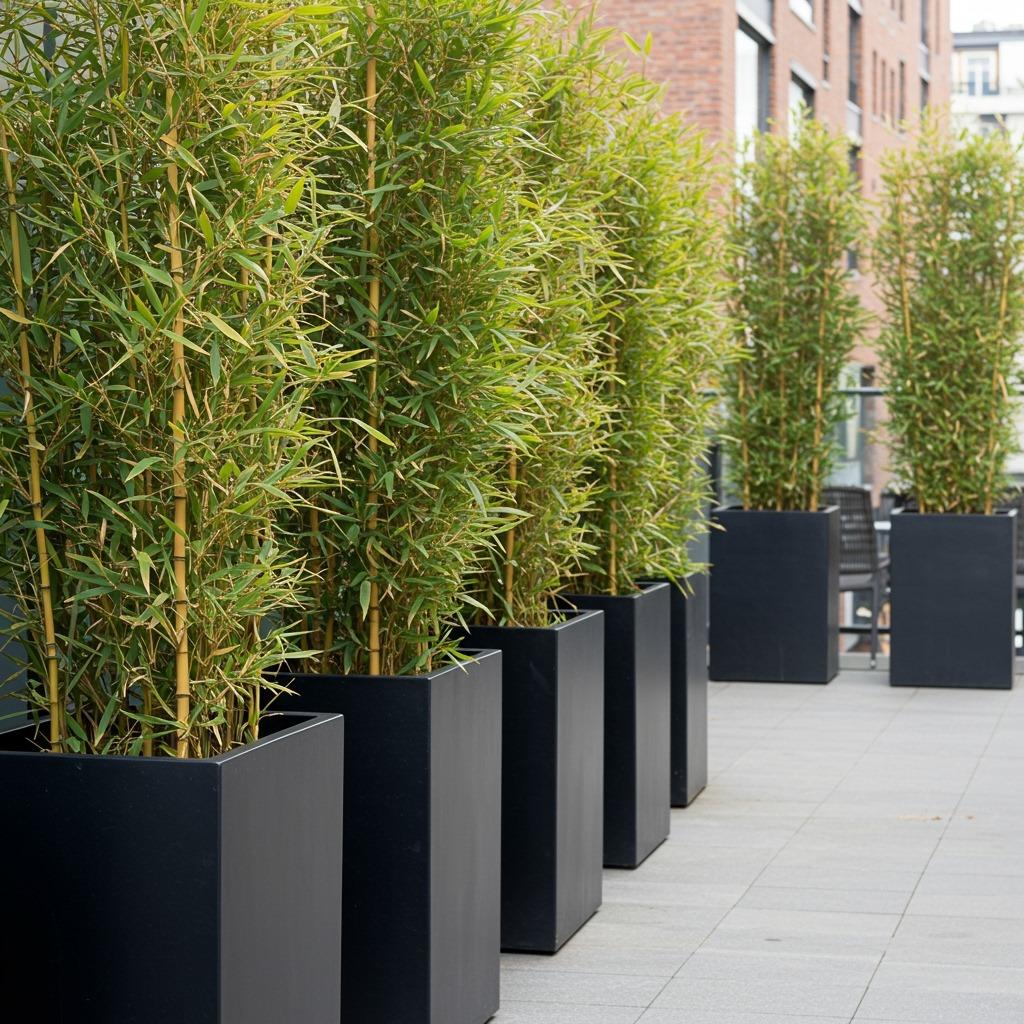
Container gardening isn’t just about pretty flowers and fresh herbs. Strategic placement of tall planters creates privacy screens that you can rearrange as needed – perfect for renters or anyone who likes flexibility.
Bamboo, tall ornamental grasses, or evergreen shrubs in large containers form living walls that block unwanted views or create intimate outdoor rooms. Because they’re mobile, you can adjust your privacy based on seasons, sun angles, or changes in how you use your space.
This approach works beautifully for small balconies where permanent structures aren’t allowed. Line containers along railings or position them to section off dining areas from seating areas. The greenery provides privacy while still feeling open and airy.
13. Repurpose Unexpected Items as Planters
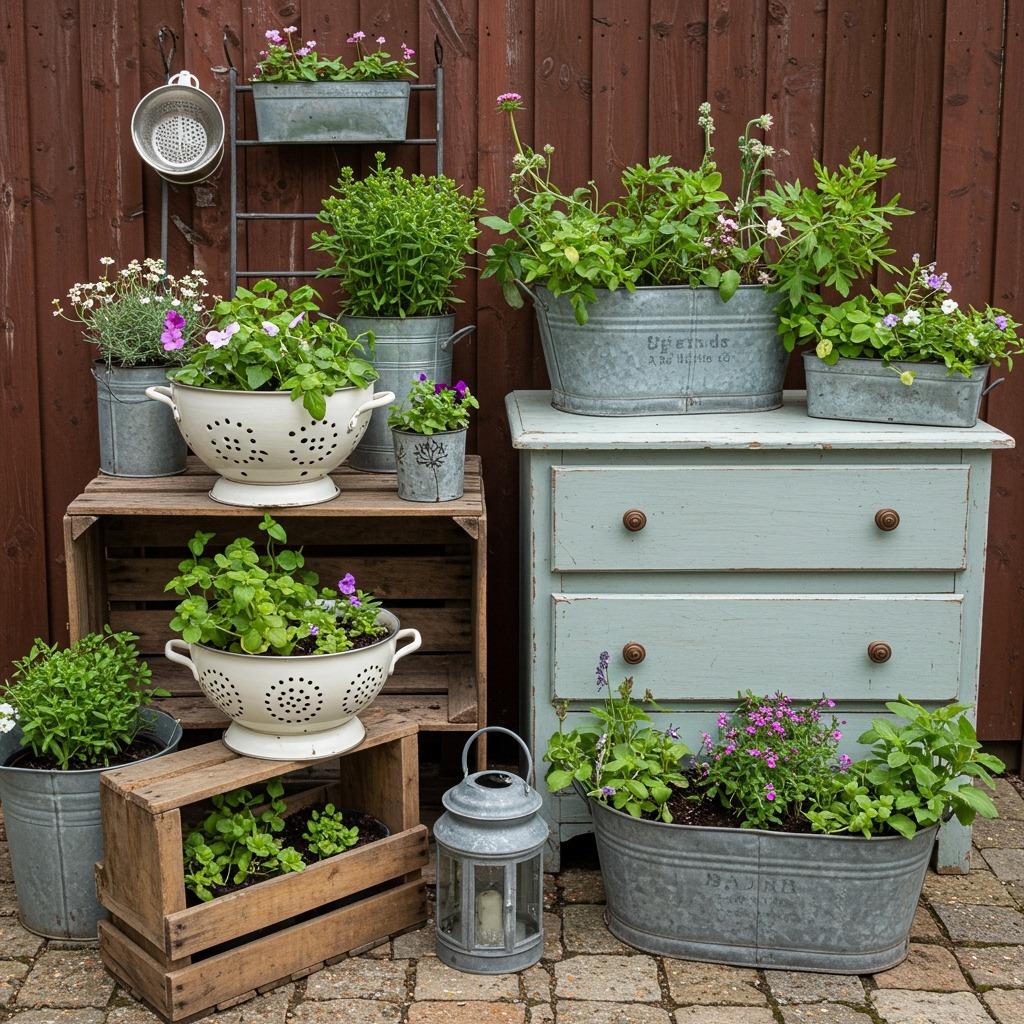
Why buy expensive containers when you’re surrounded by potential planters? Old watering cans, wooden crates, vintage colanders, and galvanized buckets all make charming homes for plants once you add drainage holes.
Thrift stores and yard sales are treasure troves for unique containers. That chipped enamelware bowl or rustic wooden toolbox could be your next favorite planter. Just remember the drainage rule – drill holes if they’re not already there.
This creative approach adds personality to your space and aligns perfectly with sustainable living. You’re giving discarded items new purpose while creating a garden that reflects your individual style. Some of the most eye-catching garden displays feature unexpected containers that spark conversation.
14. Companion Plant in Larger Containers
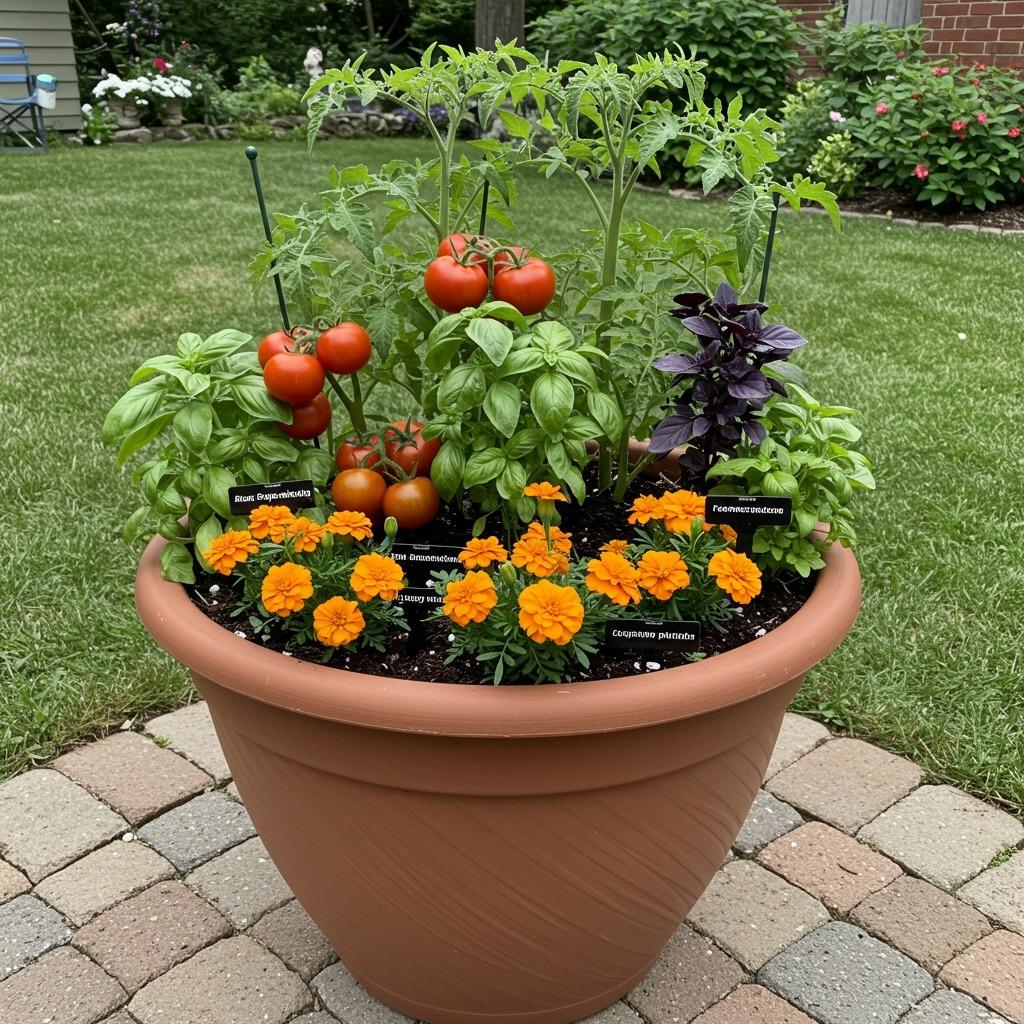
You’re not limited to one plant per pot. Large containers can support mini-ecosystems where different plants benefit each other. This companion planting strategy maximizes space while creating healthier growing conditions.
Classic combinations include tomatoes with basil (the basil may help repel pests while both plants enjoy similar conditions), or planting marigolds with vegetables to discourage harmful insects. Lettuce grows well in the shade of taller plants, and shallow-rooted herbs can share space with deeper-rooted vegetables.
Just make sure companion plants have compatible needs for water, sunlight, and nutrients. Avoid putting aggressive spreaders with plants that might get crowded out. A bit of research before planting prevents competition problems later.
15. Install Drip Irrigation for Multiple Containers
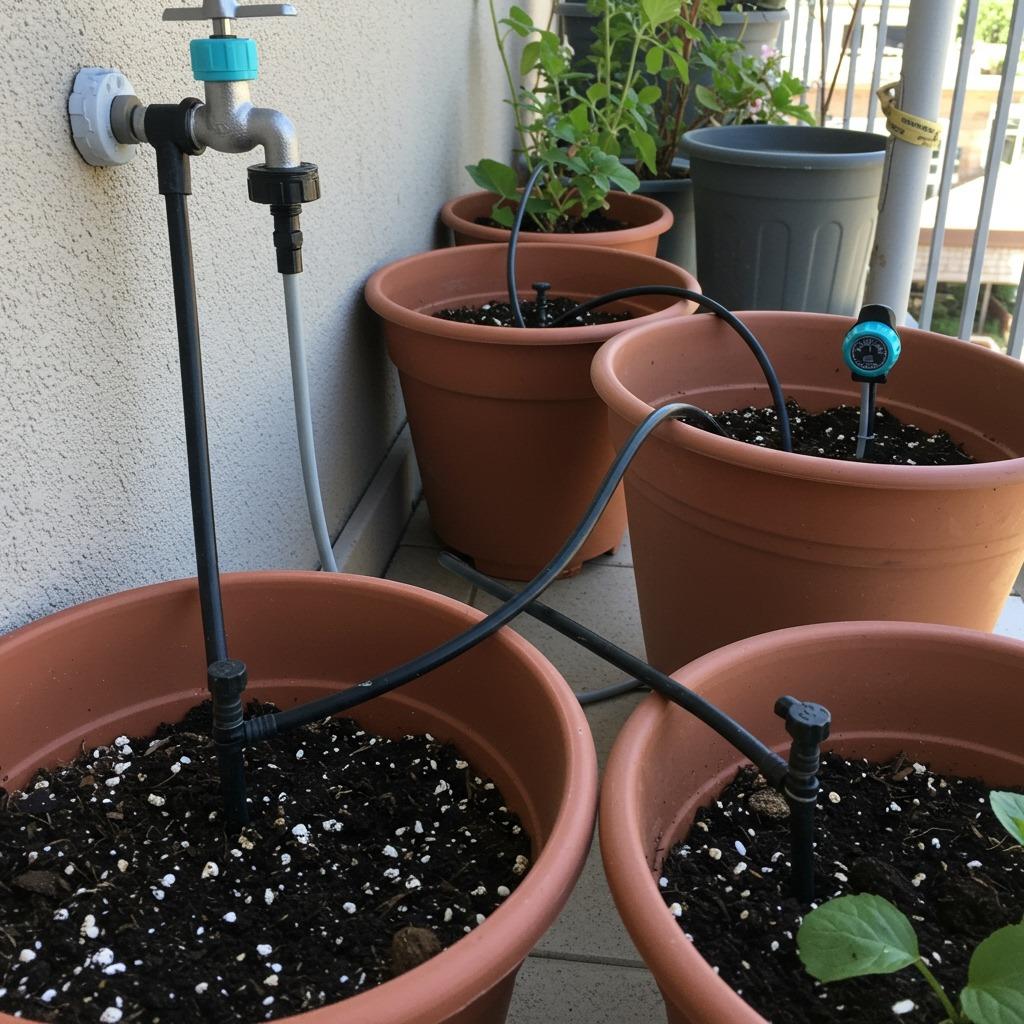
Once you have more than a handful of containers, hand-watering can become a daily chore. Installing a basic drip irrigation system automates the process and ensures consistent moisture levels.
Simple kits available at garden centers connect to outdoor faucets and use tubing to deliver water directly to each container. You control how much water each pot receives by adjusting individual emitters. Add a timer, and the system runs itself even when you’re away.
The upfront cost is offset by water savings (no more overwatering or runoff) and the time you’ll save. For anyone serious about container gardening on a balcony or patio, it’s one of those upgrades that quickly proves its worth.
16. Mulch Container Surfaces

That exposed soil surface in your containers isn’t just ugly – it’s allowing precious moisture to evaporate unnecessarily. Adding a layer of mulch solves multiple problems at once.
Organic mulches like bark chips or cocoa hulls break down slowly, adding nutrients back into the soil. They keep roots cooler during heat waves and reduce water evaporation by up to 25%. Decorative options like pebbles or sea glass add visual interest while providing the same protective benefits.
Keep mulch about an inch away from plant stems to prevent rot. A two-inch layer is typically sufficient for most containers. As organic mulches decompose, simply refresh them with a new layer.
17. Label Everything (Your Future Self Will Thank You)
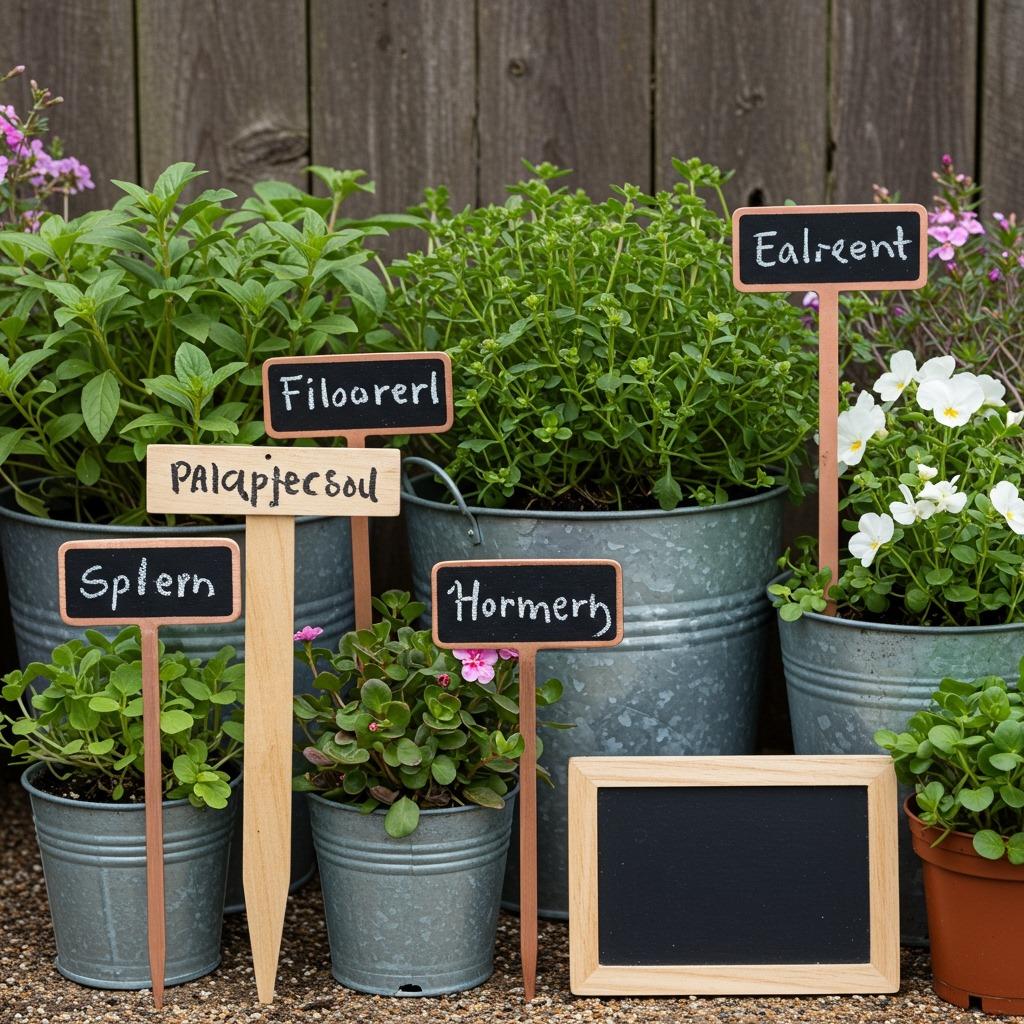
When you’re planting multiple varieties or starting seeds, it’s easy to think you’ll remember what’s where. You won’t. A few weeks later, you’ll be staring at seedlings wondering if they’re herbs or weeds.
Invest in weatherproof labels or make your own from painted rocks, wooden popsicle sticks, or recycled materials. Include the plant name, variety, and planting date. This information becomes invaluable when you’re trying to replicate successes or troubleshoot problems.
For perennials that die back in winter, labels help you remember what’s in containers that look empty. You’ll avoid accidentally dumping soil from pots that contain dormant plants just waiting for spring.
18. Refresh Soil Between Growing Seasons

Container soil doesn’t last forever. After a growing season, it’s depleted of nutrients and compacted from repeated watering. Refreshing or replacing soil gives your plants the best possible start each season.
For annual containers, dump the old soil into your compost bin or use it to amend in-ground gardens. Start fresh with new potting mix each spring. For perennials staying in their pots, remove the top few inches of old soil and replace it with fresh mix enriched with compost.
This maintenance task might seem tedious, but the difference in plant performance makes it worthwhile. Think of it as preventive care that saves you from fighting struggling plants all season.
19. Choose the Right Location for Each Plant

Even the perfect container setup fails if you put shade-loving plants in blazing sun or sun-worshippers in dark corners. Understanding your space’s microclimates is crucial for container gardening success.
Observe how sunlight moves across your outdoor area throughout the day. Full sun means six-plus hours of direct sunlight. Partial shade is 3-6 hours. True shade is under three hours. Most vegetables and flowering annuals want full sun, while many foliage plants and some herbs prefer partial shade.
Heat reflection from walls and pavement can create unexpectedly intense conditions. A spot that technically gets the right amount of sun might be too hot if it’s also getting heat radiating off a brick wall. Watch how your plants respond and be willing to relocate containers if needed.
20. Embrace Succession Planting
Your containers don’t have to sit empty after spring bulbs fade or summer annuals finish blooming. Succession planting keeps containers productive and attractive throughout multiple seasons.
When cool-season crops like lettuce or pansies bolt in summer heat, replace them with heat-loving plants. As summer flowers fade in fall, plant ornamental kale, mums, or pansies that thrive in cooler weather. In some climates, you can even grow cold-hardy greens through winter.
This strategy requires planning and some extra effort, but it maximizes your investment in containers and soil. Your outdoor space stays vibrant year-round instead of looking tired and neglected between seasons.
21. Mind the Weight for Balcony Gardens
Before filling every inch of your balcony with heavy ceramic pots full of wet soil, check your building’s weight restrictions. Balcony gardening requires awareness of structural limitations.
Lightweight alternatives like resin or fiberglass containers look like ceramic or terracotta but weigh significantly less. Vertical gardens and hanging planters distribute weight differently than clustered floor containers. Position heavier pots near walls or structural supports rather than at the balcony’s outer edge.
If you’re unsure about weight limits, consult your building management or a structural engineer. It’s better to design within safe parameters than risk damage. The good news? You can create abundant balcony garden solutions using smart container choices and strategic placement.
22. Harvest Regularly to Encourage Production

Here’s something many new gardeners don’t realize: most plants produce more when you harvest from them regularly. Pinching herbs, picking flowers, and collecting vegetables signals plants to keep producing.
Harvest herbs like basil and cilantro by cutting stems rather than picking individual leaves. This encourages bushy growth and prevents plants from getting leggy. For flowering plants, removing spent blooms (deadheading) redirects energy into producing more flowers instead of seeds.
With vegetables like beans, tomatoes, and peppers, frequent picking keeps plants in production mode rather than switching to reproduction mode. Check containers every couple of days during peak season, and you’ll be rewarded with continuous harvests.
23. Prepare for Pest Problems Before They Start
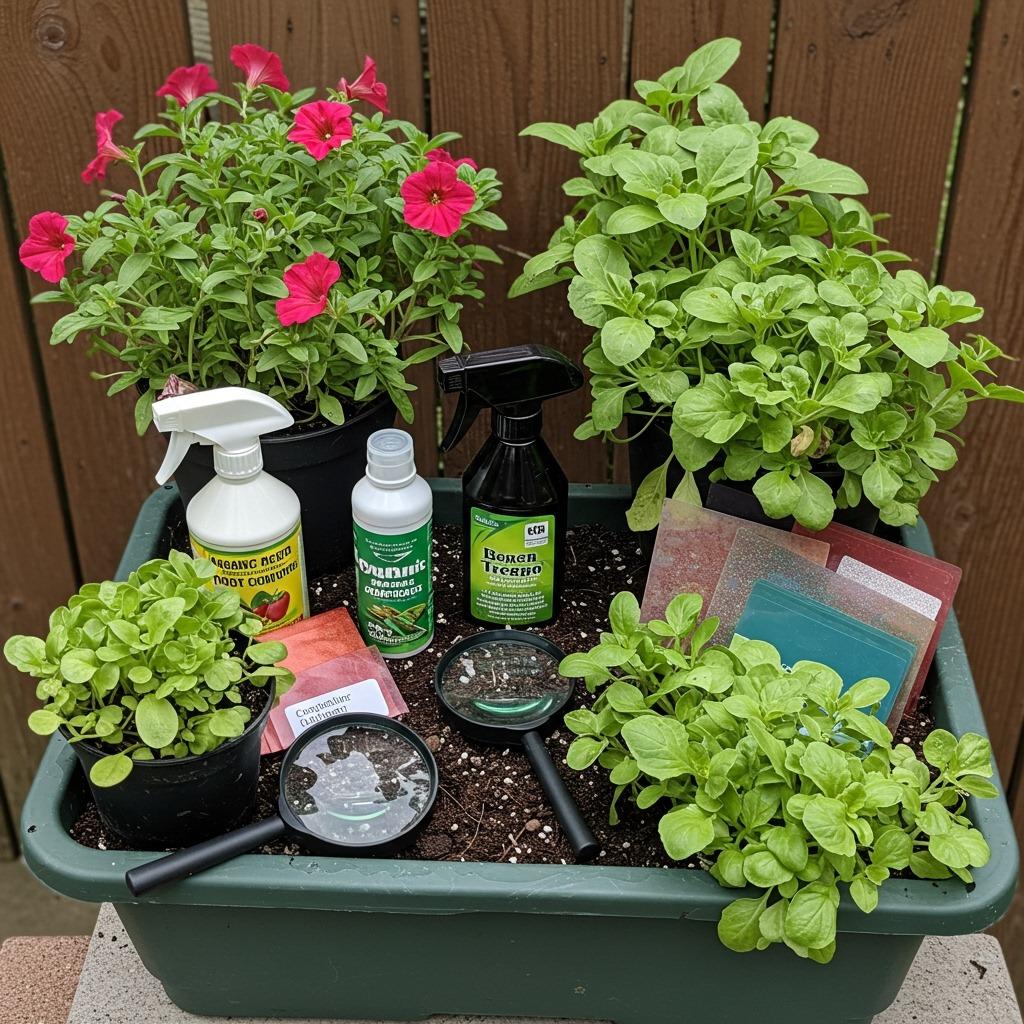
Container gardens aren’t immune to pest problems, but they’re often easier to manage than in-ground gardens. Catching issues early and having solutions ready makes all the difference.
Inspect plants regularly – flip leaves over and check stems for signs of aphids, spider mites, or other pests. Keep neem oil or insecticidal soap on hand for treating problems organically. Yellow sticky traps catch flying pests before populations explode.
Healthy plants resist pests better than stressed ones, so proper watering and feeding serve as preventive care. Sometimes the solution is as simple as spraying aphids off with water or
handpicking hornworms. Container mobility is an advantage here – you can isolate affected plants to prevent spread.
24. Create a Potting Station for Convenience
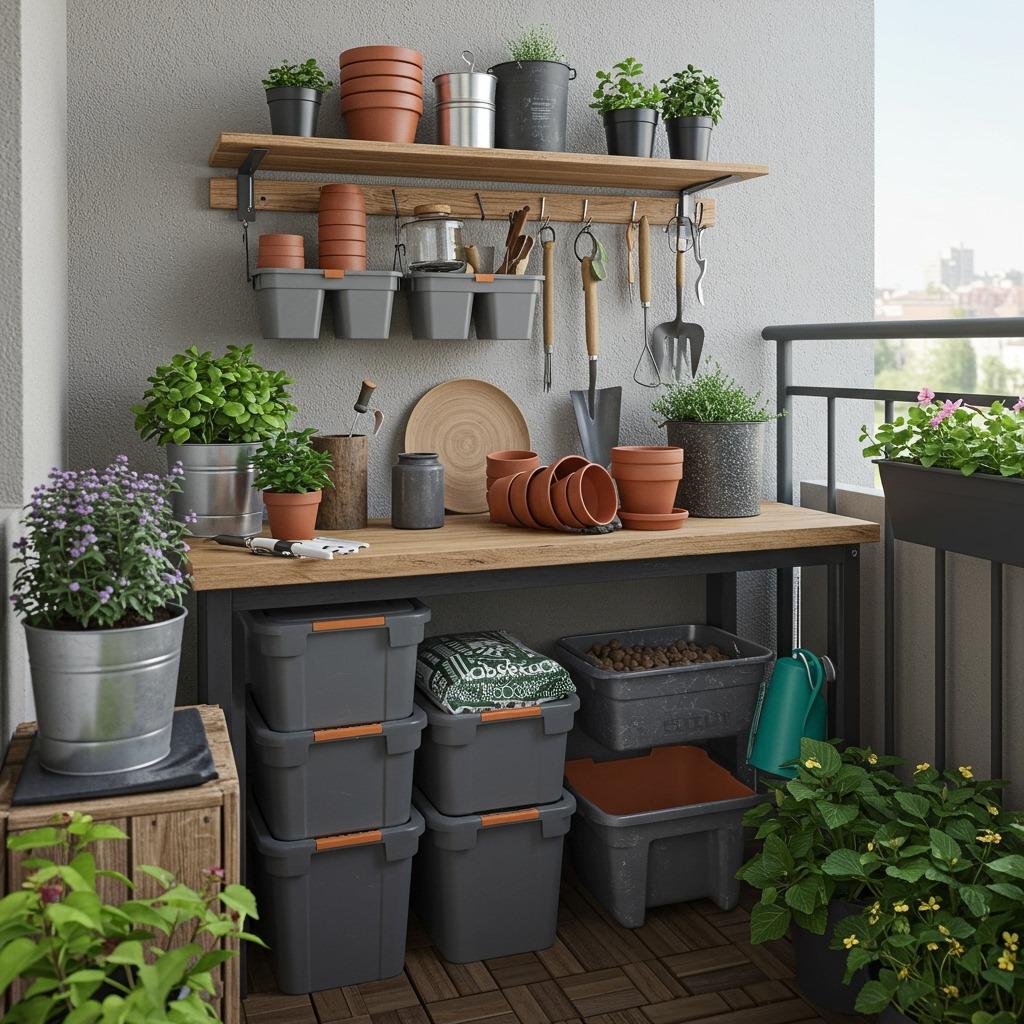
Having a designated space for potting activities makes container gardening more enjoyable and less messy. Even a small folding table becomes a functional potting bench.
Store potting soil, fertilizers, and tools within easy reach. Hang frequently used items like pruners and gloves on hooks. A nearby water source or watering can station saves steps. Some people use decorative storage bins that double as seating.
This organized approach means you’re more likely to maintain your containers properly. When everything you need is accessible, refreshing soil, transplanting, or starting new containers becomes a pleasure rather than a chore. It’s one of those affordable home upgrades that significantly improves your gardening experience.
25. Document What Works for You
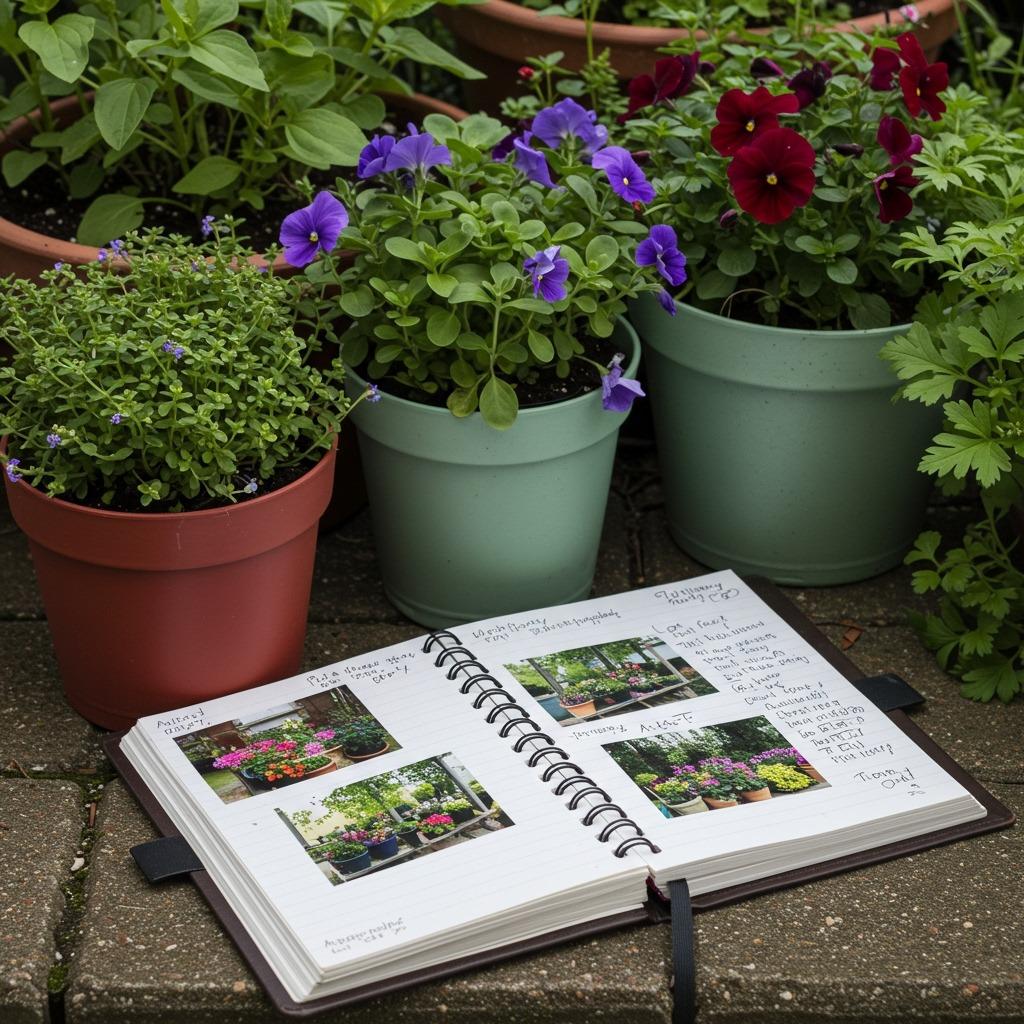
Every garden space is unique, and what thrives for someone else might struggle in your conditions. Keeping simple records helps you learn from each season and make better decisions going forward.
Take photos of container arrangements that look especially good or plants that perform exceptionally well. Note which varieties produced abundantly and which disappointed. Record when you fertilized, what pests appeared, and how you solved problems.
This doesn’t need to be elaborate – notes on your phone or a simple notebook work fine. Next season, you’ll have personalized guidance based on your actual experience instead of guessing or repeating mistakes. Over time, you’ll develop genuine expertise about container gardening in your specific environment.
Container gardening removes so many barriers to growing your own plants. You don’t need a yard, perfect soil, or even permanent space. What you do need is creativity, some basic knowledge about plant care, and willingness to experiment.
The flexibility of containers means you can constantly evolve your garden to match your changing preferences and needs. Tried tomatoes last year but prefer flowers? Switch it up. Want to create more privacy? Add taller planters. Moving to a new place? Take your garden with you.
Start with a few containers and plants you’re genuinely excited about. Pay attention to what they’re telling you through their growth patterns. Make adjustments as you learn. Before long, you’ll wonder how you ever lived without your little container garden bringing life to your outdoor space.