Your bathroom doesn’t have to look like every other bathroom on the block. Sometimes all it takes is a little creativity with your tile choices to turn a basic space into something that makes you smile every single morning.
I’ve noticed that people tend to play it safe with bathroom tiles, sticking to standard subway patterns or simple grid layouts. But what if you treated your bathroom walls and floors like a canvas? The right artistic tile installation can completely change how a space feels without breaking the bank or requiring a complete gut renovation.
This isn’t about following strict design rules. It’s about finding patterns, colors, and layouts that speak to you and figuring out how to make them work in your specific space. Whether you’re working with a small bathroom renovation or planning something more ambitious, these tips will help you nail that creative tile look you’ve been pinning.
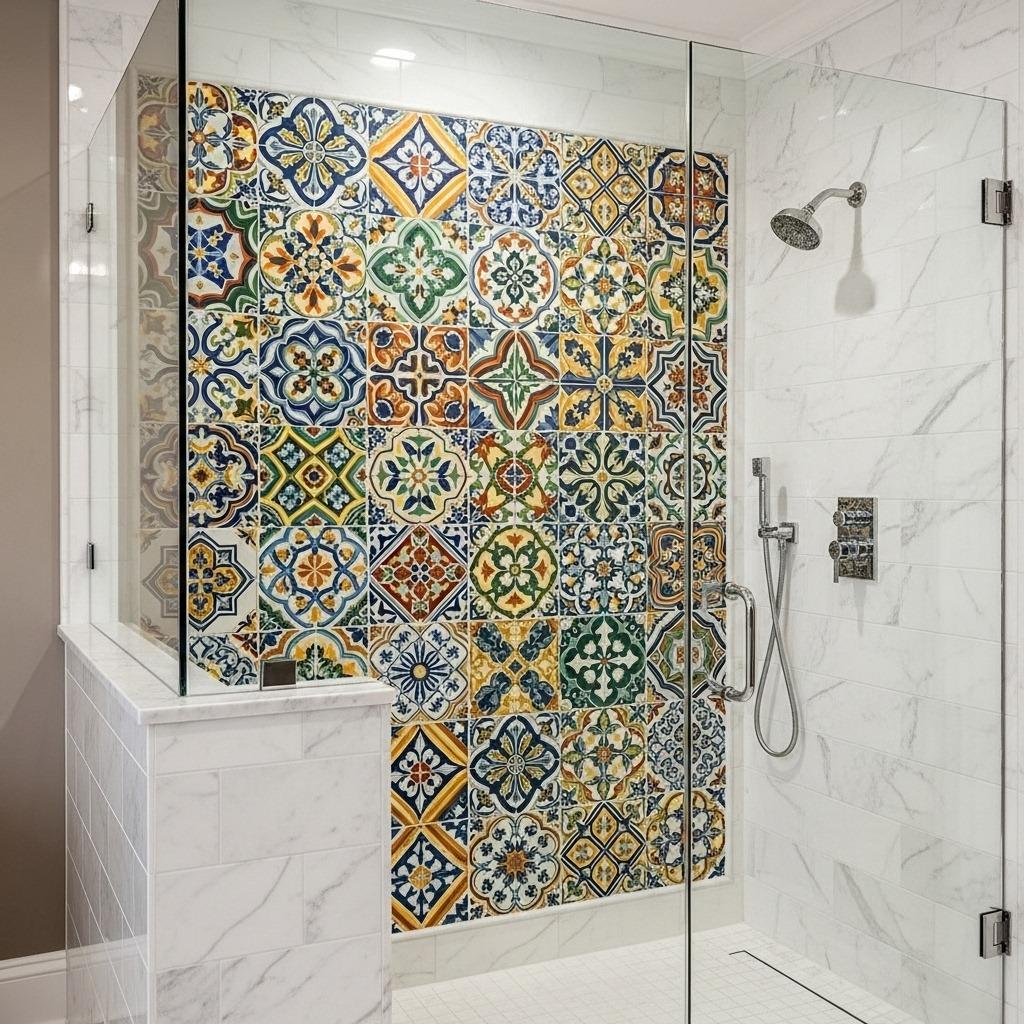
1. Start with a Bold Accent Wall
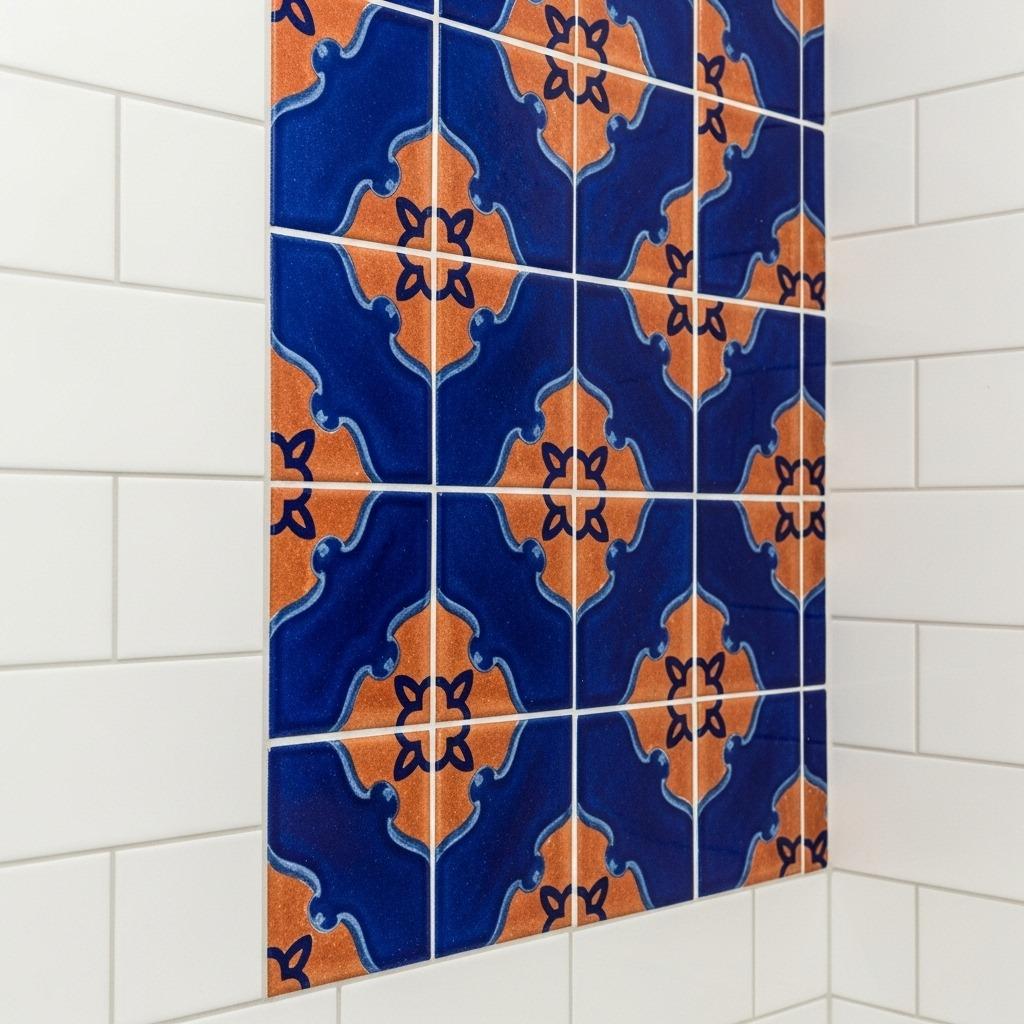
Pick one wall to make your statement. This could be the wall behind your vanity, the shower wall you see when you walk in, or even the wall behind your toilet if that’s what catches your eye first.
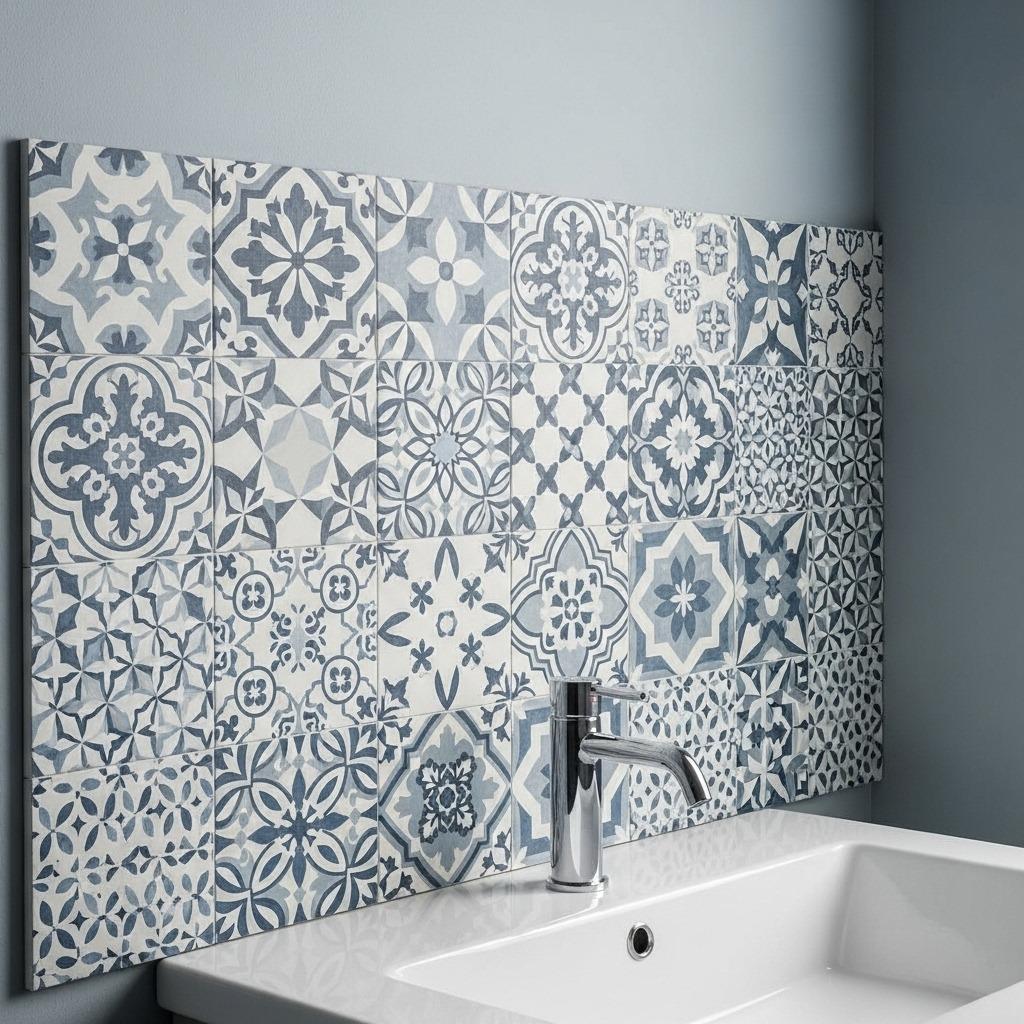
An accent wall gives you permission to go wild without overwhelming the space. You can use intricate mosaic bathroom tiles, hand-painted ceramics, or tiles with unexpected textures. The rest of your bathroom can stay relatively simple, letting that one wall do all the talking.
Think about scale too. Large-format tiles with artistic prints work differently than tiny mosaics. I’ve seen people mix both on a single accent wall, using larger tiles as the base and adding a mosaic border or pattern overlay that ties everything together.
2. Play with Unexpected Tile Shapes
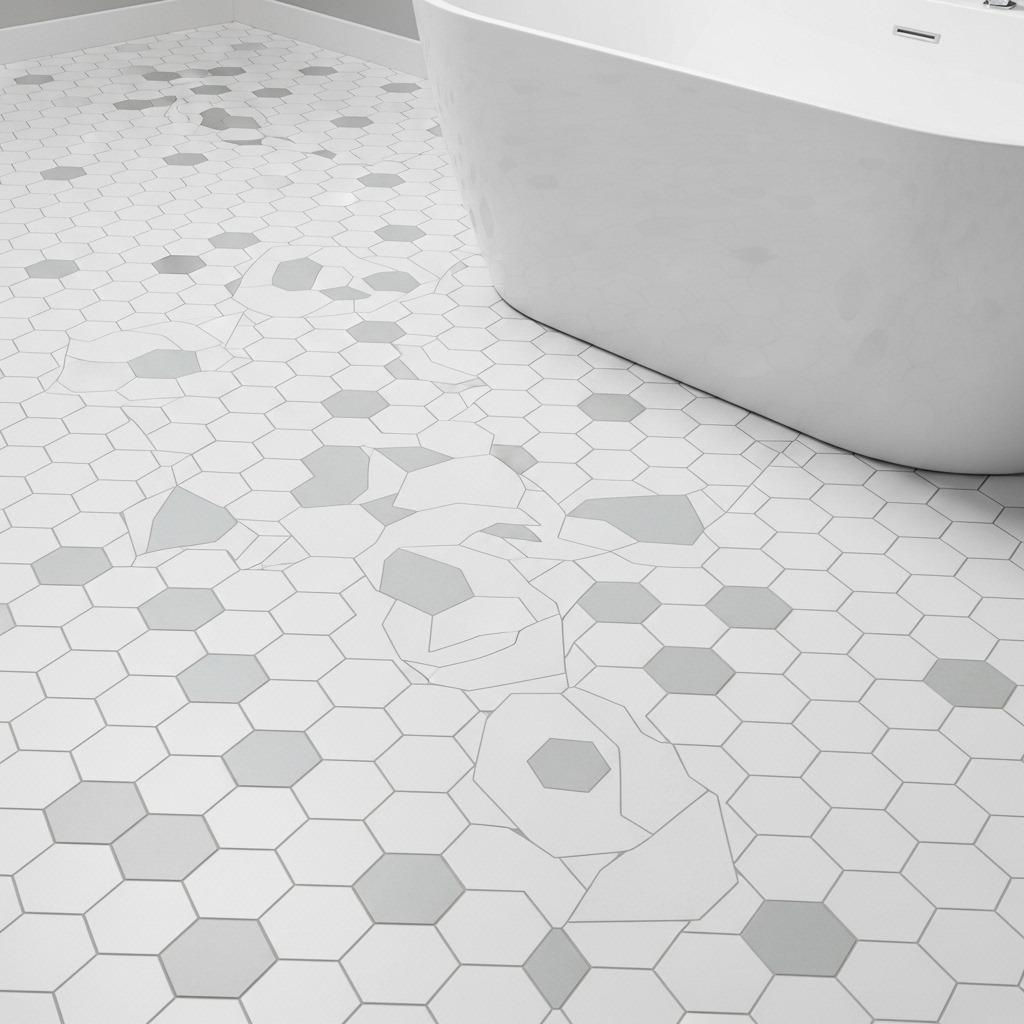
Forget squares and rectangles for a minute. Hexagons, fish scales, arabesque shapes, and even custom-cut geometric forms can add serious personality to your bathroom without requiring advanced DIY skills.
These creative tile ideas work especially well on floors or as a backsplash behind your sink. The shape itself becomes the pattern, so you don’t necessarily need wild colors or busy designs. Sometimes a simple white hexagon tile creates more visual interest than a standard grid of colored squares.
Installation does take a bit more planning with unusual shapes. You’ll need to think through your starting point carefully and maybe do a dry layout first. But the payoff is a bathroom that looks custom and thoughtful, not cookie-cutter.
3. Create a Gradient Effect
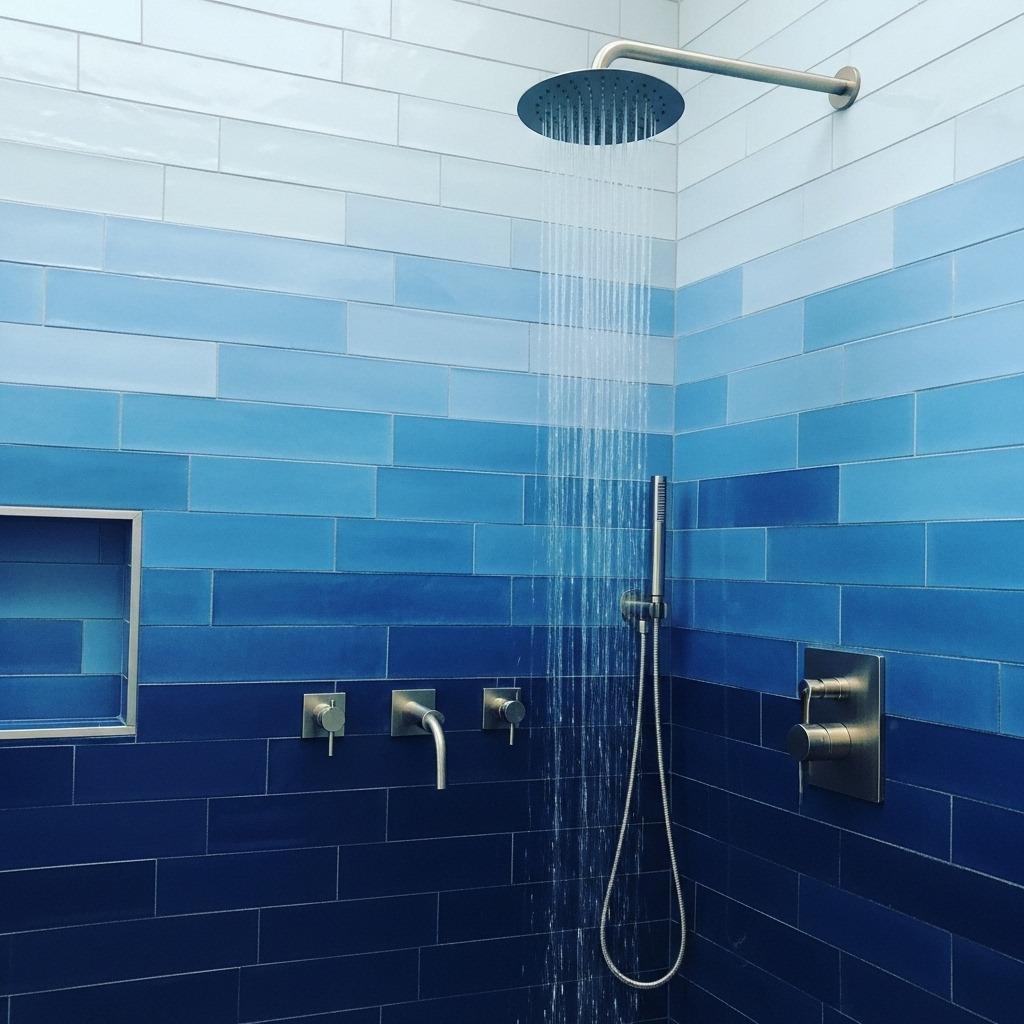
This technique has been popping up everywhere lately, and for good reason. Taking tiles in varying shades of the same color and arranging them from light to dark (or vice versa) creates this dreamy, artistic vibe that photographs like a dream.
You can do this vertically, making your walls appear taller, or horizontally to make a narrow bathroom feel wider. It works with any color family, though I’m personally drawn to blues and greens in bathrooms since they have that calming, water-inspired feel.
The trick is getting enough variation in your tile shades. Most manufacturers offer tiles in multiple tones within the same collection, which makes this easier. Plan your layout before you start installing, laying out the tiles on the floor first to make sure your gradient flows smoothly.
4. Mix Different Tile Sizes in One Space

Who says all your tiles need to be the same size? Combining large and small tiles in the same area adds depth and makes the installation feel more curated and less “builder grade.”
You might use large format tiles on your walls with a strip of smaller mosaic tiles as a border or accent band. Or install medium subway tiles on most walls with tiny penny tiles on the floor. The contrast between sizes naturally draws the eye and creates zones within your bathroom ideas without needing actual walls.
Just be mindful of transition points. You want the shift from one tile size to another to feel intentional, not like you ran out of one type mid-project. Using the same color family across different sizes usually helps everything feel cohesive.
5. Try a Diagonal or Herringbone Pattern
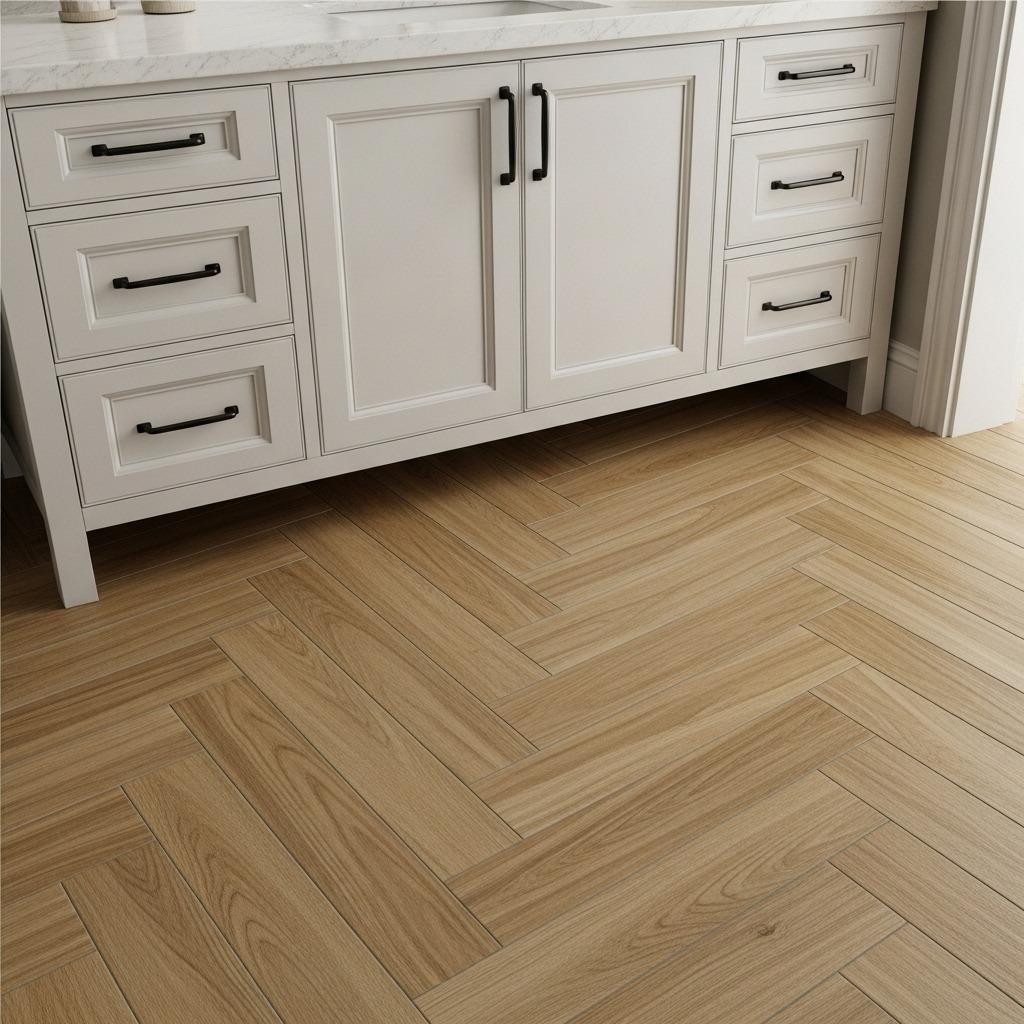
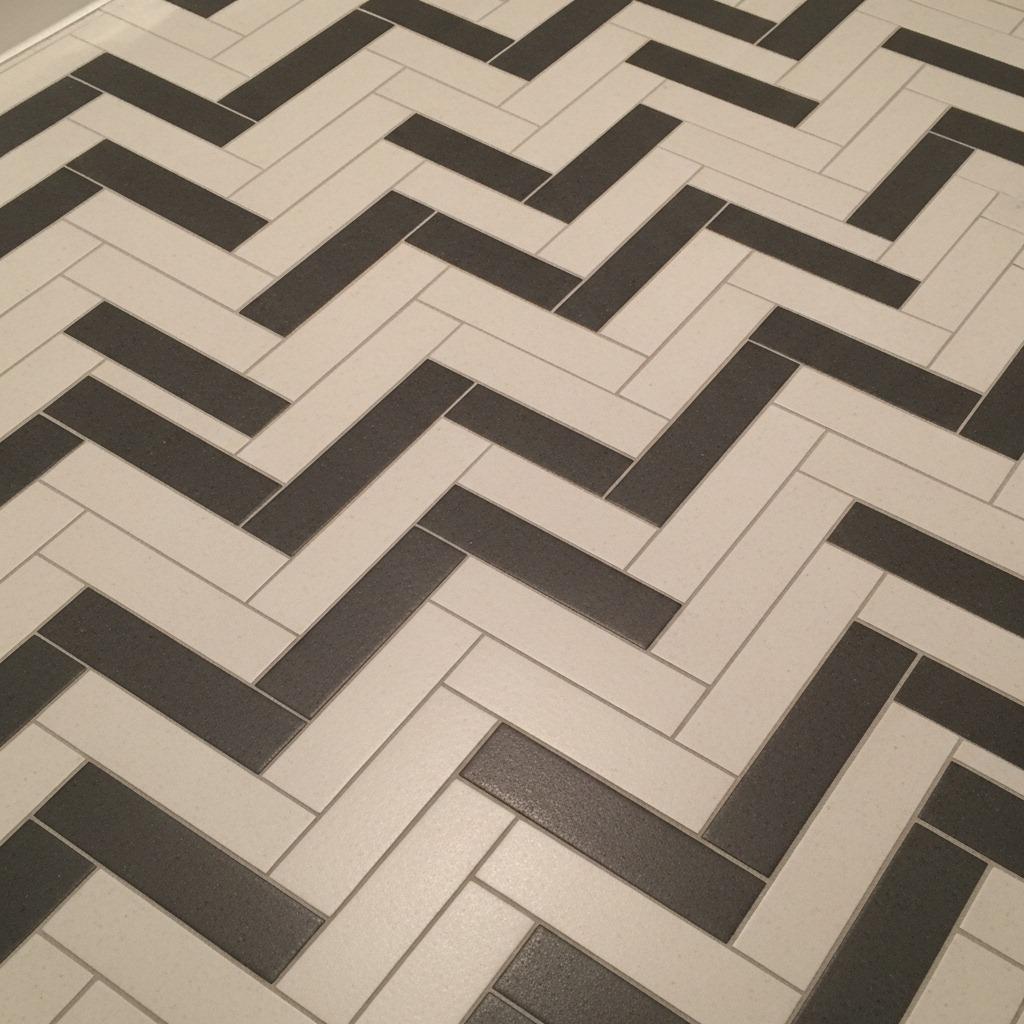
Changing the direction of your tile layout is one of the simplest ways to make standard tiles look less standard. A diagonal installation makes rectangular tiles feel more dynamic, while herringbone creates that high-end, classic look that never goes out of style.
These bold tile layouts do require more cutting and more precise measurements, but you don’t necessarily need professional help if you’re comfortable with basic tiling. The key is starting from the center of your space and working outward to keep everything symmetrical.
According to the National Tile Contractors Association at tileassn.com, pattern installations like herringbone typically take 20-30% longer than straight-lay patterns, so factor that into your timeline. The visual payoff usually makes the extra effort worthwhile, especially in a modern bathroom tile design.
6. Incorporate Mosaic Details Strategically
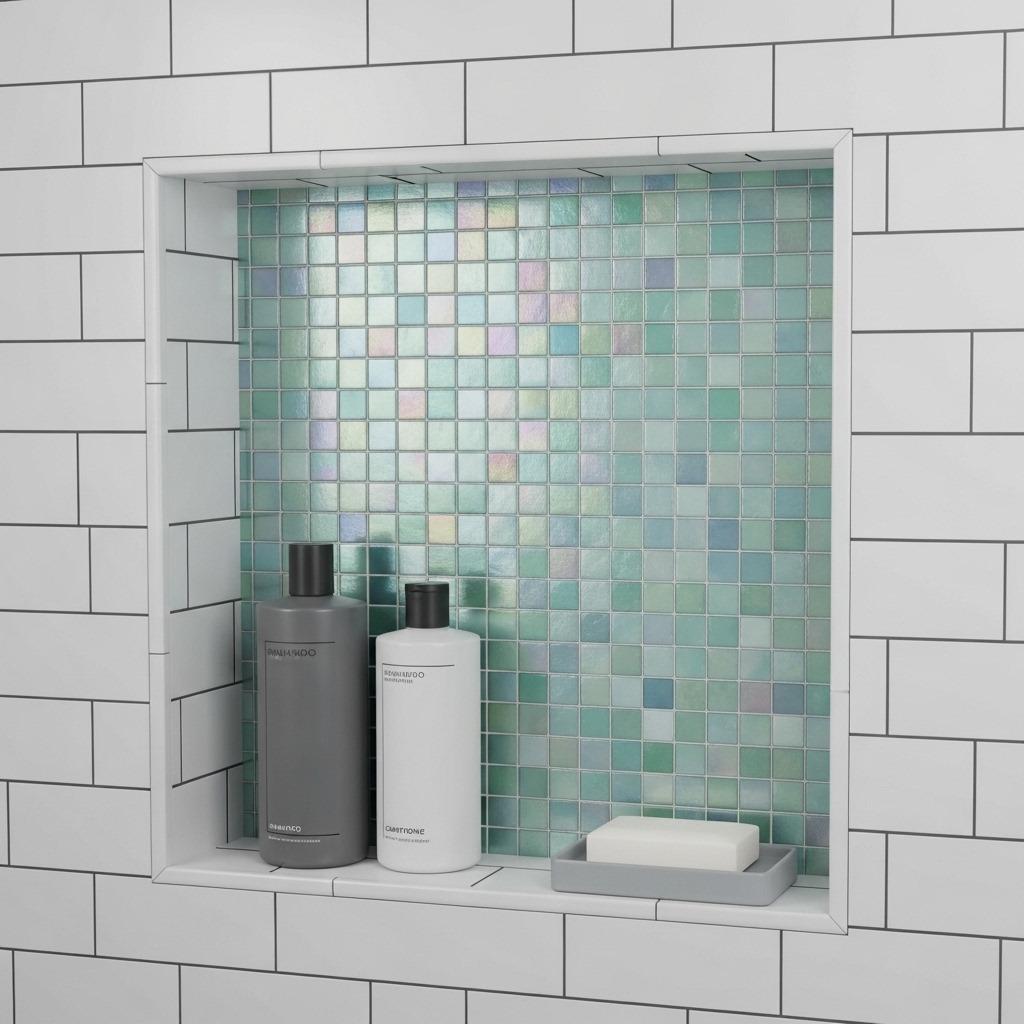
You don’t need to cover entire walls in mosaics to get that artistic effect. Small doses of mosaic bathroom tiles in the right spots can pack just as much visual punch with less expense and less installation headache.
Consider a mosaic niche in your shower, a mosaic border around your mirror, or a vertical stripe of mosaic running up one wall. These become focal points that add color and texture without overwhelming your space or your budget.
Glass mosaics catch light beautifully in bathrooms, especially if you have a window. The way they shimmer adds another layer of interest that flat tiles can’t quite match. Just make sure to seal them properly since grout lines in mosaics are more susceptible to moisture.
7. Use Contrasting Grout Colors
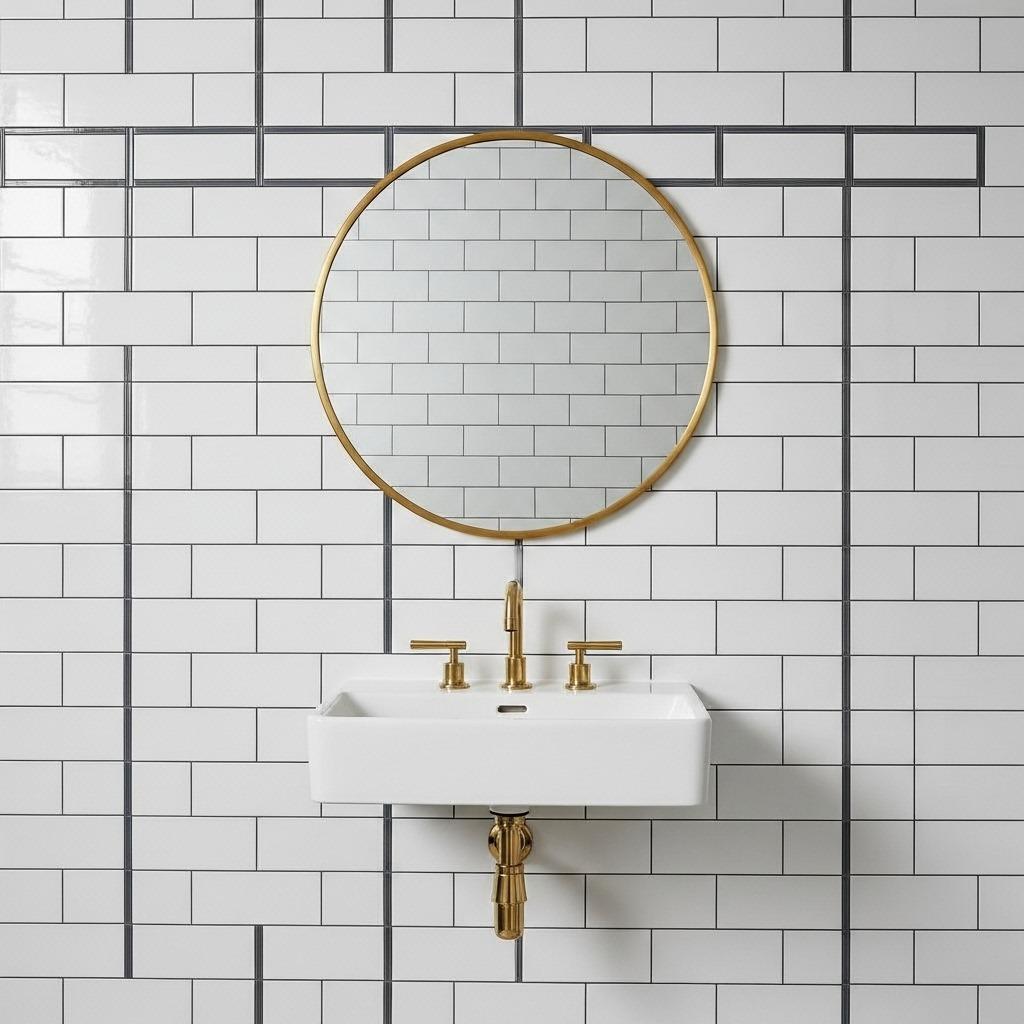
Here’s something people overlook: grout isn’t just functional, it’s a design element. Dark grout with light tiles creates a grid effect that emphasizes your tile layout. Light grout with darker tiles creates a softer, more blended look.
This works especially well with geometric or patterned tiles where you want to emphasize the shapes. Black grout with white hexagon tiles, for example, makes each individual tile pop. Gray grout with the same white tiles creates a subtler, more cohesive surface.
Keep in mind that lighter grout shows staining more easily in high-traffic areas, while very dark grout can look harsh in small spaces. Test your grout color on a few tiles before committing to the whole room. That sample board will look different once it’s on your wall at full scale.
8. Create a Patchwork or Mix-and-Match Look
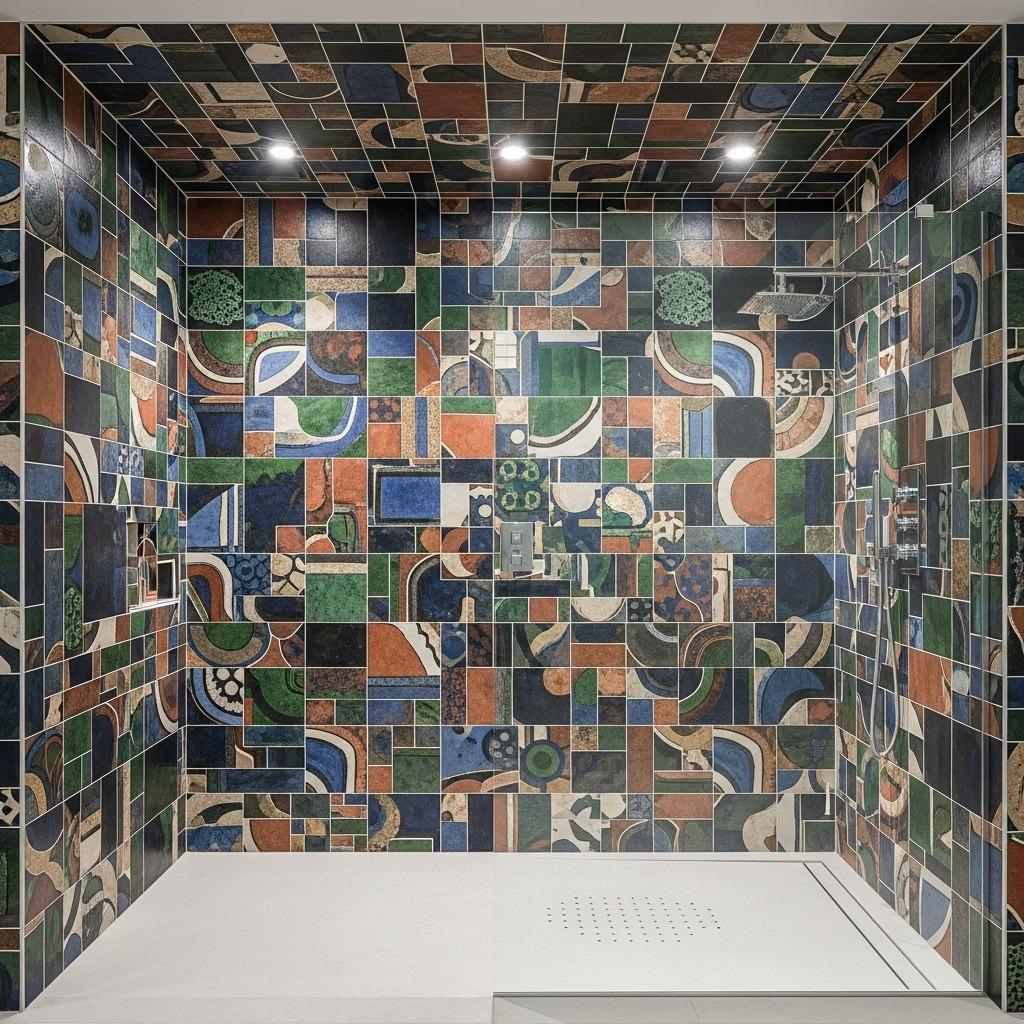
If you can’t decide on one tile style, why not use several? A patchwork approach mixes different tile designs in the same space, creating something that feels collected over time rather than bought from one store in one shopping trip.
This works best when you keep some element consistent, like color palette or tile size. You might use all 6×6 tiles but in different patterns and colors. Or stick to blues and whites but vary the designs wildly. That common thread keeps it from looking chaotic.
I’ve seen this done beautifully in spa-inspired bathroom settings where the eclectic tile mix feels worldly and relaxed rather than busy. It’s also a great way to use up leftover tiles from other projects if you’re trying to keep costs down.
9. Extend Tile Beyond Traditional Areas
Why stop at the shower walls and floor? Taking your artistic tile installation onto unexpected surfaces makes the whole design feel more intentional and immersive.
Consider tiling the ceiling of your shower for a true wet-room feel. Or run your floor tile up the side of your bathtub platform. Some people even tile behind open shelving or inside medicine cabinet recesses, turning every surface into an opportunity for pattern and color.
This approach works especially well in small bathroom renovation projects where you want to make a big impact. When tile wraps around multiple surfaces, it creates visual continuity that can actually make a small space feel more cohesive rather than chopped up.
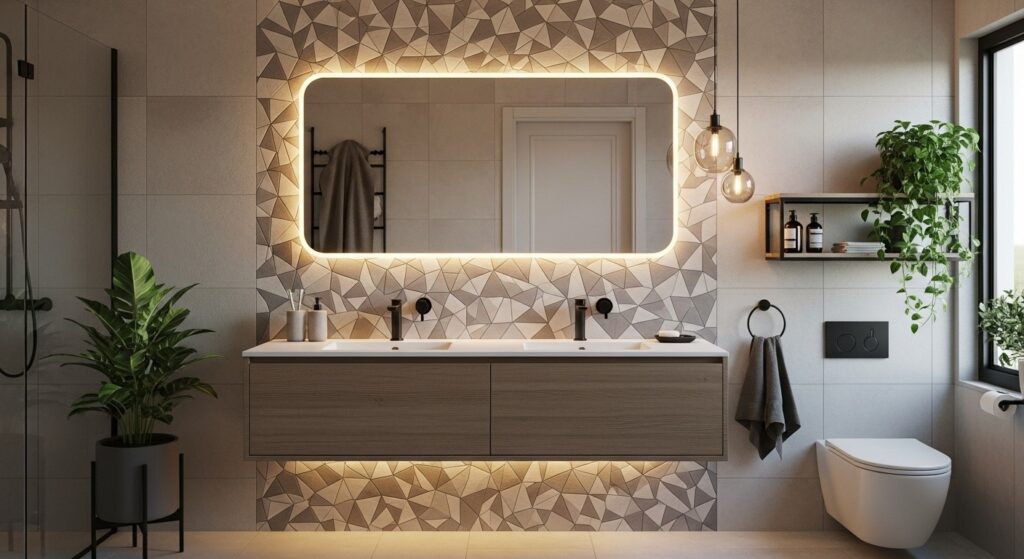
10. Add Texture with Three-Dimensional Tiles
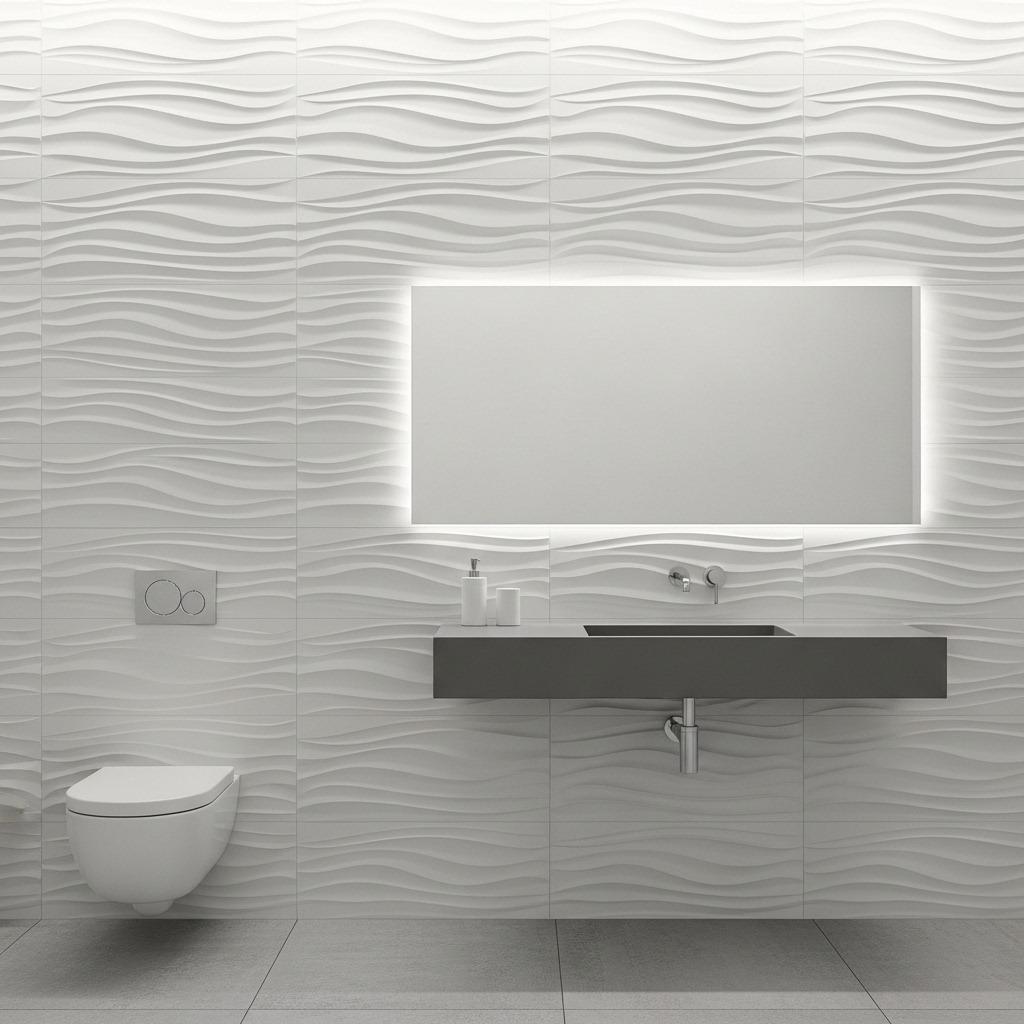
Flat tiles are fine, but textured or three-dimensional tiles add shadow and depth that flat surfaces simply can’t provide. These might be tiles with ripples, waves, geometric relief patterns, or even sculptural elements.
The play of light across textured tiles changes throughout the day as natural and artificial light shifts. Your bathroom literally looks different at different times, which I find kind of magical. It’s like having artwork that constantly evolves.
These tiles work best on walls where you won’t bump into them constantly. A textured feature wall behind your vanity or tub creates interest without creating practical problems. Just be aware that deep textures can be harder to clean, so maybe skip them for your shower walls where soap scum becomes an issue.
11. Design Custom Patterns with Standard Tiles
You don’t need custom-made tiles to create a custom look. Standard tiles can be arranged in endless ways to create patterns that feel one-of-a-kind. Basketweave, windmill, versailles patterns – these are all just clever arrangements of basic rectangular tiles.
Start by sketching your pattern or finding inspiration online, then figure out which standard tile sizes you’ll need. Most patterns use a combination of two or three sizes. The math matters here, so take time with measurements to ensure your pattern will actually work in your space dimensions.
This approach gives you the artistic effect you want while keeping material costs reasonable since you’re buying standard sizes. The installation might take longer, but your bathroom ideas become reality without the premium price tag of truly custom tiles.
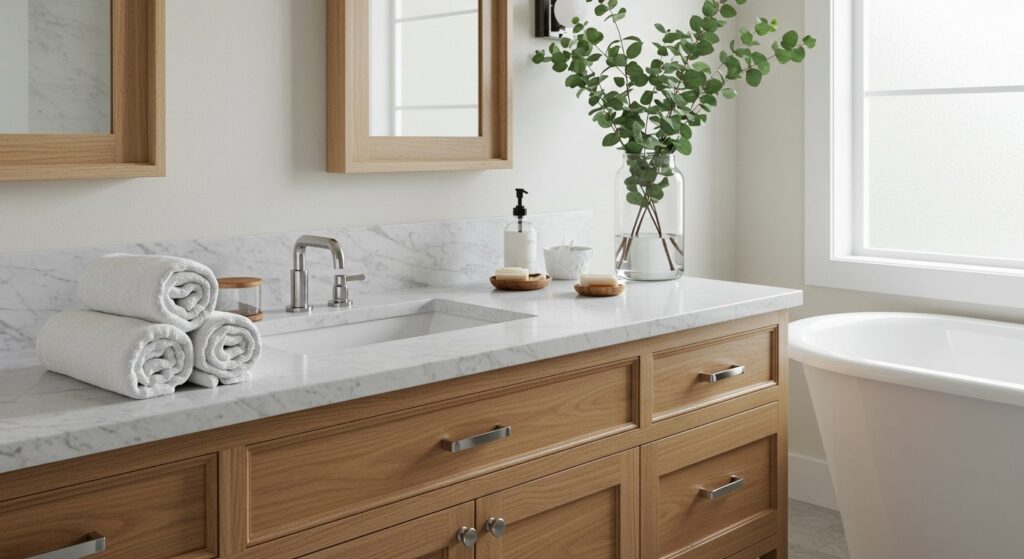
12. Frame Your Tile Installation
Adding a border or frame around your tile installation makes it feel more finished and gallery-like. This might be a different color tile, a metallic trim piece, or even wood elements that separate your artistic tile work from standard painted walls.
The frame focuses attention on your tile design and signals that this is meant to be a feature, not just functional waterproofing. It’s particularly effective when you’re doing something bold or colorful – the frame contains the energy and keeps it from feeling overwhelming.
Think about where the frame sits in relation to other bathroom elements. Does it align with your vanity top? Does it echo the height of your window? These small alignments make the overall design feel more intentional and pulled together.
13. Experiment with Color Blocking
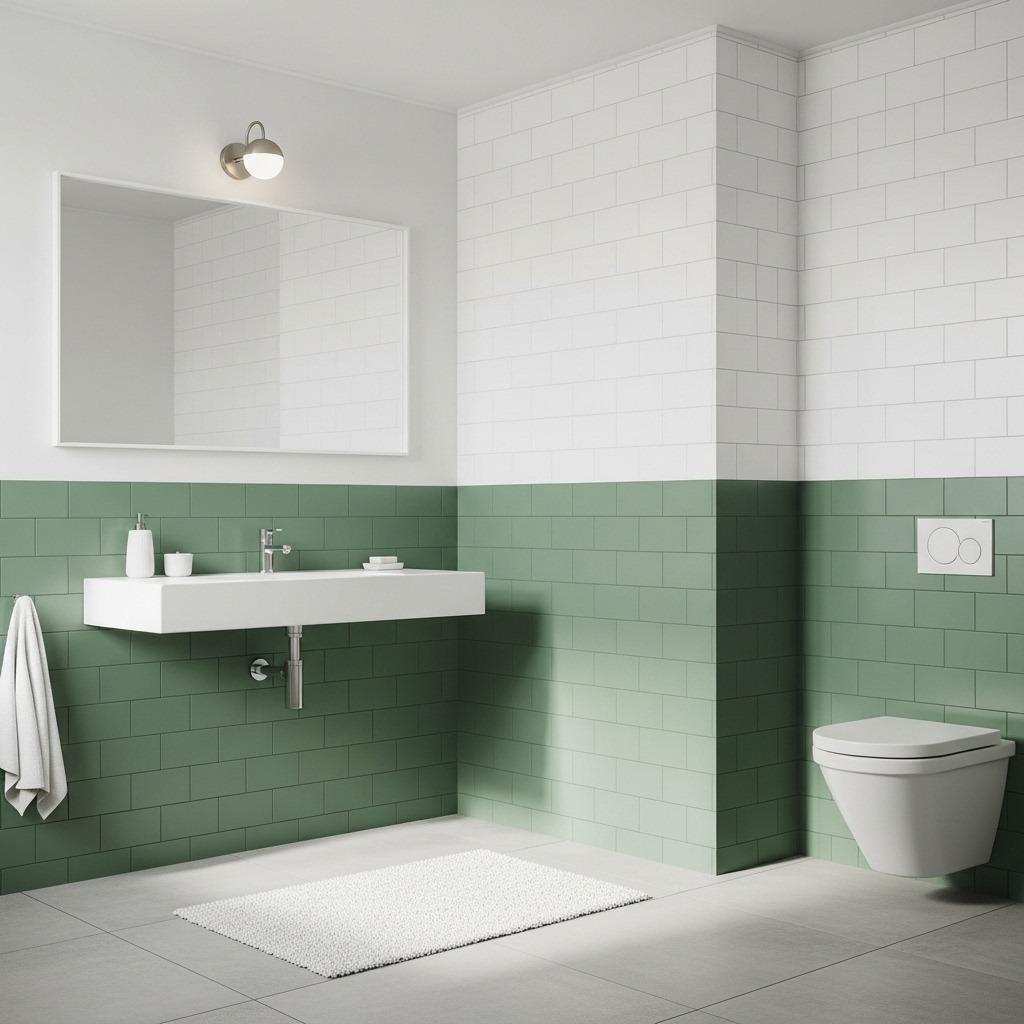
Color blocking with tiles means using solid colors in distinct sections rather than mixing them throughout. You might have the bottom half of your walls in deep green and the top half in white, or one wall in blush pink with others in gray.
This technique borrowed from fashion and graphic design translates surprisingly well to bathrooms. It’s bold without being busy, and it lets you use colors you might shy away from if they covered every surface. Plus, the color divisions can make ceilings appear higher or rooms feel wider depending on where you place your blocks.
When working with color blocking in a minimalist bathroom design, stick to two or three colors maximum. Too many blocks start to feel chaotic rather than intentional. And consider using different finishes within your color blocks – maybe matte tiles below and glossy above – to add even more dimension.
14. Install Tiles in Unexpected Orientations
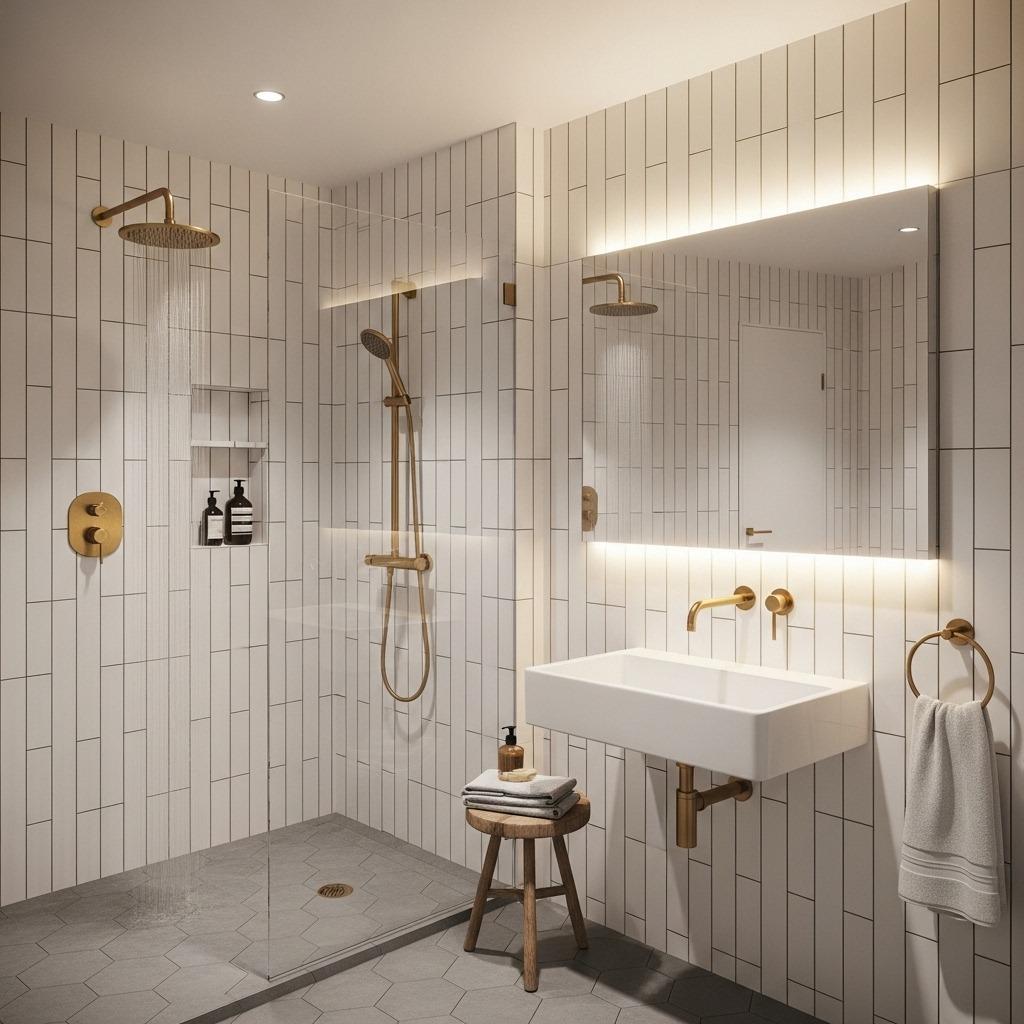
Standard subway tiles become instantly more interesting when you install them vertically instead of horizontally. Or try stacked instead of staggered. These small orientation shifts cost nothing extra but completely change the vibe.
Vertical installations tend to make ceilings feel higher – great for bathrooms with lower ceilings. Horizontal installations can make narrow bathrooms feel wider. Diagonal installations add energy and movement. The same exact tile reads completely differently depending on which way it runs.
Map out your orientation before you start. Sometimes what looks good in your head doesn’t work with your actual wall dimensions, and you’ll end up with awkward cuts or misaligned patterns. A quick dry layout or even a digital mockup can save you from expensive mistakes.
15. Combine Matte and Glossy Finishes

Using tiles with different finishes in the same space adds subtle sophistication that most people won’t consciously notice but will definitely feel. Matte tiles feel modern and understated, while glossy tiles feel classic and reflect light.
You might use matte tiles on your walls and glossy on your floor, or vice versa. Some designers mix finishes within the same installation, creating patterns where glossy tiles pop against matte backgrounds. The texture difference catches light in ways that color alone can’t achieve.
This works especially well in modern bathroom tile schemes where you’re sticking to a limited color palette but want to avoid a flat, one-note look. The interplay between matte and shine adds complexity without adding visual clutter.
16. Design Around a Statement Tile

Sometimes you find one absolutely perfect tile, whether it’s hand-painted, wildly patterned, or uniquely textured. Instead of using it everywhere, treat it as the star and design everything else to support it.
You might use your statement tile as a single row of accents within an otherwise simple field of tiles. Or create a small focal area, like behind your sink or in a shower niche, where that special tile really shines. Surrounding it with simpler tiles lets people actually appreciate its beauty instead of getting overwhelmed.
This approach also helps when you fall in love with expensive artisan tiles. You can afford to splurge on a small quantity when you’re using them strategically rather than covering entire walls. The impact remains high while the budget stays reasonable.
17. Create Zones with Different Tile Styles
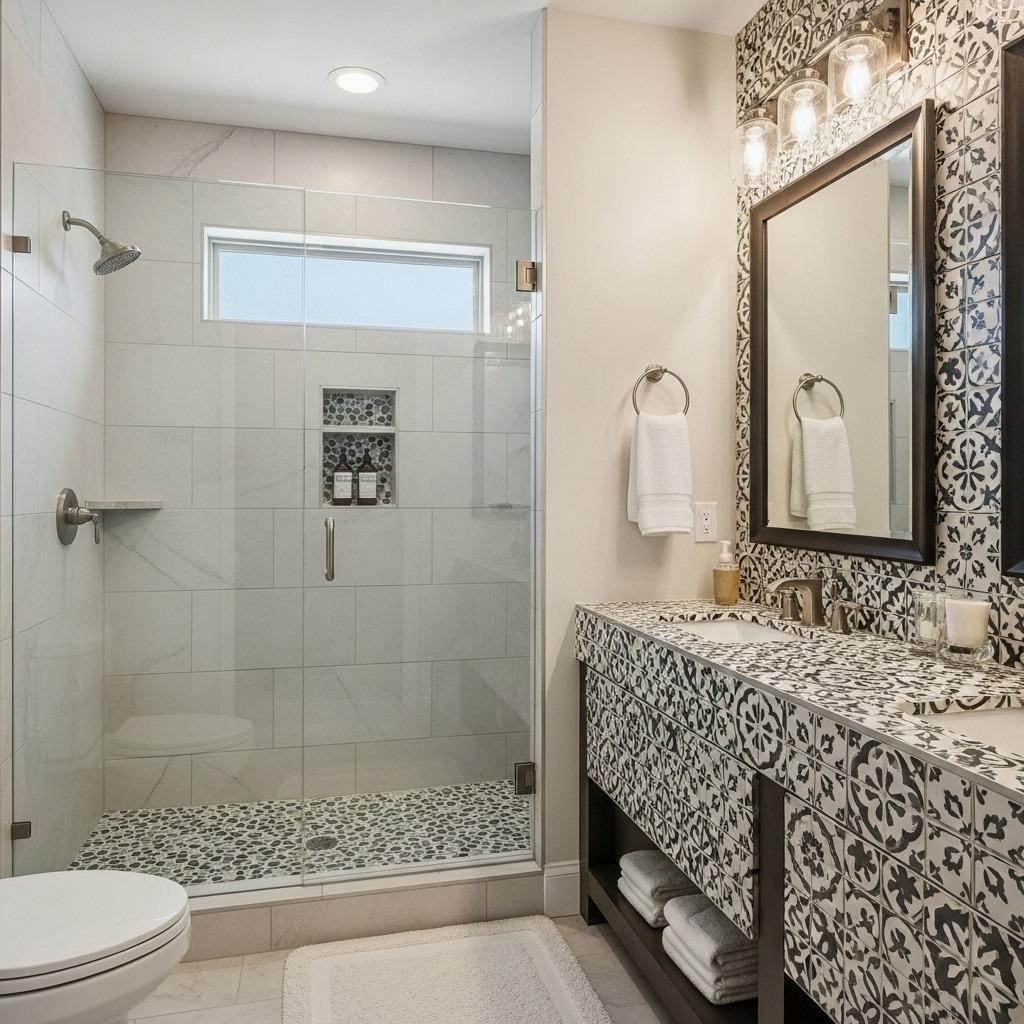
In larger bathrooms or combined bath spaces, using different tile styles in different zones helps define areas without needing actual partitions. The shower might have one tile treatment, the vanity area another, and the toilet area a third.
This works best when there’s some visual connection between your different tile choices – maybe the same color family, or complementary patterns, or a consistent grout color. You want distinction without disconnection.
I’ve seen this done beautifully in spa-inspired bathroom designs where the wet areas have practical, slip-resistant tiles while the dry areas get more decorative treatments. Each zone feels purpose-built while the whole space still hangs together visually.
18. Use Tile as Functional Art
Beyond looking good, some artistic tile installations can solve practical problems. A tile with extra grip prevents slips. A dark tile in high-splash areas hides water spots. Tiles with antimicrobial properties in a kids bathroom organization setup provide extra protection.
Think about your bathroom’s specific challenges. Do you have hard water that leaves marks? Pick tiles and finishes that hide or resist those marks. Is cleaning time limited? Choose tiles with fewer grout lines or self-cleaning glazes. Your artistic choices can be smart choices too.
This functional approach to artistic tile installation means your beautiful bathroom also works hard for you daily. Form and function aren’t opposites – they’re partners when you plan thoughtfully.
Planning Your Artistic Tile Installation
Before you order a single tile or pick up a trowel, spend real time planning. Measure everything twice. Consider your lighting, your fixtures, your storage needs. How will your tile choices interact with everything else in the space?
Create a mood board, either physical or digital. Pin inspiration images, collect tile samples, note colors and patterns that speak to you. This helps you see whether your ideas actually work together before you’re committed. Sometimes things that look great separately clash when combined.
Budget matters too. Artistic doesn’t have to mean expensive, but you should know your numbers upfront. Factor in not just tile costs but also installation supplies, potential professional help for tricky areas, and enough extra tiles to account for mistakes and future repairs. Having a clear budget keeps your creativity focused rather than overwhelming.
Your bathroom should feel like you. Not like a magazine spread you’ll tire of in six months, but genuinely comfortable and inspiring to you specifically. These artistic tile installation approaches give you frameworks to work within, but your intuition about what feels right matters most.
Start with one technique that resonates, maybe test it in a small area first. You don’t have to tile your entire bathroom in one go. Sometimes the best designs emerge gradually as you see what works in your actual space with your actual light and your actual daily routine.
What tile idea are you most excited to try? The one that makes you slightly nervous is probably the right choice.