Renovating a cramped bathroom feels like solving a puzzle where none of the pieces quite fit. You need storage, style, and breathing room, but your square footage has other plans. The good news? Small spaces actually force you to think smarter, not bigger.
I’ve watched countless homeowners transform bathrooms smaller than a walk-in closet into surprisingly functional retreats. The secret isn’t knocking down walls or moving plumbing lines. It’s understanding how to manipulate perception, maximize vertical real estate, and choose fixtures that earn their keep. Some of these tricks cost less than $50, while others require a bit more investment, but they all deliver visible results.
Whether you’re planning a DIY home renovation or working with a contractor, these 17 hacks will help you reclaim every forgotten corner. Let’s turn that shoebox bathroom into something you’ll actually want to show off.
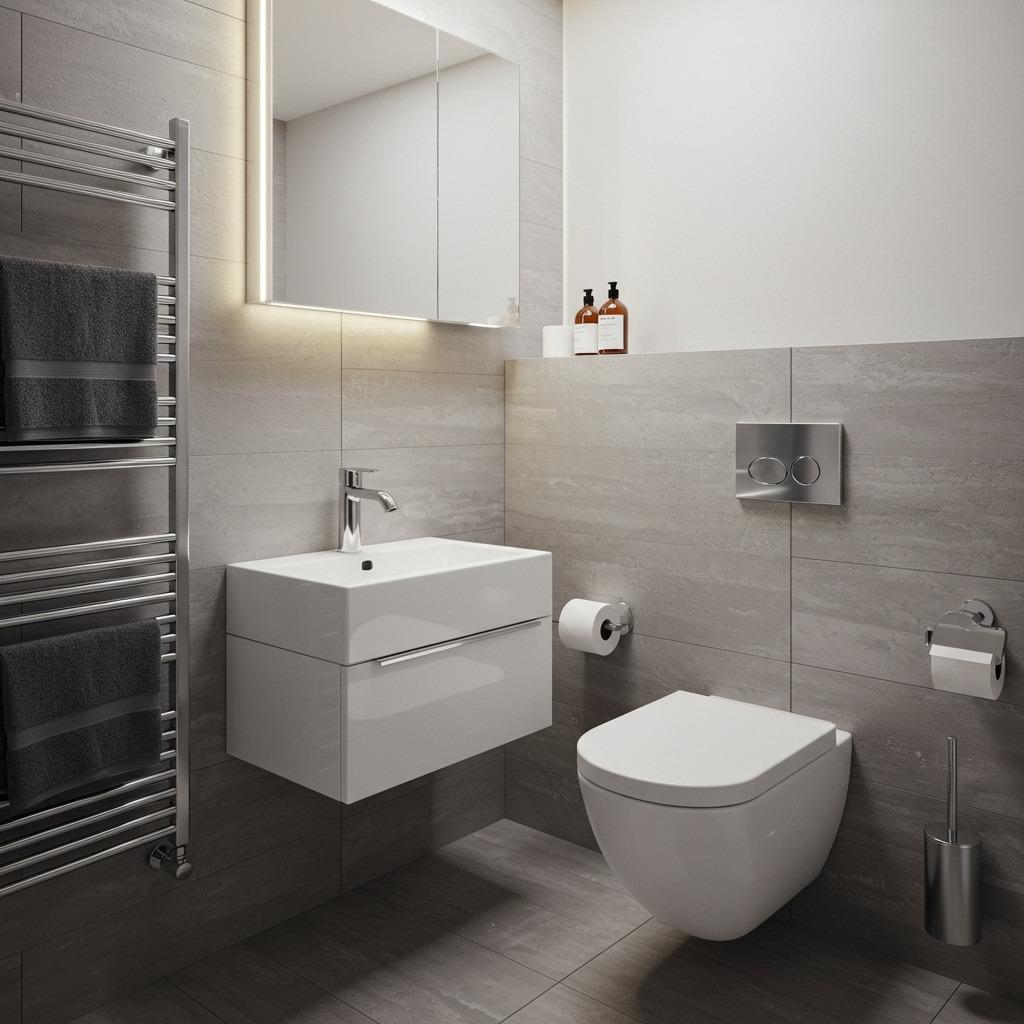
1. Install a Wall-Mounted Toilet

Wall-mounted toilets float above your floor, creating visual space where you’d normally see a bulky base. The hidden tank sits inside the wall, which sounds complicated but opens up about six extra inches of walking room. That might not seem like much until you’re trying to navigate around someone at the sink.
These toilets also make cleaning ridiculously easier since there’s no awkward base to mop around. The installation does require some wall construction and professional help, but the payoff in perceived spaciousness is worth it. Your bathroom suddenly looks less cluttered, even if the actual dimensions haven’t changed.
Plus, the modern aesthetic works beautifully with both contemporary and traditional styles. Just make sure your wall structure can support the mounting system before you commit.
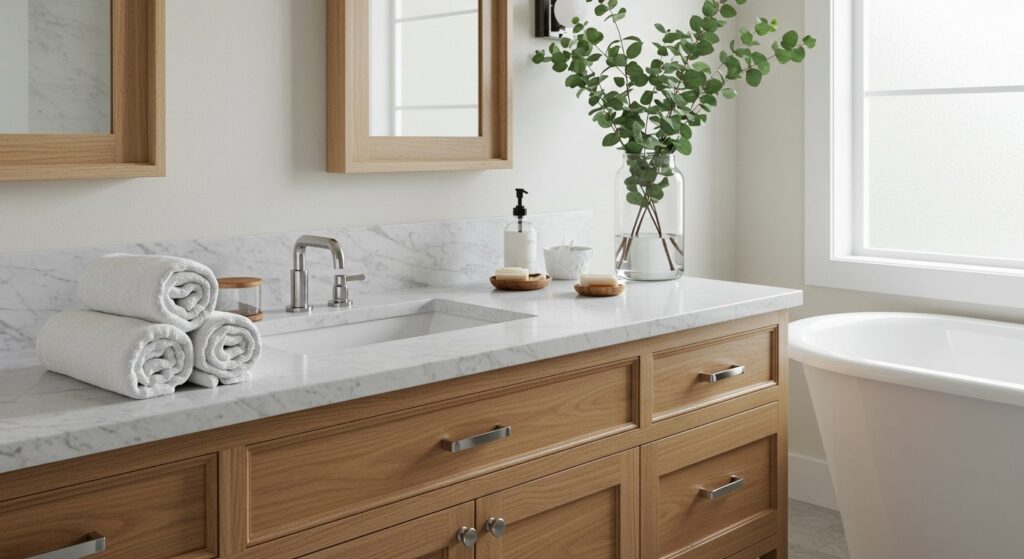
2. Replace Your Vanity with a Pedestal Sink
Sometimes less really is more. Pedestal sinks take up half the footprint of traditional vanities, which can be a lifesaver in extremely tight quarters. Yes, you lose cabinet storage, but you gain the ability to actually move around without bumping into things.
The exposed floor beneath makes the room feel significantly larger. It’s that visual continuity that tricks your brain into thinking there’s more space than there actually is. If you’re worried about storage, wall-mounted shelves or a narrow rolling cart can fill that gap.
This swap works especially well in small space renovations where every inch of maneuverability counts. Consider models with a slightly wider base if you need some counter space for daily essentials.
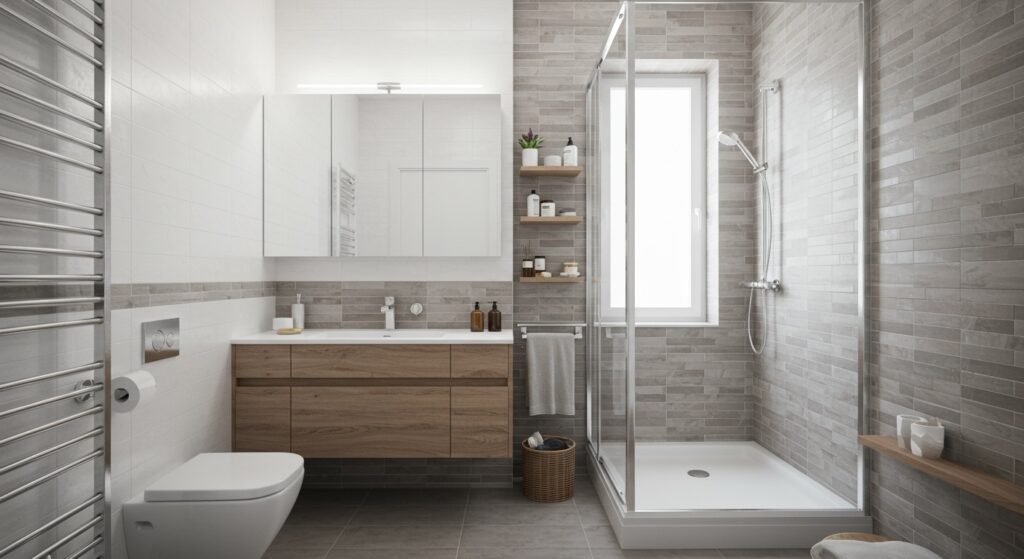
3. Go Doorless with Your Shower
Shower doors take up swing space that compact bathrooms simply don’t have. A doorless walk-in shower eliminates that awkward door dance and creates uninterrupted sightlines across the room. The key is proper floor sloping and strategic showerhead placement to avoid water everywhere.
This design works best with a partial glass panel or half-wall that contains spray without blocking views. The continuous flooring makes your bathroom feel like one cohesive space instead of chopped-up zones. It’s also significantly easier to clean without all those door tracks and hinges.
Just be prepared to invest in good ventilation since doorless showers introduce more moisture into the room. A quality exhaust fan becomes non-negotiable.
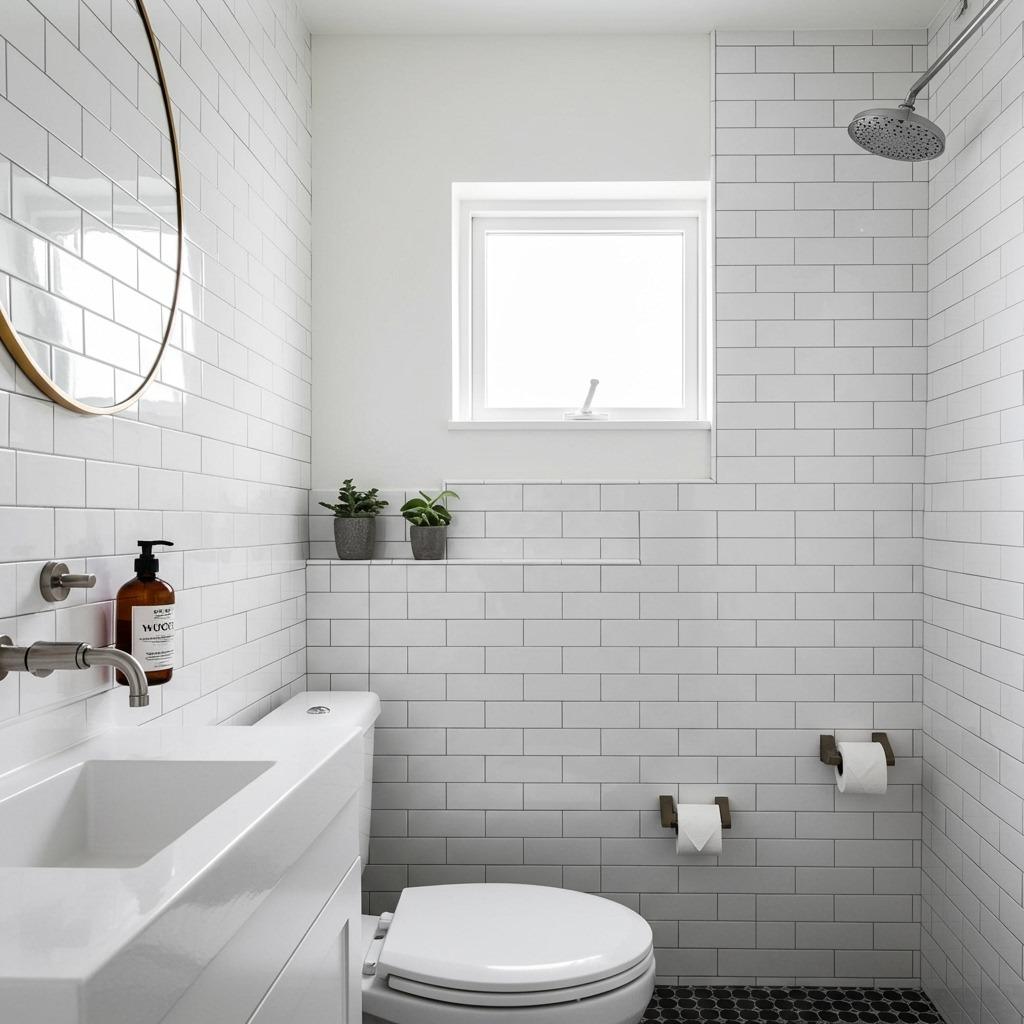
4. Use Large-Format Tiles
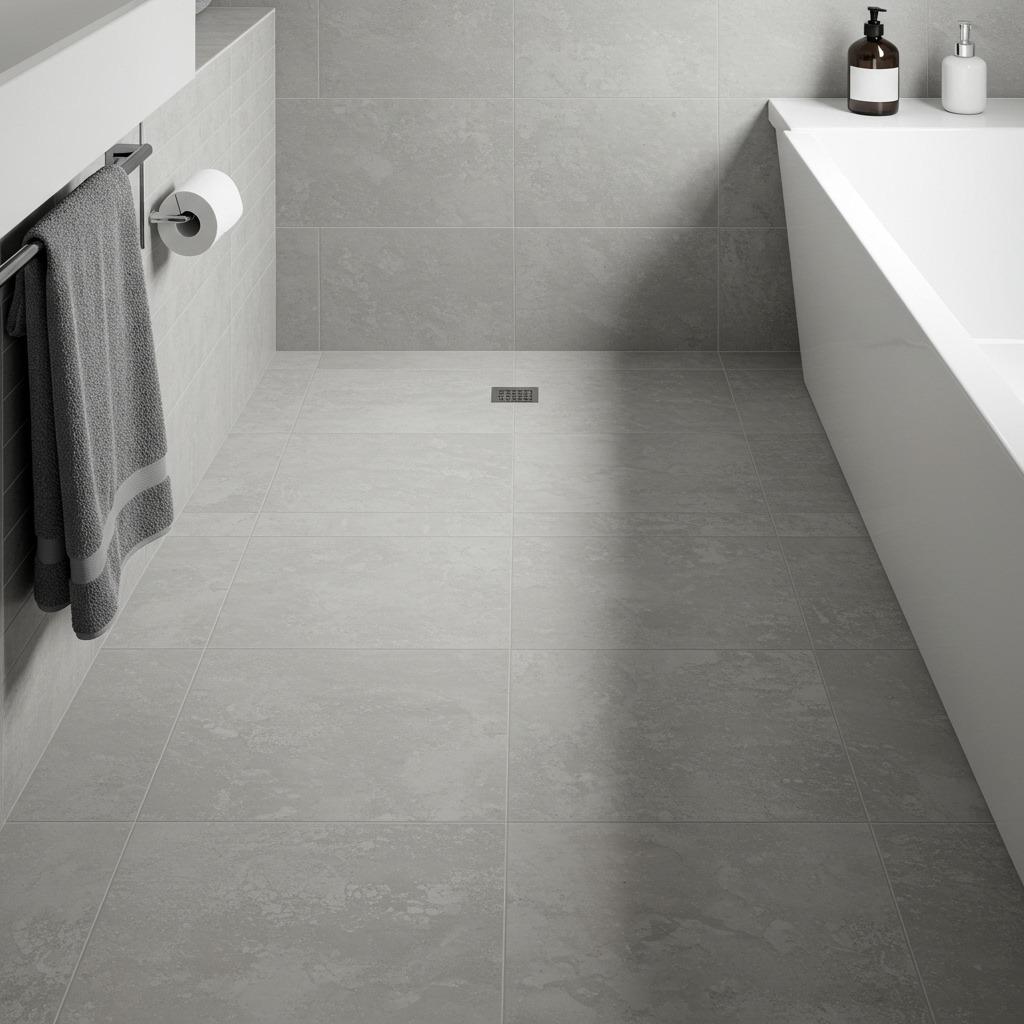
Here’s something surprising: bigger tiles actually make small rooms look larger. Fewer grout lines mean less visual interruption, which helps the space feel more open and cohesive. I’ve seen tiny bathrooms completely transformed just by switching from standard 12×12 tiles to 24×24 formats.
The installation requires a bit more precision since you’re working with fewer pieces, but the clean, modern result speaks for itself. Light colors amplify the effect even more, bouncing light around and creating an airier atmosphere. This approach works on both floors and walls for maximum impact.
5. Install a Pocket Door
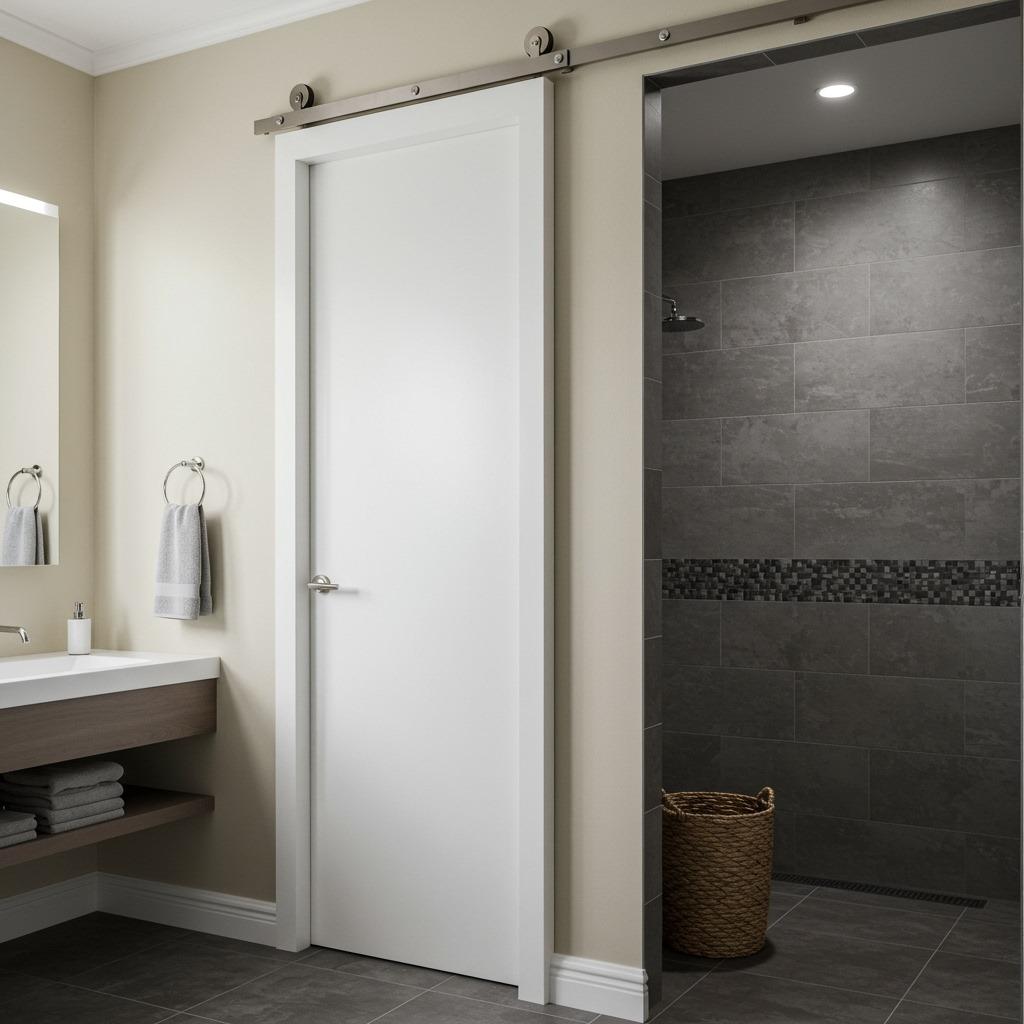
Traditional swing doors eat up precious square footage every time they open. Pocket doors slide directly into the wall cavity, freeing up that entire arc of floor space for something more useful. It’s especially helpful if your door currently swings inward, blocking part of your already limited room.
The installation does require opening up your wall and adding a track system, but it’s not as invasive as it sounds. You might lose a bit of wall space for hanging towels, but you gain so much more in usability. Consider this upgrade if your current door setup feels like an obstacle course.
Modern pocket door hardware has come a long way in terms of smoothness and durability. This works beautifully as part of broader home improvement ideas that prioritize function over convention.
6. Add Recessed Medicine Cabinets
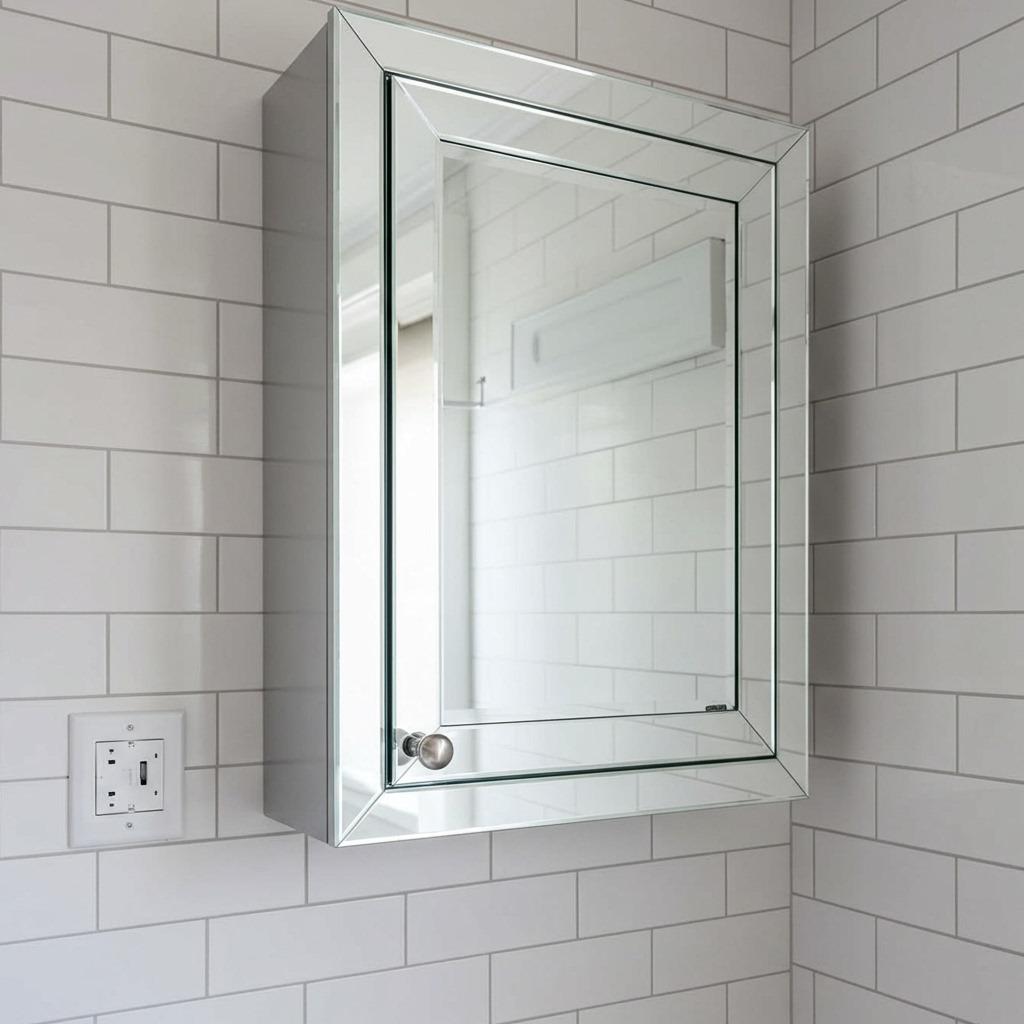
Recessed storage lives inside your wall instead of jutting out into your room. These cabinets sit flush with your wall surface, providing the same storage capacity as traditional medicine cabinets without stealing any floor space. It’s like finding hidden square footage you didn’t know existed.
The mirrored door does double duty, eliminating the need for a separate wall mirror while keeping toiletries organized behind the scenes. Installation requires cutting into drywall between studs, which sounds scary but is fairly straightforward for anyone comfortable with basic carpentry. Just avoid walls with plumbing or electrical lines.
You can find recessed cabinets in various sizes to fit different wall configurations. Some even include interior lighting, which adds ambiance without requiring additional fixtures that would crowd your space.
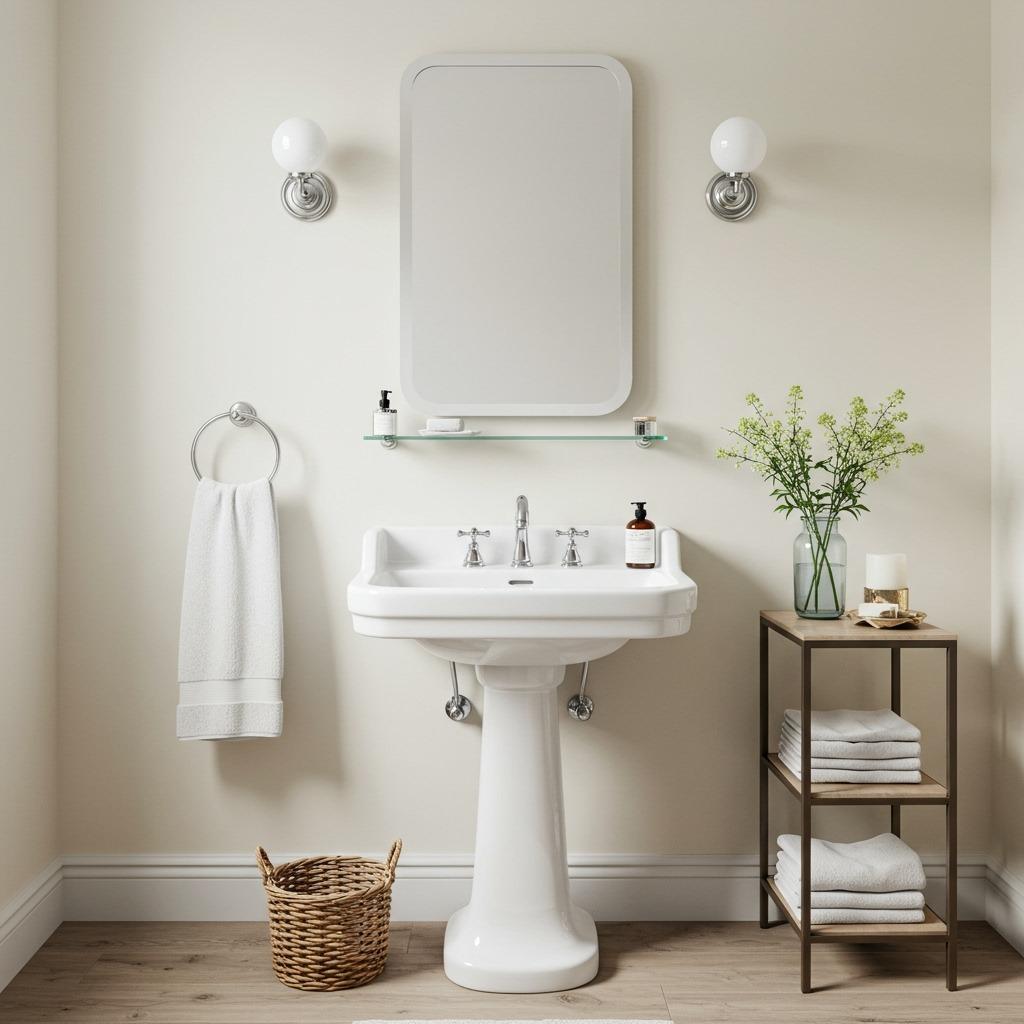
7. Choose a Corner Sink
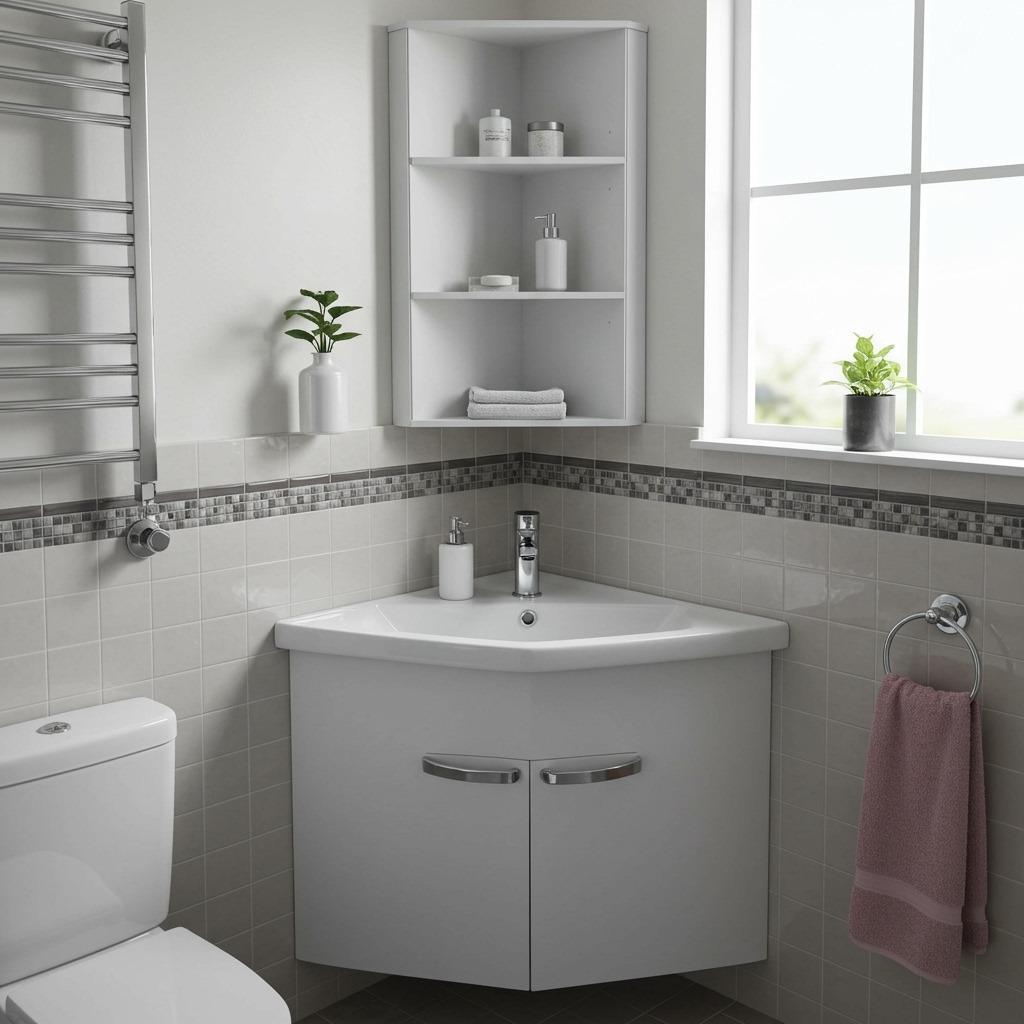
Corners usually go to waste in tiny bathrooms, but a corner sink puts that dead space to work. These compact fixtures tuck into angles that can’t accommodate standard vanities, opening up your main walkway. The shape might look unusual at first, but you’ll appreciate the extra breathing room.
Corner sinks work especially well in powder rooms or half-baths where you need basic functionality without a full vanity setup. Some models include narrow storage cabinets beneath, though many opt for a simple pedestal design. The trade-off is counter space, so think about what you actually need versus what’s just habit.
Pair this with corner shelving above for toiletries, and you’ve turned wasted space into a functional zone. It’s one of those solutions that makes you wonder why more bathroom ideas don’t embrace the corner approach.
8. Install a Curbless Shower
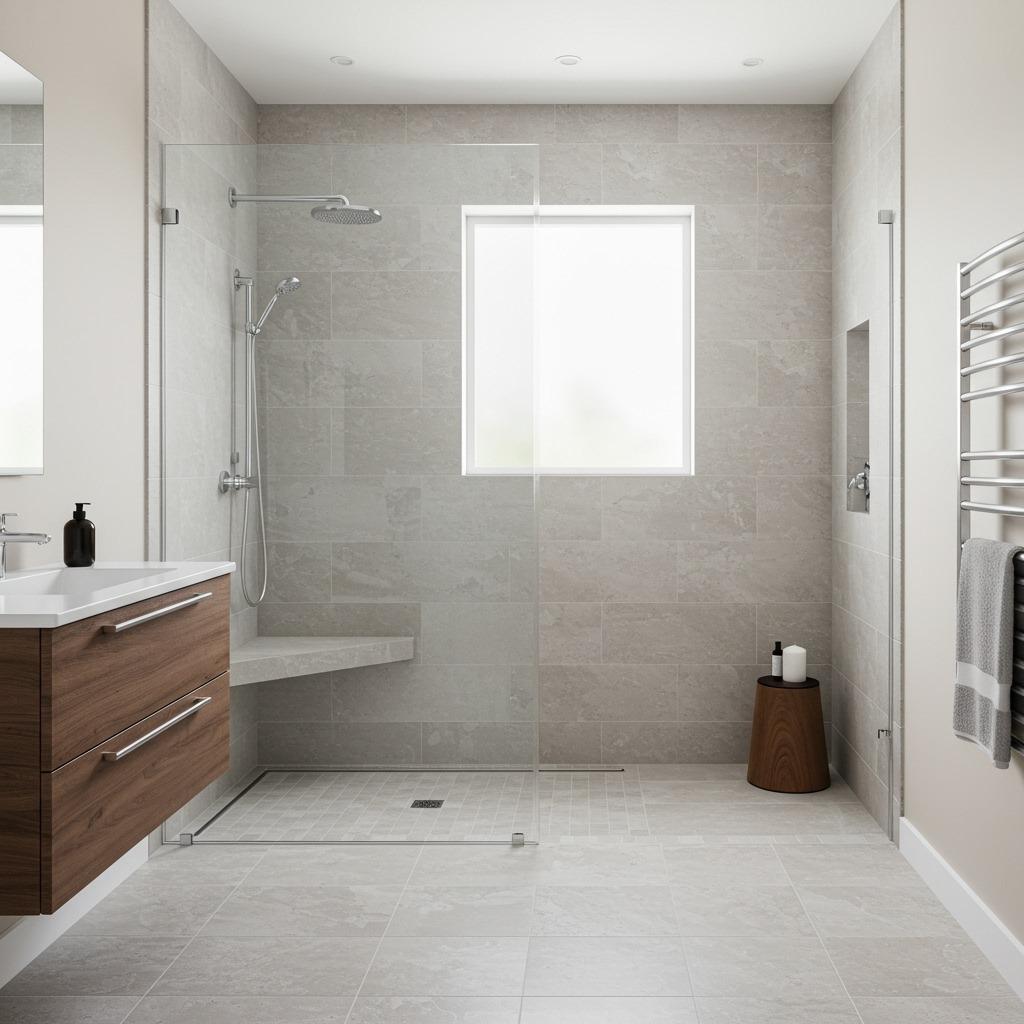
Curbless showers eliminate that raised threshold you typically step over, creating seamless transitions between shower and bathroom floor. The result? Your eye travels uninterrupted across the entire room, making everything feel more spacious. It’s the same principle as open-concept living, just applied to your bath.
This design requires careful floor sloping to direct water toward the drain, which means some concrete work during installation. The payoff is both aesthetic and practical, especially if accessibility matters to you or your family. Plus, cleaning becomes exponentially easier without that annoying curb collecting soap scum.
Linear drains work particularly well with this setup, running along one edge instead of sitting in the center. This allows your tile pattern to flow naturally without awkward cuts around a circular drain.
9. Use Vertical Stripe Patterns
Vertical patterns pull your gaze upward, making ceilings feel higher and spaces more expansive. This works with tile layouts, wallpaper designs, or even painted stripes. The human eye naturally follows these lines, and that upward movement creates an illusion of added height.
I particularly love vertical subway tile installations where the tiles run up-and-down instead of the traditional horizontal layout. It’s unexpected enough to feel fresh while delivering that space-enhancing effect. You can apply this principle to shower walls, accent walls, or even floor patterns if you’re feeling adventurous.
Keep the color contrast subtle if you’re worried about it feeling too bold. Even tone-on-tone stripes create enough visual interest to achieve the height-enhancing effect without overwhelming a compact space.
10. Opt for a Sliding Shower Door

Sliding doors move parallel to your shower opening instead of swinging out into your bathroom. This saves the entire door swing radius, which in a cramped bathroom can be the difference between comfortable and claustrophobic. You can install a towel bar on the wall opposite your shower without worrying about door clearance.
The track systems have improved dramatically over the years. Modern versions glide smoothly and stay cleaner than the old aluminum-framed versions your parents probably had. Frameless glass options look particularly sleek and maintain those uninterrupted sightlines that make spaces feel larger.
This solution costs less than a full doorless renovation while still reclaiming valuable square footage. Just make sure you have enough wall space on either side of the opening for the door to slide into.
11. Install Floating Shelves Instead of Cabinets
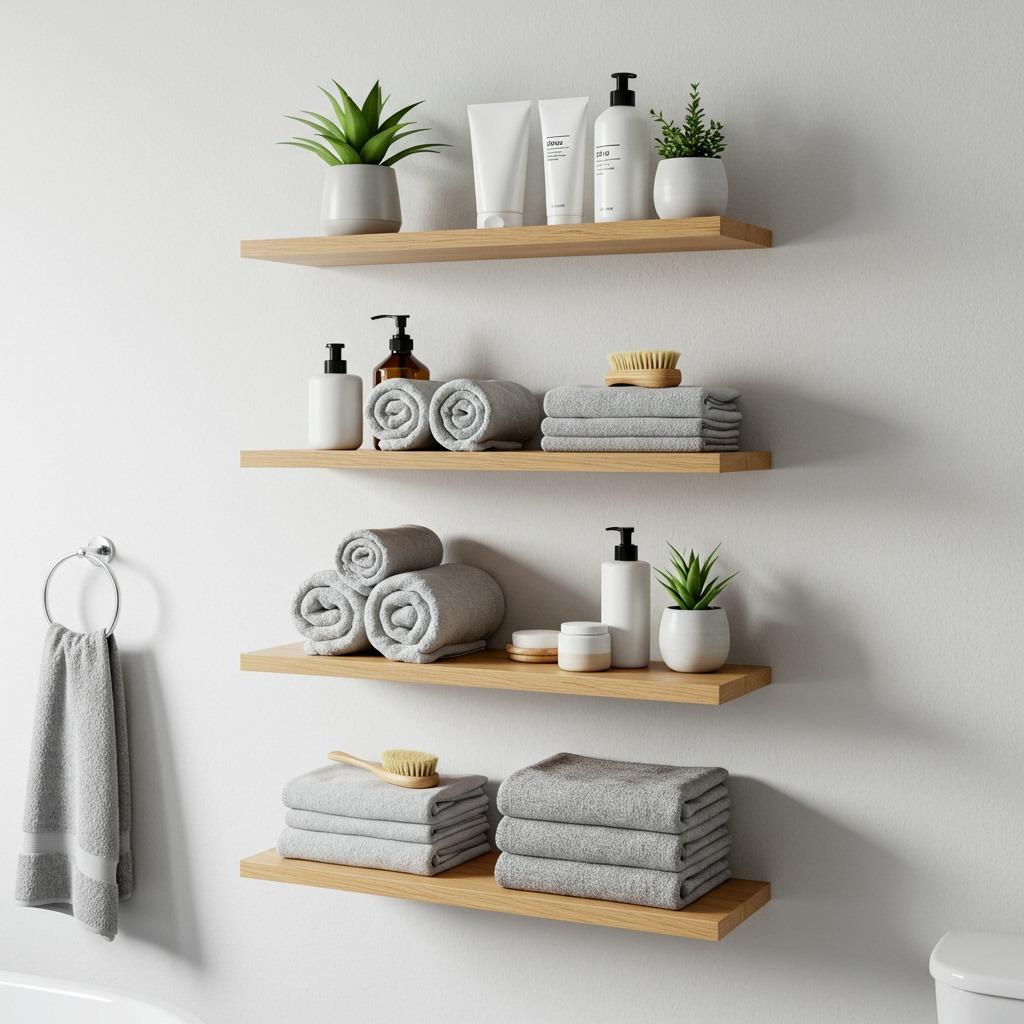
Floating shelves provide storage without the visual bulk of closed cabinets. The open design lets light and sight lines pass through, preventing that boxed-in feeling. You lose some of the “hide everything” convenience, but you gain a more breathable space.
The key is keeping things organized and styled rather than cluttered. Think spa aesthetics with neatly rolled towels, a few attractive containers, and maybe a small plant. This forces you to be more intentional about what you keep, which often leads to better bathroom habits anyway.
Installation is straightforward with the right wall anchors, and you can add or remove shelves as needs change. Position them above the toilet, beside the sink, or anywhere you have vertical wall space going to waste. This approach fits beautifully with minimalist bathroom design principles.
12. Choose Light, Reflective Colors
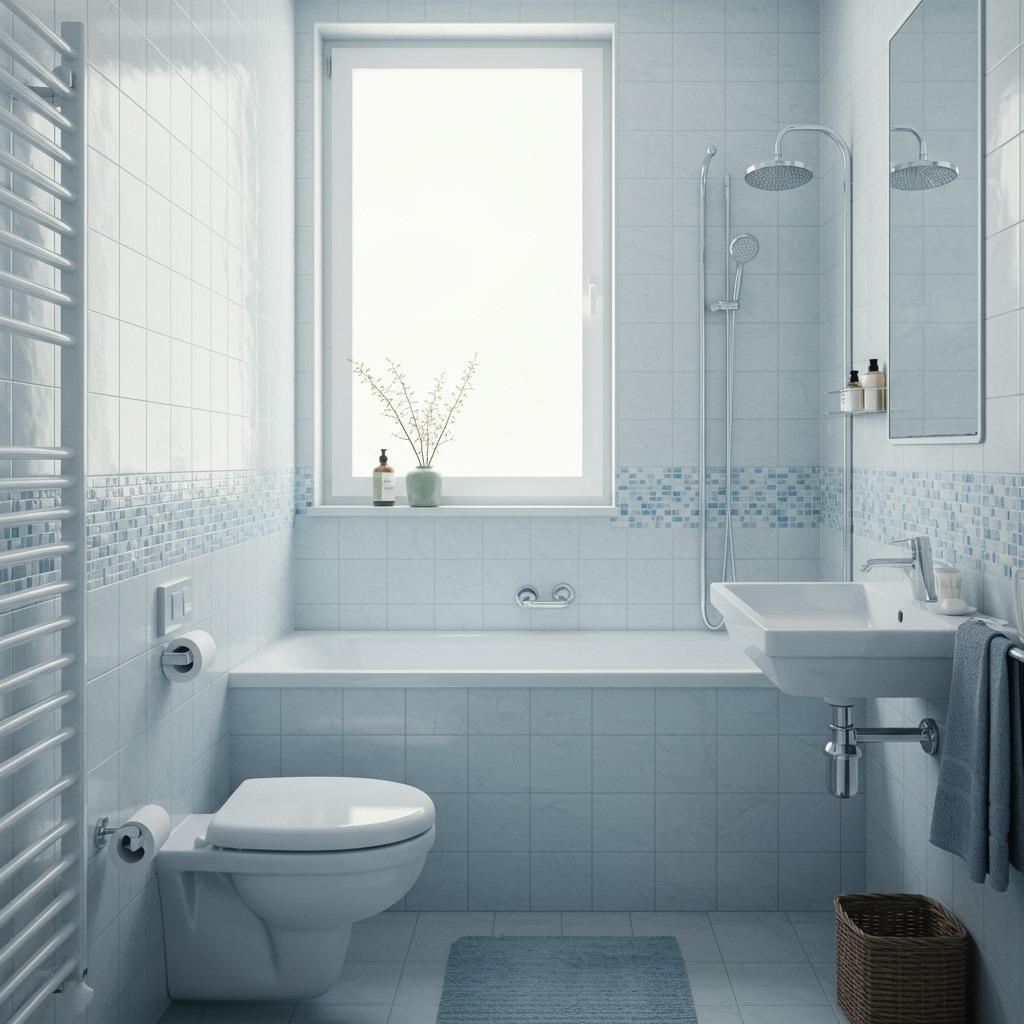
Light colors bounce illumination around your room instead of absorbing it. Whites, soft grays, pale blues, and gentle greens all help compact spaces feel airier and more open. The reflective quality is just as important as the color itself, which is why glossy or semi-glossy finishes work better than flat paint.
This doesn’t mean your bathroom has to be boring. You can layer different shades of the same light color for depth, or add interest through texture and pattern. The goal is keeping the overall palette bright enough to maximize whatever natural or artificial light you have.
Dark colors can work as accents, but covering all four walls in deep hues will definitely shrink your space visually. If you’re craving drama, consider one dark accent wall while keeping the rest light and bright.
13. Add a Skylight or Solar Tube
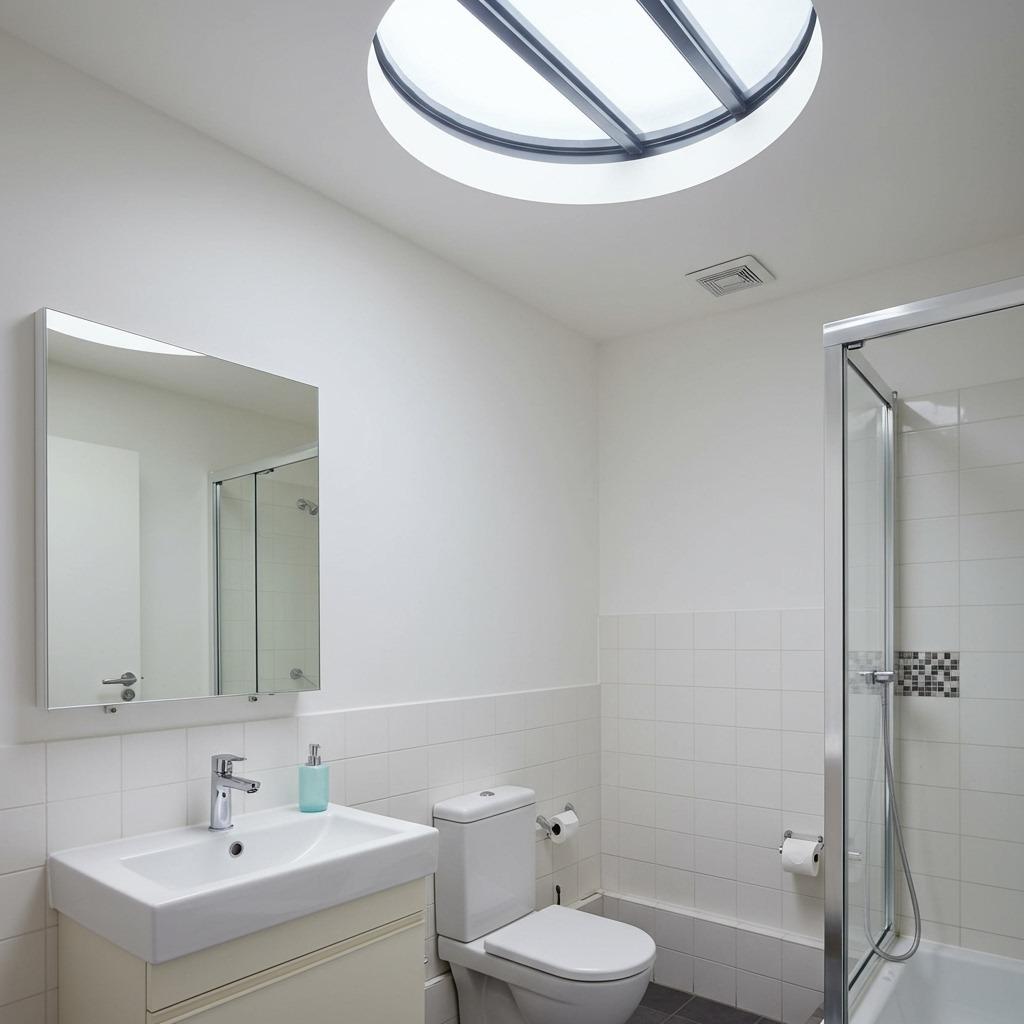
Natural light performs magic in small spaces. A skylight or solar tube brings daylight from your roof down into your bathroom, eliminating that cave-like feeling many compact baths suffer from. Solar tubes are particularly brilliant for spaces where a full skylight isn’t feasible, channeling light through a reflective tube.
The brightness makes everything feel more spacious and welcoming. You’ll also reduce your reliance on artificial lighting during the day, which is a nice energy bonus. Installation does require cutting through your roof and ceiling, so it’s definitely a professional job, but the transformation is stunning.
This upgrade works especially well in bathrooms without windows or with north-facing windows that don’t get much direct sun. The consistent natural light also makes tasks like applying makeup or shaving much easier.
14. Use Mirrored Cabinet Doors
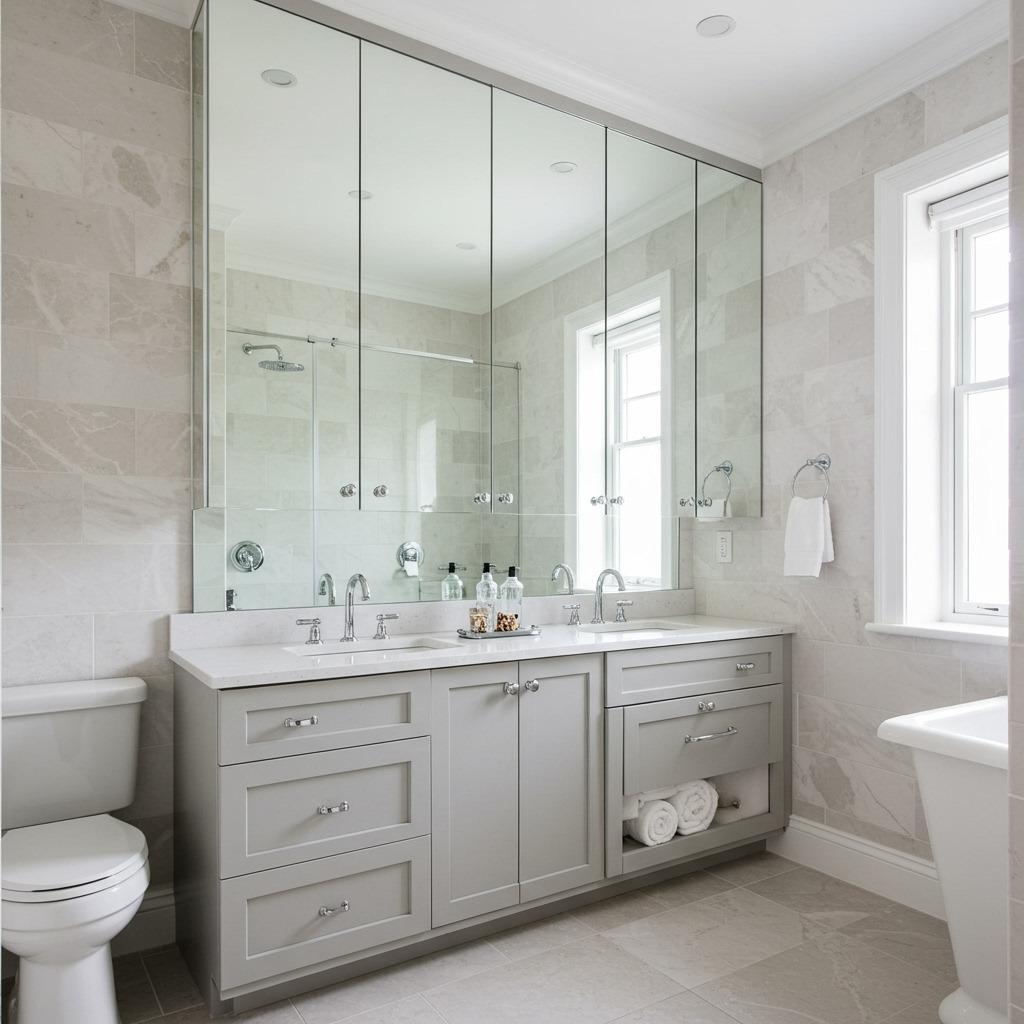
Mirrors are the oldest trick in the small-space playbook, but they genuinely work. Mirrored cabinet fronts give you storage while doubling your visual space through reflection. Floor-to-ceiling mirror panels can make a narrow bathroom feel twice as wide.
The key is strategic placement. Position mirrors opposite windows or light sources to maximize their light-bouncing abilities. Avoid putting mirrors directly opposite each other unless you enjoy infinite reflections that can feel disorienting.
Large, frameless mirrors work better than multiple small ones with heavy frames. You want the reflection, not the frame, to dominate. This simple upgrade can be part of affordable home upgrades that deliver immediate visual impact.
15. Install a Compact Tub-Shower Combo
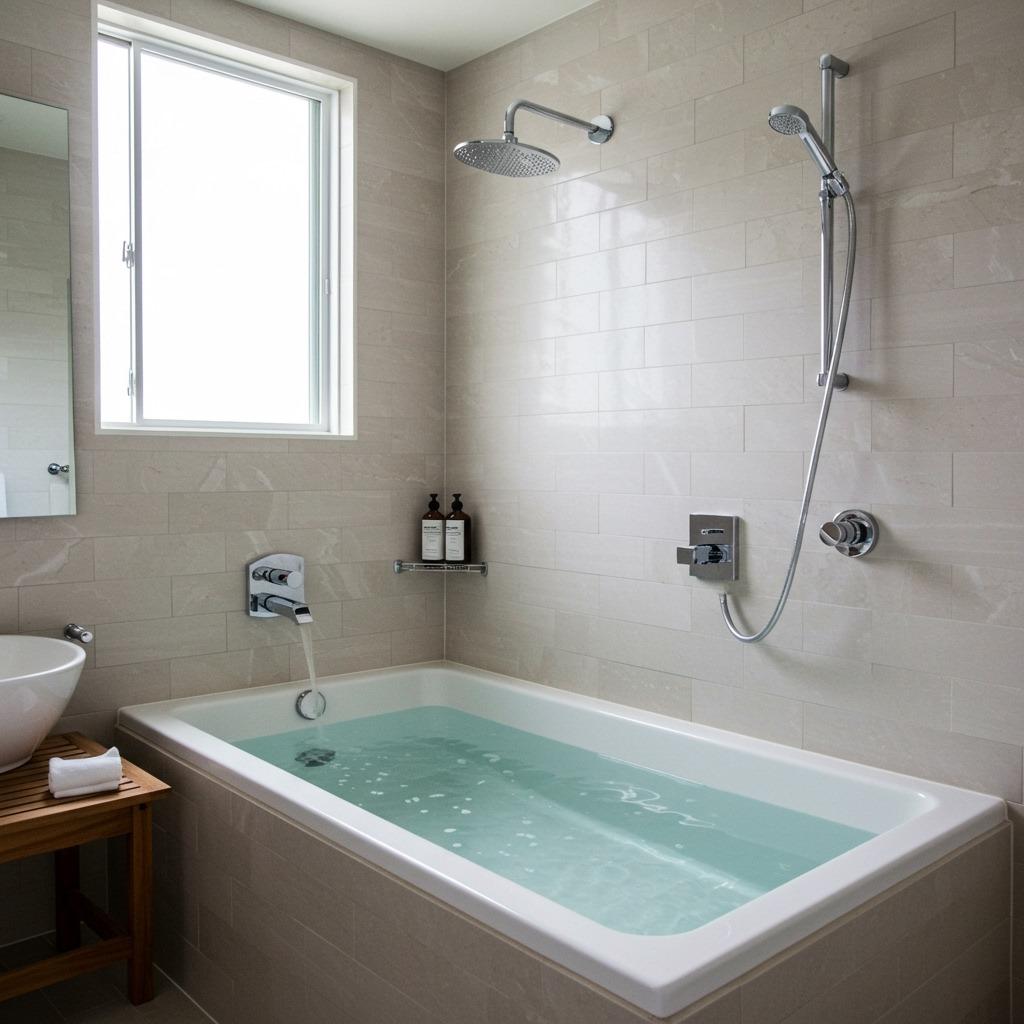
If you’re committed to having a bathtub, consider compact Japanese soaking tubs. These run deeper than standard tubs but take up less floor length, giving you the soaking experience
without dominating your entire bathroom. They’re typically around 48 inches long versus the standard 60 inches.
Pair it with an overhead shower and a curtain or glass panel, and you’ve got full functionality in a smaller footprint. The vertical orientation means you sit upright rather than reclining, which takes some adjustment but works surprisingly well. It’s a different bathing experience, but one that saves considerable space.
This solution works best if you actually use your tub regularly. If you’re a shower-only person, you’re better off ditching the tub entirely and reclaiming that space for a more generous shower.
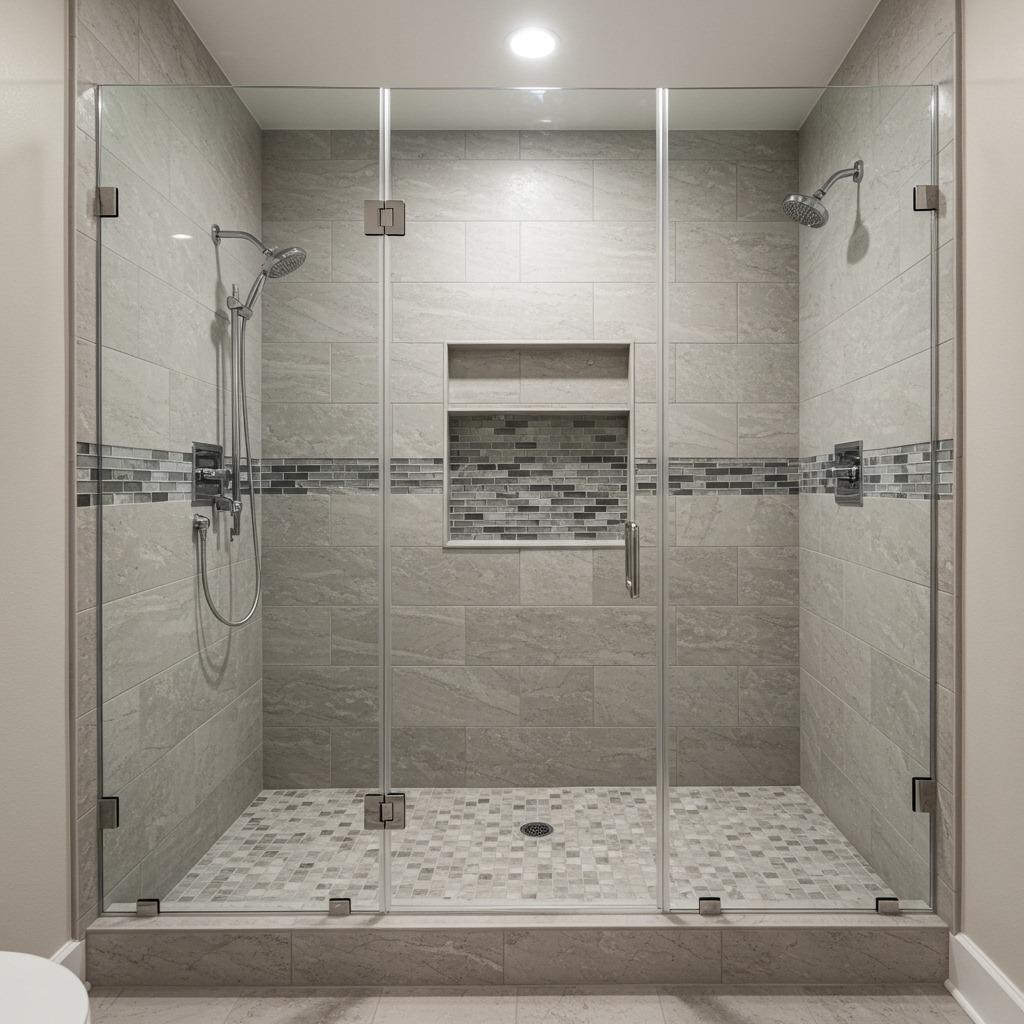
16. Create Built-In Niches
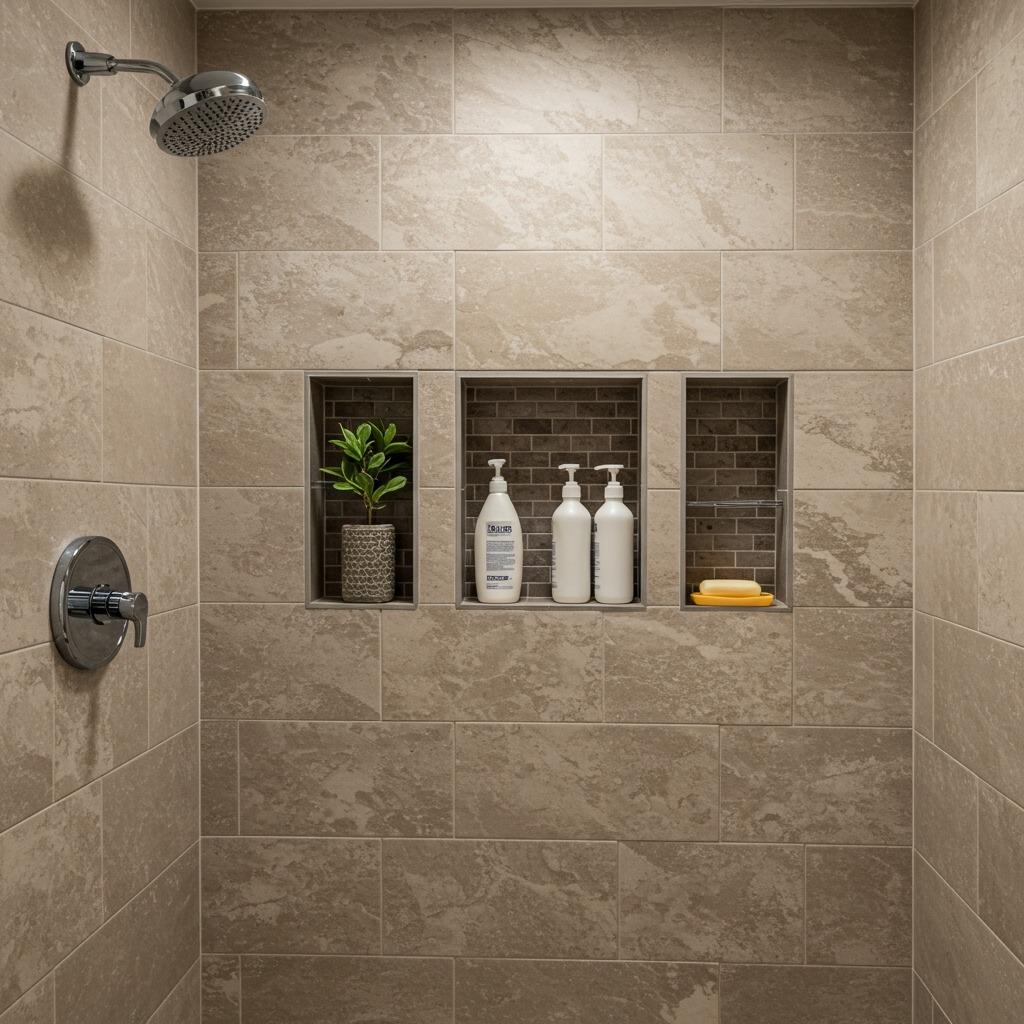
Built-in shower niches carve storage directly into your wall cavity, keeping products off the floor and out of your way. These recessed shelves take up zero shower space while providing organized storage for all your bottles and bars. They look infinitely more polished than hanging caddies or corner shelves.
Installation happens during your tile work, so this is a renovation-phase decision rather than an afterthought. Plan for at least one large niche in your shower, and consider a smaller one near your sink for frequently used items. Waterproofing is critical, so make sure your installer knows what they’re doing.
You can tile the interior to match your shower walls or use a contrasting color for visual interest. LED strip lighting inside the niche adds a spa-like ambiance while helping you actually see what you’re grabbing.
17. Mount Everything Possible on the Wall
Wall-mounting your fixtures creates the illusion of floating furniture while exposing maximum floor space. The continuous floor underneath tricks your eye into perceiving more room than actually exists. This works for toilets, vanities, faucets, soap dispensers, and towel bars.
The visible floor also makes cleaning dramatically easier since you’re not constantly moving things or working around bases. Everything looks more intentional and designed when it’s mounted rather than sitting on the floor. Just make sure your walls have proper backing and support before hanging heavy fixtures.
This approach requires careful planning since you can’t easily relocate wall-mounted items later. Map out your layout thoroughly, considering how you’ll actually move through the space. Done right, it creates that high-end hotel bathroom aesthetic in even the smallest footprint.
Making Your Small Bathroom Work Harder
Small bathroom renovation isn’t about cramming everything in and hoping for the best. It’s about questioning which fixtures you actually need, how you can use vertical space, and what tricks make your brain perceive more room. Some of these hacks require significant investment and construction, while others are simple swaps you can tackle in a weekend.
The bathrooms that feel most successful aren’t necessarily the biggest. They’re the ones where every element has been thoughtfully chosen to maximize both function and visual space. Whether you’re tackling a full gut renovation or just looking for smart updates, these 17 strategies give you a solid starting point.
What surprised me most while researching compact bathroom solutions? How much difference lighting and color make. You can implement half of these ideas and still feel cramped if your bathroom is dark and painted in heavy colors. Start with the changes that deliver the biggest visual impact, then layer in the functional improvements as budget allows.
Your tiny bathroom has more potential than you think. Sometimes it just needs someone willing to break the rules a bit.