
There’s something magical about walking into a room with beautifully paneled walls. The texture, the dimension, the instant sophistication it brings – it all feels like something only professional contractors could achieve. But here’s the truth: wall paneling is one of the most beginner-friendly projects you can tackle yourself.
I’ve watched countless friends transform their bland walls into architectural showpieces with nothing more than basic tools and a free weekend. The best part? You don’t need a massive budget or years of carpentry experience. These projects work whether you’re sprucing up a rental living room or finally tackling that bedroom makeover you’ve been pinning for months.
Ready to add serious character to your walls? Let’s explore twelve stunning wall paneling projects that look custom and expensive but are actually doable for real people with real budgets.
1. Classic Board and Batten Paneling

Board and batten remains wildly popular for good reason – it’s timeless, adaptable, and surprisingly forgiving for first-timers. This style features vertical boards (the battens) spaced evenly across your wall, creating clean lines that make ceilings appear taller.
The beauty of this approach is its flexibility. You can space your battens close together for a modern cottage vibe or spread them wider for contemporary minimalism. Most people use 1×2 or 1×3 boards from the hardware store, which keeps costs incredibly low.
What makes this project especially appealing? You can complete an accent wall in a single weekend. The installation process is straightforward – measure, mark, cut, nail, caulk, and paint. Even if your measurements aren’t perfectly precise, caulk becomes your best friend in hiding small gaps.
2. Horizontal Shiplap Paneling
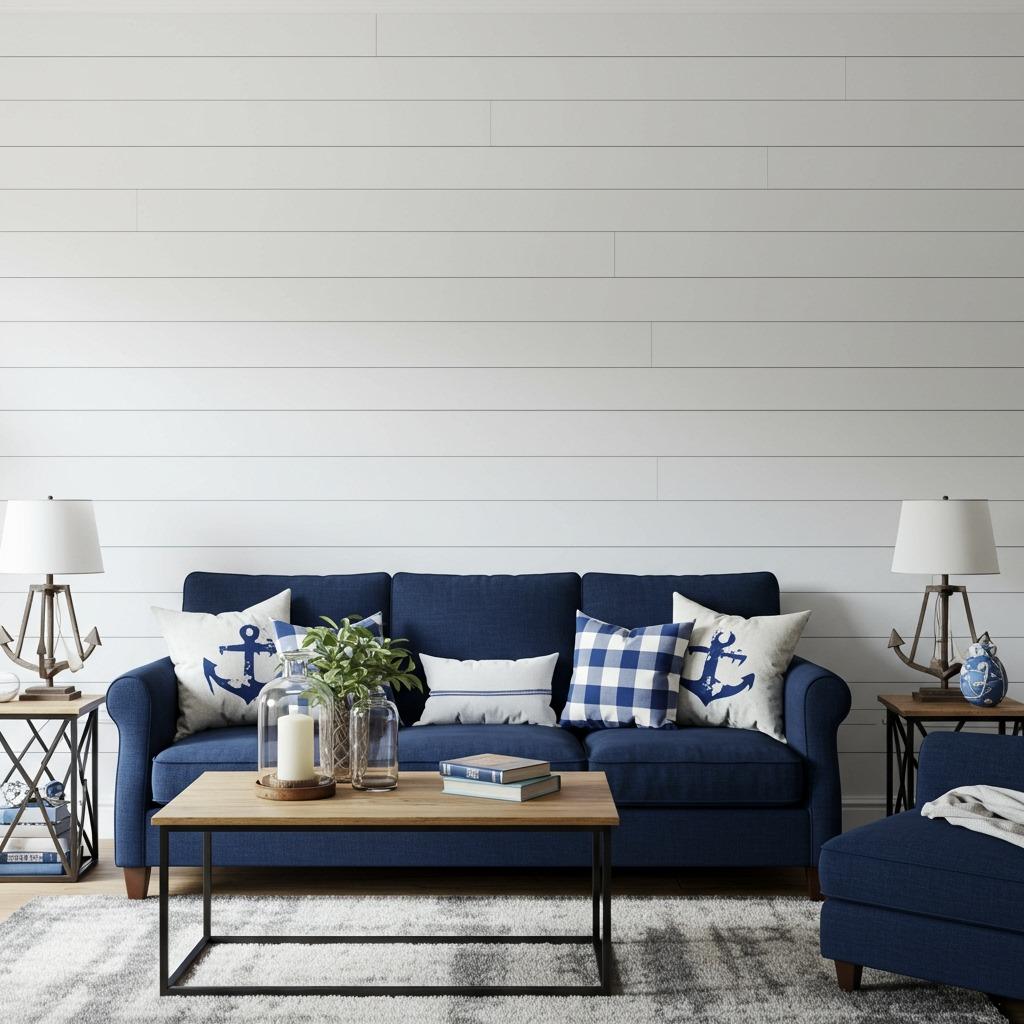
Shiplap exploded in popularity thanks to certain home renovation shows, but it’s stuck around because it genuinely transforms spaces. Those horizontal lines create movement and make rooms feel wider – perfect for narrow hallways or compact bathroom spaces.
You have options here. Real shiplap lumber has a rabbet joint that creates that signature shadow line, but plenty of DIYers achieve similar results with simple pine boards installed with small gaps. Some even use plywood ripped into strips for an ultra-budget-friendly approach.
The installation goes faster than you’d expect. Start at the bottom, work your way up, and use spacers to keep gaps consistent. Many hardware stores now sell prefinished shiplap panels that snap together, cutting your project time in half if you’re willing to spend a bit more.
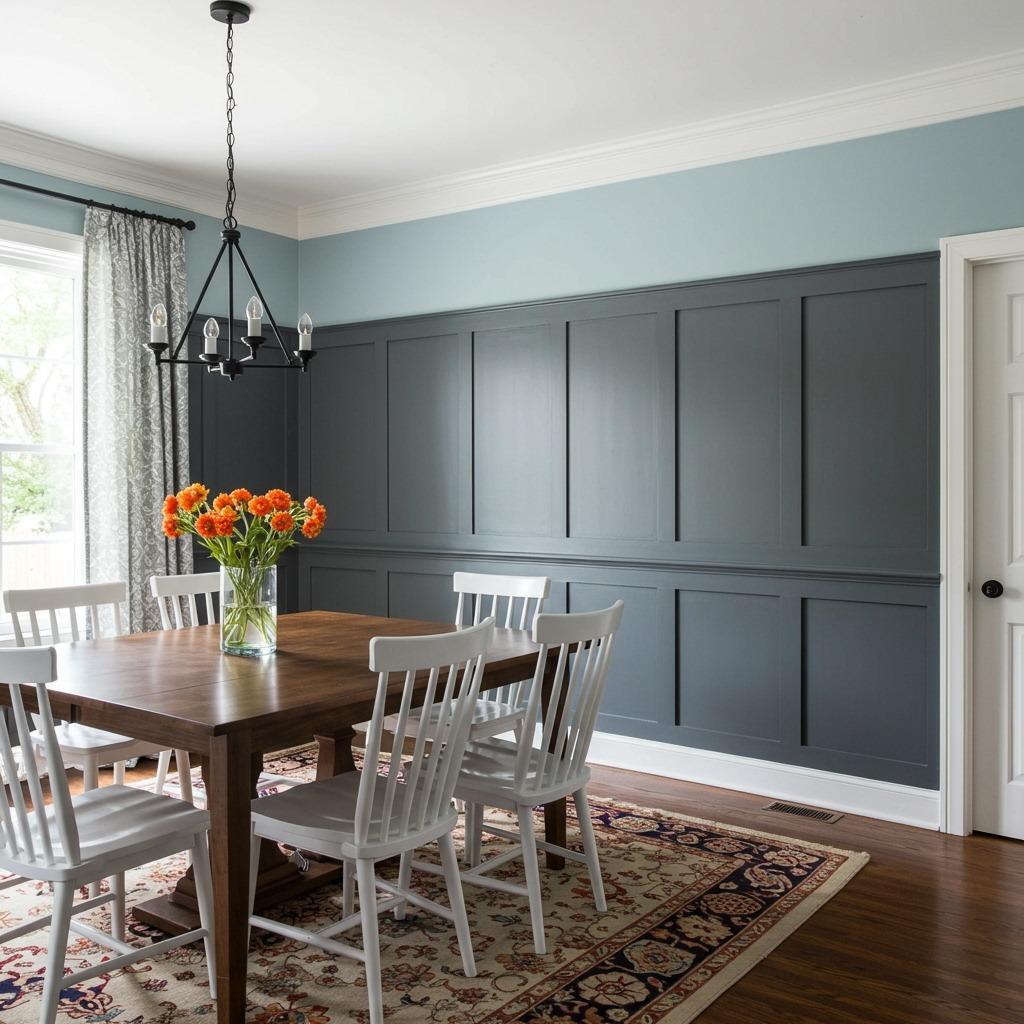
3. Grid Panel Wainscoting
Nothing says “custom millwork” quite like grid panel wainscoting, yet it’s essentially just rectangles made from trim pieces. This style typically covers the lower third of your wall and works beautifully in dining rooms, hallways, and traditional spaces.
The secret is planning your grid layout before buying materials. Measure your wall, decide on rectangle dimensions that divide evenly, and sketch it out. Most designs use 1×4 boards for the frame and 1×2 or 1×3 pieces for the internal grid.
This project does require patience with your miter saw and some math skills, but the payoff is massive. Paint it a contrasting color from your upper walls for drama, or keep it monochromatic for subtle sophistication.
4. Vertical Slat Wall

Vertical slat walls are having a serious moment right now, and for good reason. These evenly-spaced vertical boards create a contemporary look that works in everything from modern minimalist spaces to warmer Scandinavian-inspired rooms.
The installation is wonderfully repetitive once you get your system down. Most people use a French cleat or horizontal backing boards, then attach their vertical slats at consistent intervals. The spacing you choose dramatically changes the feel – closer spacing reads more solid and dramatic, while wider gaps feel airier.
Material choice matters here too. Pine offers affordability, while oak or walnut brings warmth if you’re keeping wood tones natural. You can also paint everything a unified color for a cleaner look that won’t compete with your furniture.
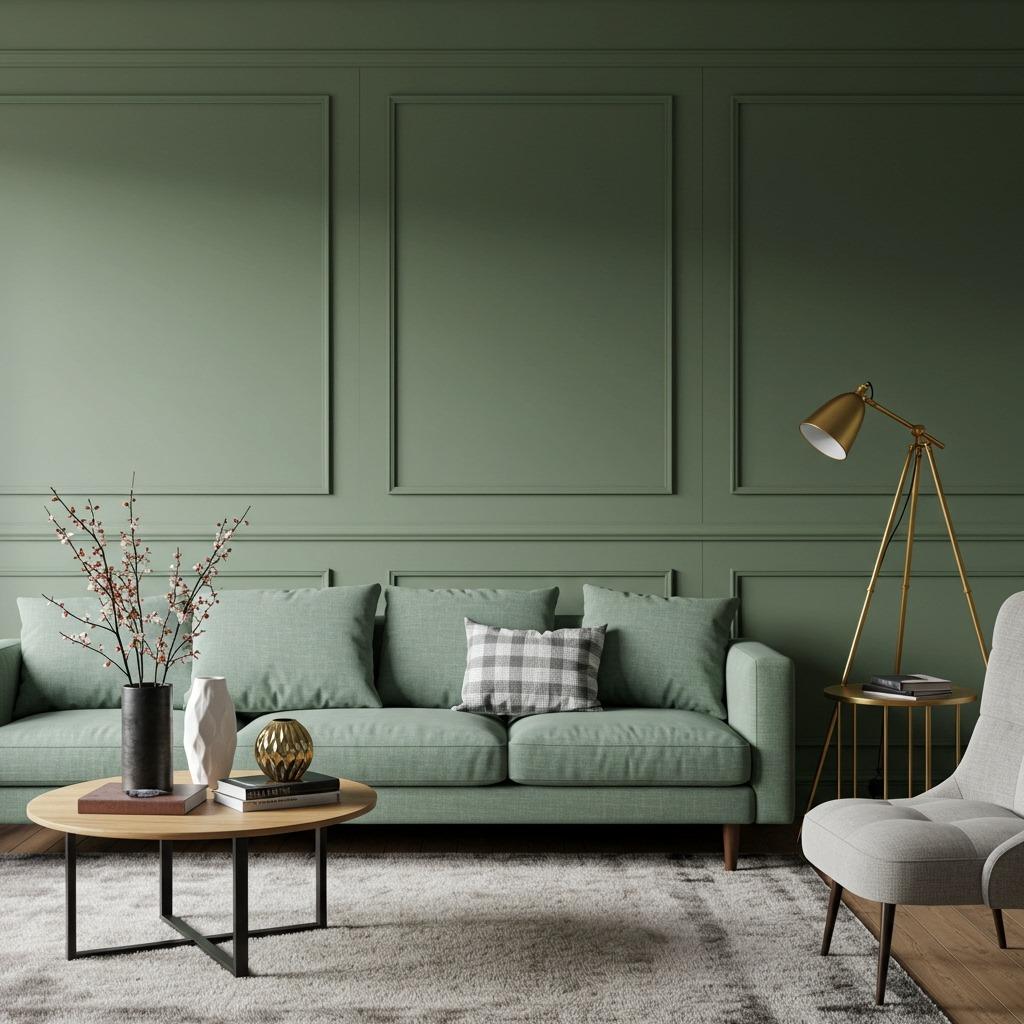
5. Picture Frame Molding
Picture frame molding delivers maximum impact with minimal materials – just simple trim creating rectangular frames on your walls. This classic technique originated in grand European homes but translates beautifully to modern spaces when executed thoughtfully.
The frames can be any size you want, though most designers recommend keeping them proportional to your wall size. Smaller rooms benefit from fewer, larger frames, while expansive walls can handle more intricate patterns. The installation requires careful measuring and miter cuts, but the actual attachment is just nails and glue.
Here’s a styling trick: paint the inside of each frame a different shade than the trim for added depth. Or keep everything monochromatic for understated elegance. This approach works especially well in formal living rooms and bedrooms where you want architectural interest without overwhelming the space.
6. Reclaimed Wood Plank Wall
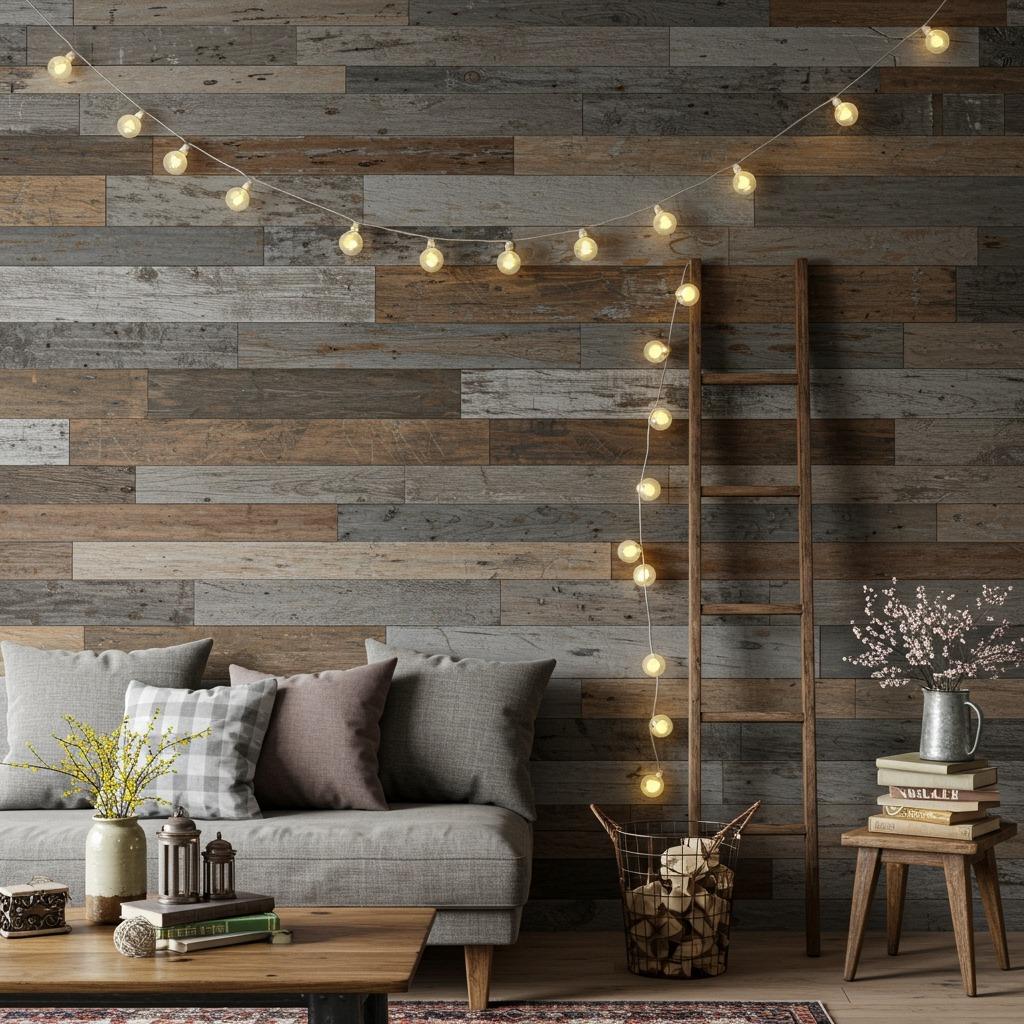
A reclaimed wood wall brings instant warmth and character that’s impossible to replicate with new materials. The weathered textures, varied tones, and occasional nail holes tell stories that make your wall genuinely one-of-a-kind.
Finding reclaimed wood is half the adventure. Check architectural salvage yards, demolition sites, old barns, or even Craigslist and Facebook Marketplace. Some lumber yards now sell “reclaimed-look” wood that’s actually new but distressed, which works if authenticity isn’t your primary concern.
Installation is straightforward – most people simply nail or screw planks directly to studs or existing drywall. The beauty of reclaimed wood is that irregular spacing and mismatched widths actually enhance the rustic charm. No need for perfect measurements or cuts here. This works brilliantly in farmhouse-style spaces or as a DIY home renovation project that instantly adds character.
7. Beadboard Paneling
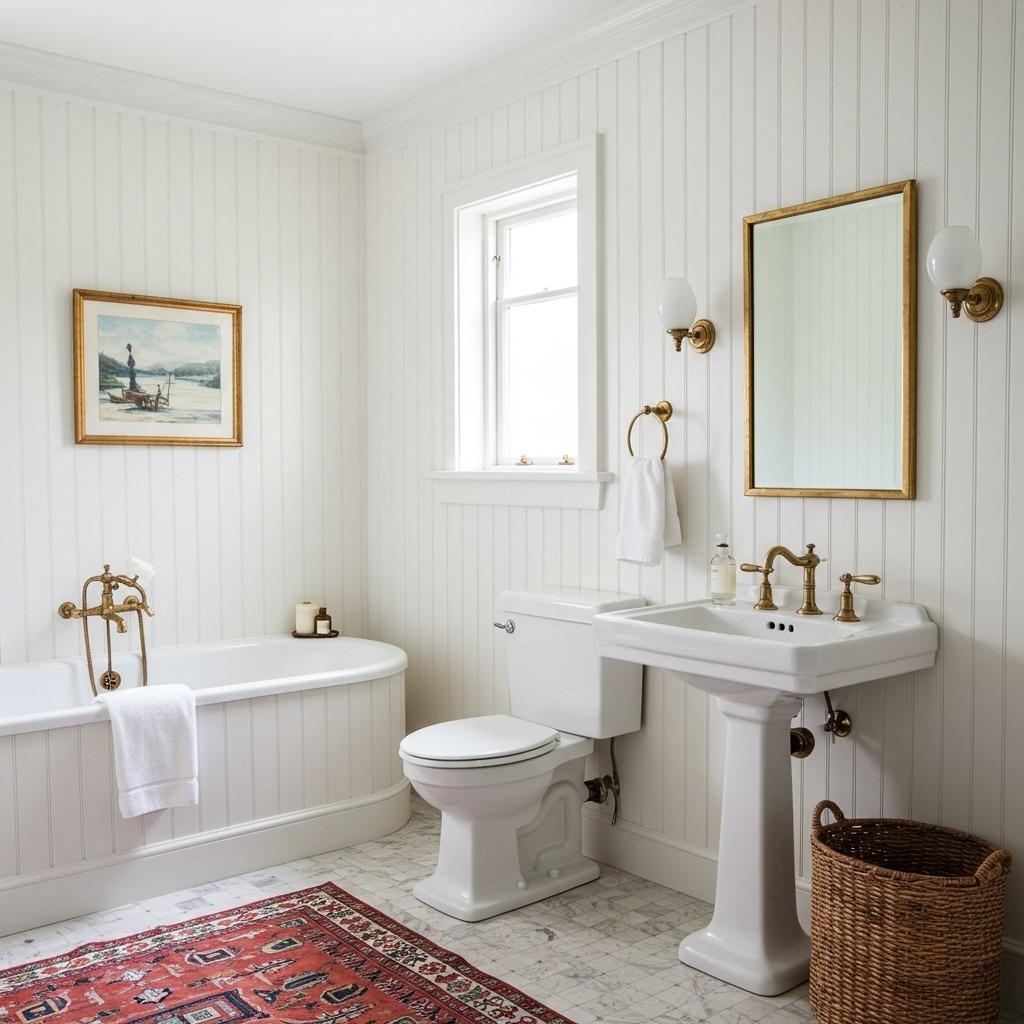
Beadboard brings that charming cottage aesthetic that never goes out of style. Those narrow vertical grooves create subtle texture that’s perfect for bathrooms, mudrooms, or kitchen backsplashes where you want something more interesting than plain drywall.
You can buy beadboard in several formats. Individual planks give you flexibility but take longer to install. Sheet panels (typically 4×8 feet) cover walls quickly but require more planning for seamless joints. There are even beadboard wallpapers now, though purists might argue that’s cheating.
The traditional approach installs beadboard as wainscoting with a chair rail cap, but don’t let tradition limit you. Floor-to-ceiling beadboard works beautifully in bathrooms and creates that classic seaside cottage vibe. Paint it bright white for maximum light reflection, or go bold with navy or sage green for a more personalized look.
8. Herringbone Wood Pattern Wall
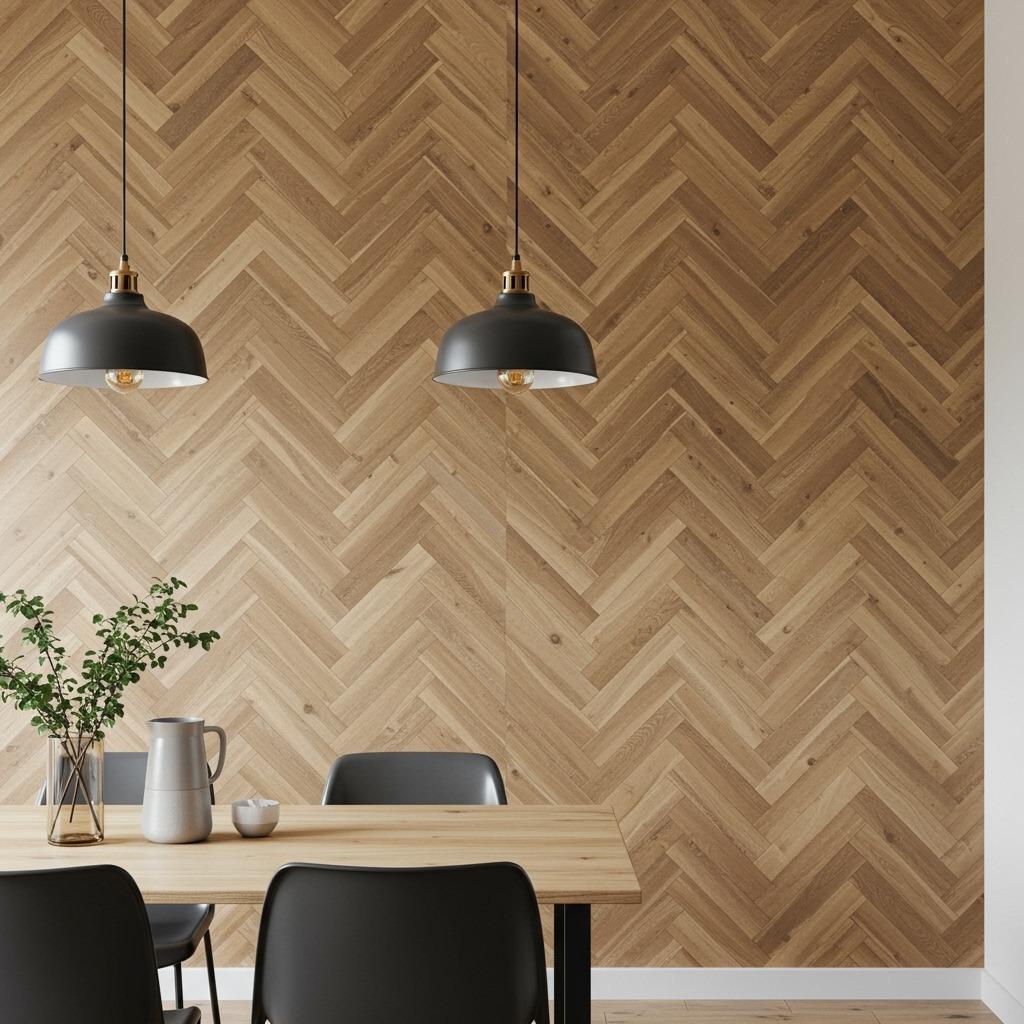
Herringbone patterns bring dynamic visual interest that makes people stop and stare. Yes, this project requires more planning and precision than simpler options, but the stunning result makes it worth the extra effort for the right space.
The pattern consists of rectangular pieces arranged in a V-shape that repeats across your wall. You can use actual hardwood, engineered flooring, or even pine boards cut to size. The key is keeping your angles consistent – a speed square becomes essential here.
Start from the center of your wall and work outward to ensure symmetry. Many DIYers create a plywood backing with chalk lines marking the pattern before attaching individual pieces. This approach is particularly striking as an accent wall in bedrooms or behind built-in shelving in living rooms.
9. Plywood Panel Wall with Geometric Design
Modern geometric wall panels prove that plywood isn’t just for construction – it’s a legitimate design material. Large plywood sheets cut into geometric shapes and arranged in patterns create bold, contemporary walls that photograph beautifully.
This project rewards creativity. You might create a hexagon honeycomb pattern, overlapping rectangles, or abstract angular shapes. Some designers mix panel depths, mounting some flush and others on spacers for additional dimension. Painting different sections in coordinating colors amplifies the effect.
The technical execution is simpler than it looks. Sketch your design, create cardboard templates, trace onto plywood, cut with a jigsaw or circular saw, sand edges smooth, and mount. Birch plywood provides a smooth, attractive surface that takes paint beautifully. This contemporary approach works wonderfully in home offices or modern bedrooms.
10. Tongue and Groove Ceiling-to-Floor Planks
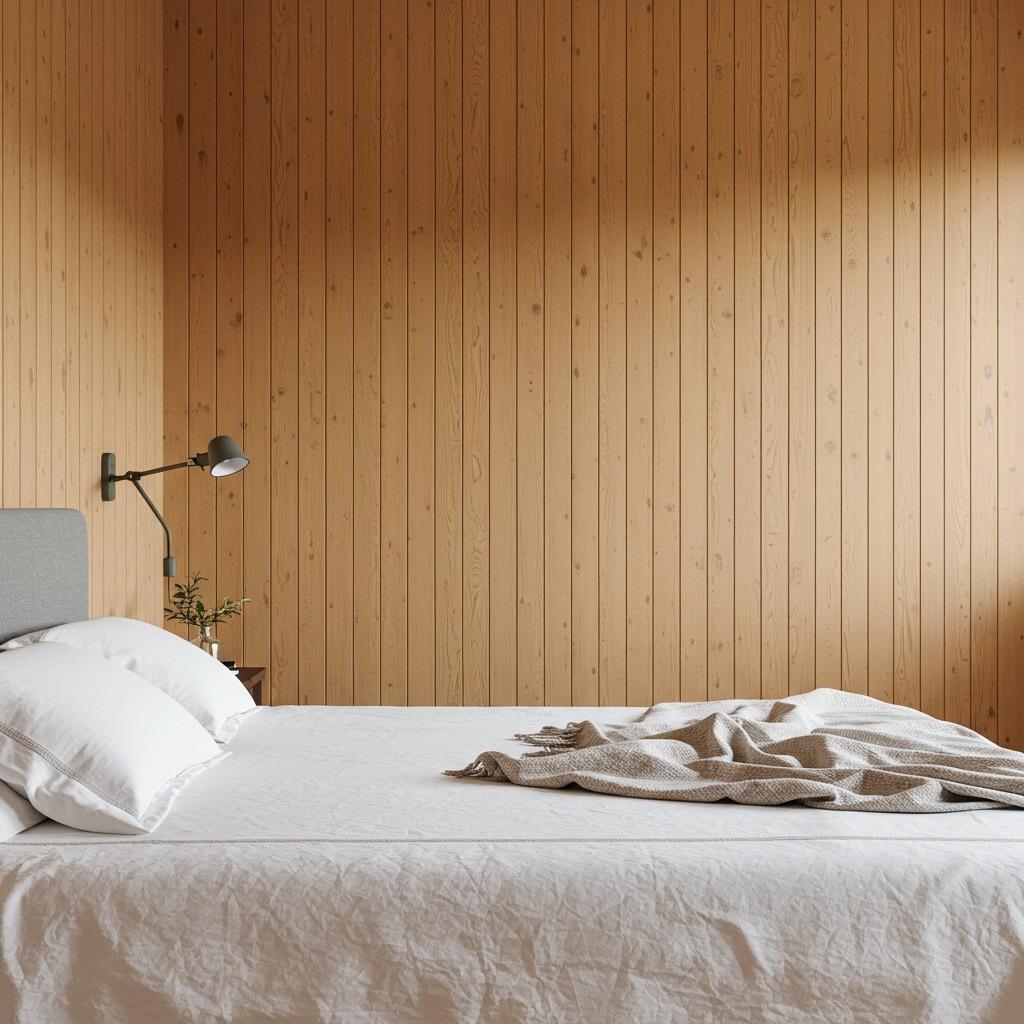
Tongue and groove paneling creates seamless walls with no visible gaps – each plank locks into the next for a clean, professional finish. This system originated for flooring but works equally well vertically, creating walls that feel more substantial than standard drywall.
The installation moves quickly once you get into a rhythm. Start in one corner, ensure your first plank is perfectly level (this is crucial), then each subsequent plank clicks into place. You’re essentially working with puzzle pieces that happen to be made of wood.
This approach shines when you want texture without busy visual patterns. The subtle lines where planks meet add interest without overwhelming your decor. Natural wood tones bring warmth to Scandinavian-inspired spaces, while painted versions work in virtually any style. The system is surprisingly forgiving – those tongue and groove joints hide minor imperfections.
11. Half-Wall Paneling with Contrasting Paint
Half-wall paneling offers the perfect compromise when you want architectural detail without fully committing to floor-to-ceiling wood. This approach typically panels the lower third or half of your wall, then caps it with trim before continuing with painted drywall above.
The contrast is where magic happens. Dark paneling below with light walls above makes rooms feel grounded and sophisticated. Alternatively, light paneling with moody upper walls creates cozy drama. This technique works especially well in rooms with lower ceilings where full paneling might feel overwhelming.
You can apply this concept using virtually any paneling style we’ve discussed – board and batten, beadboard, shiplap, or picture frame molding. The horizontal break that the chair rail creates naturally draws the eye and adds proportion to your walls. This is a particularly smart approach for small space renovations where visual balance matters.
12. DIY MDF Panel Wall
Medium-density fiberboard (MDF) doesn’t sound glamorous, but it’s secretly one of the best materials for creating smooth, professional-looking wall panels on a budget. It cuts cleanly, takes paint beautifully, and costs significantly less than real hardwood.
MDF works particularly well for creating large, flat panels that you want to paint. Think modern paneling with wide, clean rectangles or simple vertical sections. The material is heavier than wood, which actually helps it hang securely and reduces vibration noise in walls.
The only real drawback is that MDF doesn’t handle moisture well, so avoid it in bathrooms unless you prime and seal every edge thoroughly. For living rooms, bedrooms, and dining spaces, it performs beautifully. Many professional installers use MDF exclusively for painted paneling projects because the finished result is indistinguishable from more expensive materials.
Planning Your Wall Paneling Project
Before you buy a single board, spend time planning your project properly. Measure your walls carefully, accounting for windows, doors, outlets, and switches. Sketch your design to scale – graph paper works great for this, or use free online room planners.
Consider your skill level honestly. Board and batten or simple shiplap make excellent first projects. Intricate geometric patterns or herringbone might be better as second or third paneling adventures after you’ve gotten comfortable with tools and techniques.
Budget matters too. Calculate materials carefully, and don’t forget those unsexy essentials like nails, caulk, wood filler, primer, and paint. These supplies add up quickly. A typical accent wall using basic pine boards usually costs between $150-400 in materials, depending on your wall size and wood quality.
Essential Tools and Materials
You don’t need a fully stocked workshop, but certain tools make paneling projects dramatically easier. A miter saw is essential for clean, accurate cuts – you can rent one if buying doesn’t make sense. A nail gun speeds installation tremendously compared to hammering by hand.
Other must-haves include a level (a long one, 4-6 feet, helps ensure straight lines), tape measure, pencil, stud finder, and a decent caulk gun. If you’re painting, invest in quality brushes and rollers – cheap ones leave brush marks that no amount of sanding fixes.
For materials, most projects need your paneling boards, construction adhesive, finishing nails, caulk, wood filler, primer, and paint. Some designs require additional trim pieces for caps, corners, or decorative elements. Buy 10-15% extra material to account for mistakes and wonky cuts – they happen to everyone.
Installation Tips for Success
Professional-looking results come down to preparation and patience. Prime your walls before installation – it prevents paint bleed and helps adhesives stick better. Take time locating studs and marking them clearly before you start attaching panels.
Caulk is your secret weapon. After installing all your paneling, go back with white paintable caulk and fill every gap, seam, and nail hole. This step transforms an obviously DIY project into something that looks professionally installed. Let it dry completely before painting.
Don’t skip the final paint job. Even if you’re using primed boards, at least two coats of quality paint unify everything and hide construction evidence. Many successful projects use the same paint color as the surrounding walls but in a different sheen – the paneling in eggshell or satin with flat walls above creates subtle dimension.
Styling Your Newly Paneled Walls
Once your paneling is complete, resist the urge to cover it entirely with artwork or shelves. The paneling itself is the architectural feature – let it shine. A single large piece of art or a simple wall sconce often works better than a gallery wall.
Consider how lighting interacts with your new texture. Directional lighting creates gorgeous shadows that emphasize the dimensionality you’ve created. Wall sconces positioned to graze across paneling surfaces enhance the texture beautifully.
Color choices impact the final feel dramatically. White or cream paneling feels fresh and bright, expanding small spaces visually. Darker tones create moody sophistication but work best with plenty of natural light. Don’t be afraid to go bold – a deep green or navy paneled wall can anchor an entire room’s design scheme.
Wall paneling transforms ordinary rooms into spaces with character and sophistication, and you absolutely don’t need contractor-level skills to make it happen. These twelve projects range from weekend warriors to slightly more ambitious undertakings, but all deliver that custom millwork look without the custom millwork price tag.
The beauty of paneling is that it’s incredibly forgiving. Small gaps disappear with caulk. Slight measurement errors hide behind trim. And the dimensional texture naturally distracts from any minor imperfections. You’re creating depth and interest that flat drywall simply cannot match.
Which style speaks to your space? Maybe classic board and batten for a traditional home, or sleek vertical slats for your modern bedroom? The project you choose matters less than actually starting. Your walls are waiting for the transformation, and you’ve got everything you need to make it happen.

